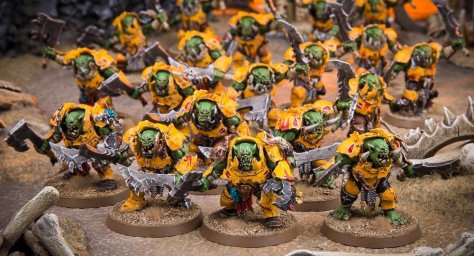
Although having never taken Nurgle to an event myself, I have been infected by Grandpapa Nurgle at a good number of them. From the early third terrors of Pusgoyle Blightlord spam to Glottkin Monstermash at the end of third, I definitely know enough to keep my vaccines updated! In many ways they are also the other side of the coin to my Chaos main, Tzeentch (for whom I have already written the review for on this site).
Who are the Maggotkin of Nurgle?
As alluded to, Maggotkin are, in many ways, the opposite of Tzeentch. Whereas Tzeentch is more of a liberalist Chaos God in the Gordon Gecko mould of greed being good and here are the tools to achieve it, Nurgle is a more socialist and inclusive god who promises to love you just as you are, however pathetic, weak or unfortunate you are. Nurgle themselves can be found in their Plague Garden where the Feculent Gnarlmaws that we’ll discuss later along with all of the plagues and diseases spread by Grandfather Nurgle’s followers.
Why play the Maggotkin of Nurgle?
Maggotkin have a very patient play style, where an enemy army is not going to be tabled in a turn or two. Instead, they play the long game, wearing their opponents down through attrition, while spreading diseases to weaken the enemy further. You also have two flavours of toxin to enjoy, mortals, whose bodies have swollen almost beyond recognition from the Gifts from the Grandfather and daemons, who are realisations of Nurgle’s wishes made real. Within these, you can also play with big monsters or with little gribblies, so lots of options to indulge in.
Battle Traits
Blessed by the Plaguefather
Once per turn at the end of every turn, Nurgle players have a choice to make about how best to enjoy Nurgle’s blessings. In most cases, they will probably ‘infect’, which is to choose a unit in combat with a Maggotkin unit and bless them with the Diseased keyword. Alternatively, particularly if you have caused a unit to be Diseased early game through the shooting of the Rotmire Creed or a spell, you can ‘spread’ Disease to every other unit in the combat range of a chosen Diseased unit. The third choice is if everyone is Diseased, you can ‘mutate’, which is causing 1 mortal damage to every unit. None of these require dice rolls and can quickly add up because in addition…
Wracked with Disease
…at the end of every turn you also do D3 damage on a 2+ to every Diseased unit. This is where the Nurgle version far outstrips Tzeentch’s Wyrdflame as the maximum damage Tzeentch can do is 3 to one unit and the maximum Nurgle do is 3 for every unit, plus 1 for ‘mutating’ plus one from a particular battle formation. That will start to add up as will the pile of diseased corpses your opponent removes from the board.
Desperate Remedies
Finally, a passive that means that any healing Nurgle’s for attempts first removes the Disease, preventing any healing or slain models from being returned.
Battle Formations
Tallyband of Nurgle
Let’s start with a banger right out of the gate with the Tallyband of Nurgle’s Disease and Pestilence Personified. Very simply, add one to the mortal damage that Wracked with Disease causes. All Nurgle armies will be able to benefit from this and, if you decide to lean into spreading the love as much as possible, then this is your no-brainer choice.
Nurgle’s Menagerie
This battle formation allows for two Feculent Gnarlmaws rather than the one, which is handy, as they can be vectors of Disease, can block up parts of the board and can fight a very little if they get charged. However, they don’t fight that well to make charging one with two units a risk for Do Not Waver and can allow a unit to slingshot round into another, juicier target. However, it’s not really worth a whole battle formation, especially when Horticulous Slimux can add extra trees automatically every Nurgle movement phase until there are 3 trees on the battlefield.
Affliction Cyst
Do you ever think that having to deploy 18” away from your enemy is an inconvenience you just don’t want to deal with? That you would quite like to deploy 1000 points of it a mere 9” away? This is the battle formation for you. From Noxious Skies allows you to deploy Maggotkin of Nurgle units that have fly 9” away after deployment has otherwise been concluded. This could be Plague Drones or it could be 2 x 4 Pusgoyle Blightlords just raring to go. If you know that it’s your decision to go first, then this can give you a huge advantage right from the start, being able to box your opponent in while you take control of the board.
Plague Cyst
Vectors of Contagion
Allows all mortal units slain in combat to roll a number of dice equal to their health characteristic, to a maximum of 4 dice, and each 5+ is mortal damage back to the unit that killed them. It will work on flies, but it’s very inefficient with them as you don’t get to roll for all of their health, so probably one for Blightking heavy forces.
Heroic Traits
Gift of Febrile Frenzy allows you to add 1” to the movement of all units without fly if they are wholly within 12” at the start of the move. Could be useful in conjunction with Plague Cyst to get your slow moving Blightkings up the board, but there are better options available.
Grandfather’s Blessing
Now we’re talking! Heal D6 at the end of every turn if the unit with this is within combat range of a Diseased unit. Great on an 8 wound Lord of Afflictions and even better on a Great Unclean One. Extra survivability while your diseases do their work will always be a good choice.
Overpowering Stench
A useful trait that means that if a unit is in combat with the bearer, on a 5+ any command has no effect but the points are still lost. With the Great Unclean One’s base being bigger, this might be best place on them.
Artefacts
Rustfang
Rustfang allows you to reduce the save on an enemy hero that is in combat range by one for the rest of the battle. It is also once per battle, so you need to be selective over which hero to use it on. Potentially using Overpowering Stench to potentially turn off All out Defense would be a better use of your resources.
The Carrion Dirge
This artefact allows you to reduce the control scores of 3 units within 12” in any hero phase. This might be after your opponent has declared the Attack on Two Fronts battle tactic and can make achieving that tactic much harder. Potentially a great combo with the Harbinger of Decay’s prayer (more on that later) to maximise control reduction.
The Witherstave
Really straightforward strikes last on the enemy on a 4+ if they charge you. Obviously somewhat situational, but could be helpful to make Slay the Entourage more of a risk and could affect your opponent’s plans.
Spell Lore
Cloying Quagmire
The first of three spells reduces an enemy unit’s movement by half and causes run and charge moves to be reduced by 1” each if they have a 3+ save. Nurgle is a slow army for the most part, so slowing down your opponent is almost as good as speeding yourself up. The only issue might be having to be within 18” to cast this before the ten Blood Knights you were planning on slowing have got within combat range!
Fleshy Abundance
The unlimited spell is a pretty great one as it can heal D3 to a unit wholly within 12” (and a Great Unclean One can obviously use on itself) or make that unit -1 to wound if they are at full health. Great spell and one you will want to cast each turn.
Magnificent Buboes
After the universal applications of Fleshy Abundance we have Magnificent Buboes which makes an enemy hero worse at everything they do – fight, cast, pray – while they deal with whatever horrific malady has just afflicted them. One of those 4th edition spells that you wouldn’t select if you had to, but useful to have in the bag when you need it.
Manifestation Lore
There is no manifestation lore for Nurgle and you probably won’t be taking that many wizards so the Krondspine is a legitimate option here. Alternatively, Morbid Conjuration and Shackles could complement Cloying Quagmire well.
Units
Great Unclean One
I’ve mentioned this chap a few times already, so we’ll start here. Only a 4+ save but with a 5+ ward and 20 health, they’re pretty survivable. They have a decent ranged weapon that can shoot in combat and a good melee profile that is 4 damage for each of its 4 attacks. So it’s not necessarily going to carve its way through swathes of heavy cavalry or infantry in one combat phase but it is going to make a dent and reduce the effectiveness of the clap back from that unit. Then, at the end of every turn, the ability Bloated with Corruption will cause D3 mortal damage on a 2+ to up to 3 units in combat range. The Great Unclean One also has a great spell in Plague Wind. It goes off on a 7, so being near a Place of Power will be handy, and gives as unit the Diseased keyword within 12”. The more disease the better for Grandfather Nurgle, so this is right up there with Fleshy Abundance as a spell you want to cast when you can. Fortunately, the Great Unclean One is a Wizard (2), so these can go off every turn. Finally, in line with the other unnamed Greater Daemons, Locus of Nurgle means that a Daemon unit greater than 3 models can be brought back within 12” of the GUO and 9” from enemy units, if you can roll a 4+. Good targets for this could be reinforced Plaguebearer units or Plague Drones units could bring back 2 of the 3 they started with. While it does encourage you to go Daemon heavy, even without this the Great Unclean One is a good place to start in any list.
Great Unclean One by Rot’n’Roll
Rotigus
The named Great Unclean One, Rotigus, is another good unit with slightly more health and the potential to do a bit more damage in melee but without the ranged attack. He’s a better caster than the GUO, getting those narratively driven casts of 7 off that little bit easier and comes with his own spell, Deluge of Nurgle. It is cast on an 8, but, if it is successful, affects every Diseased unit on the battlefield and all Nurgle units they are in combat with. On a 2+ on a D3, the Diseased unit takes that much mortal damage, while the Nurgle unit heals for that much. Combo this with Tallyband of Nurgle for the +1 mortal damage on Wracked with Disease and your opponent can only look on, helpless as their army is ravaged by disease. Of course, you can cast this in your opponent’s hero phase too for extra damage. Finally, Rotigus has a horde clearing rampage called Mountain of Loathsome Flesh where, on a 3+, you roll a number of dice equal to the number of models in the unit, with 5s being mortal damage.
The Glottkin
With even more health than the Great Unclean Ones, the mortal Warmaster is The Glottkin. With 24 health, 4+ save and a 5+ ward, the Glottkin has a control scores of 10 and the passive Horrific Opponent reduces control scores by 3 if they are in combat with The Glottkin. However, it’s unlikely much will be in combat with The Glottkin by the end of a turn as they can do a potential of 41 damage each combat phase. Being able to Counter Charge such a combat monster is bad enough, but the ability Blighted Stampede allows another two units to Counter Charge as well for an absolute ride of mutated Nurgle flesh smashing into your opponent’s lines…on their turn. Of course, they can stop this happening by charging The Glottkin…but that’s a win for the Nurgle player too! He does have a spell that can do damage based on the health characteristic of the target, up to a maximum of 7. It will reliably hit this maximum against an enemy of 21 health or above, so good luck Gargants!
Horticulous Slimux
The snail rider is very much a tech piece who isn’t dangerous in combat not is particularly survivable. Its two abilities are very useful though, with Beast Handler allowing him to bring back a Beast of Nurgle 9” away from an enemy on a 3+ and Cultivating the Garden or Nurgle allowing a tree to be dropped down within 12” of Horticulous until each movement phase whenever there are less than 3 trees on the board. These trees can be set up 3” away from enemies and terrain, putting it well within the Disease range of the Gnarlmaw.
Orghotts Daemonspew
The fightiest of the three Maggoth Lords has 7 attacks on 3s/3s, -1 rend, 2 damage and then 5 companion attacks on 4s/2s, -2 rend, 3 damage. In addition, their Grasping Tongue ability gives +1 to wound for all Maggotkin units that target an enemy in combat range of Orghotts, including Orghotts himself. He also has a single shot D6 damage ranged attack and can bounce mortal damage back on a save roll of a 6 with Acid Ichor.
Bloab Rotspawned
The wizard of the three, Bloab’s spell (Miasma of Pestilence) is the main reason for taking him as, on a cast roll of only a 6, an enemy unit with 12” takes an extra point of damage each time a different friendly ability causes damage. So, if that enemy unit takes damage in the hero phase, the shooting phase, the charge phase, the combat phase and then from disease at the end of the turn, that’s an extra 5 damage…and it lasts until your next turn, do that’s potentially another 5 damage on top. Bloab also has a decent, if short ranged, shooting attack that has 7 shots at D3 damage. Finally, he has a really lore-appropriate rampage where each enemy within 7” take a mortal damage and has -1 to hit on the roll of a 4+. If this unit was the successful target of Miasma, that’s 2 mortal damage on another 4+.
Morbidex Twiceborn
Twiceborn – once as a mortal and once as a weird man-Nurgling – is the most survivable of the three, with Gigantic Nurgling-Kin allowing Morbidex to heal half the damage he has taken each turn. He also buffs up nearby Nurglings with Lord of Nurglings adding to control scores of the little fellas and helping them to ignore the first damage point each phase (note: not turn) and also Tide of Nurglings helping to recreate Morbidex’s second birth by giving Nurglings Crit (Mortal) on a 2+.
Harbinger of Decay
This amazing model has an okay melee profile, which will pop off for 9 damage every now and then and also has a once per game ability called Knell of Decay that reduces the movement of up to 3 units within 24” by 1” and reduce run and charge by 1 each too. Potentially this could be just enough to shut down a battle tactic. The main reason for taking the Harbinger though is the prayer that it has that reduces the control score by double the battle round number of one enemy unit of a prayer of a 4 or all enemy units on a 10. So build the prayer up over a couple of turns and then pop the big prayer on turn 3 to reduce the control score of all enemies within 12” by 6. Couple this with The Carrion Dirge to reduce 3 of these units control scores by a further 3 and if they happen to be in combat range of the Glottkin, then that’s another -3 to control score.
Lord of Afflictions
The last of the heroes in this review (but there are a few others with some possible applications) is the Lord of the Flies himself. He has a decent melee profile and is survivable on a 3+ save, 5+ ward and 8 health. His abilities allow 2 Pusgoyle Blightlord units within 12” to add -1 rend to their flies’ melee profile with Master of Rot Flies and do do mortal damage to up to 3 units around him on a 2+ D3 roll.
Pusgoyle Blightlords
Sticking with the mortal flies, they only have a 4+ save, but otherwise are as survivable as the Lord of Afflictions. While their damage isn’t quite as high on the charge, 4 attacks 3s/3s, rend -1, 2 damage isn’t bad, especially as Relentless Attackers is a passive that can add -1 rend to riders’ attacks when attacking a unit on an objective you don’t control. They are 250 points for 2 and can be reinforced, but are pretty decent and can have a huge headstart at getting into combat with the Affliction Cyst battle formation.
Plague Drones
The daemon flies are neither as survivable nor as lethal as the Blightlords, but are a lot cheaper at only 180 points for 3 and 2 of these could be brought back by a Great Unclean One’s Locus of Nurgle ability. They can also retreat (and not take mortals) and then charge the same turn, making them able to get places for battle tactics that your opponents might not expect.
Plaguebearers
The daemon infantry are Plaguebearers and they’re essentially 20 wounds on a 6+ save and 5+ ward for 140 points, or 40 wounds for 280 points. With battleshock no longer in the game, each of these wounds needs to be taken off and then a Great Unclean One can bring back a half-strength unit. 40 of these plus a Great Unclean One is a decent 1000 points or so to start a list with.
Nurglings
To round off the daemons, we have everyone’s favourite cute little bag of vomit – the Nurglings. They aren’t great – 12 health for 110 points on 6+ save and 5+ ward, hitting and wounding on 5s for one damage. However, they are daemons, so can be recycled by a Great Unclean One; Morbidex can give them mortal damage, ignore a point of damage and increase their control score; and their own ability allows them to heal any wounded unit back to full at the end of every turn, so an opponent needs to commit more than what they would like to be rid of them.
Putrid Blightkings
These mortals have a good save, have Nurgle’s 5+ ward and, on 3 health, have a decent chance to bring one back through rally, especially with a musician. With their Bloated Bulk ability adding 3 to control scores of the unit if they are all contesting and a standard bearer adding another point of control, 5 will count for 9 and 10 will count for 14…and with some of the other control manipulation that Nurgle have access to, they could do enough to swing an objective. With 4 attacks 3s/3s, rend -1, 1 damage they are decent enough in combat and the two variants of Lords of foot can buff them further.
Rotmire Creed
The final mortal unit is the Warcry warband with their 12” blowpipes that might do a wound here and there, but can be great for spreading diseases at range if you choose ‘infect’ when using Blessed by the Plaguefather ability. However, unless you have nothing else in combat to ‘infect’ with, it’s likely that this ability won’t be used, which is the whole reason for the unit being taken at all.
Beast of Nurgle
The puppies of Nurgle are beasts, so only have a control value of one, but do have a great ability (which has no limitations on usage in the charge phase) to allow them to charge the nearest enemy and do D3 damage to them, even in your opponent’s charge phase. With a couple of Beasts accompanied by The Glottkin and friends, your opponent may be wondering exactly whose charge phase it is supposed to be!
Feculent Gnarlmaws
Nurgle’s arboreal masterpieces count as faction terrain for the first one and then can have additional ones added by the right battle formation or by Horticulous Slimux. They do have an attack profile if they are engaged in combat, but the main reason for wanting more of them is that you can make an enemy within 6” of a tree have the Diseased keyword, if you can roll a 4+. The more disease, the better, just beware of giving free movement or even battle tactics to your opponents via the tree.
Sample Lists
Nurgle Flies (1970 points)
ARMY
Grand Alliance Chaos
Maggotkin of Nurgle
Affliction Cyst
2000 Points Limit
Drops: 1
Spell Lore – Lore of Malignance
Manifestation Lore – Krondspine Incarnate
Regiments
General’s Regiment
Lord of Afflictions (220)
• General
• Overpowering Stench
• The Witherstave
Pusgoyle Blightlords (500)
• Reinforced
Pusgoyle Blightlords (500)
• Reinforced
Pusgoyle Blightlords (500)
• Reinforced
Pusgoyle Blightlords (250)
Faction Terrain
Feculent Gnarlmaw
Ever slipped on an online order and accidentally bought 8 of the same kit by mistake…actually, me neither, but this army can be made from the same box of minis. This was the list that mildly terrorised early 3rd and is still decent now. 1000 points of Blightlords can be pushed into your opponent’s face, tagging as much as possible when you choose to take the first turn. On the flanks, the other units move up, ready to claim Seize the Flanks for themselves, while making it very risky for your opponent. Eventually the first 8 flies will go down, but you have 7 left and the disease spread mechanic will really start to take a toll.
Nurgle Daemon Recursion (2000 points)
ARMY
Grand Alliance Chaos
Maggotkin of Nurgle
Tallyband of Nurgle
2000 Points Limit
Drops: 2
Spell Lore – Lore of Malignance
Manifestation Lore – Krondspine Incarnate
Regiments
General’s Regiment
Great Unclean One (480)
• General
• Grandfather’s Blessing
• The Carrion Dirge
Beasts of Nurgle (150)
Beasts of Nurgle (150)
Plaguebearers (280)
• Reinforced
Plaguebearers (280)
• Reinforced
Regiment 1
Horticulous Slimux (150)
Beasts of Nurgle (150)
Plague Drones (180)
Plague Drones (180)
Faction Terrain
Feculent Gnarlmaw
The second sample list is purely daemons, looking to maximise the recursion mechanic via the Great Unclean One bringing Plaguebearers and Plague Drones back and through Horticulous Slimux returning the Beasts of Nurgle. Not a lot of output in this list, but excellent board control and, with The Carrion Dirge able to impact control scores for one hero phase, an excellent list for the primary game.
Nurgle Full Spread (1970 points)
ARMY
Grand Alliance Chaos
Maggotkin of Nurgle
Tallyband of Nurgle
2000 Points Limit
Drops: 2
Spell Lore – Lore of Malignance
Manifestation Lore – Krondspine Incarnate
Regiments
General’s Regiment
Rotigus (500)
• General
Plaguebearers (280)
• Reinforced
Regiment 1
Great Unclean One (480)
• Grandfather’s Blessing
• The Carrion Dirge
Plague Drones (180)
Plaguebearers (280)
• Reinforced
Pusgoyle Blightlords (250)
Faction Terrain
Feculent Gnarlmaw
The last one looks to spread as much disease as possible with the spells from the two big chaps doing a lot of work getting the disease spread in the first place and then maximising the damage caused by it. Everything else is there to screen off the big guys while the whole plan slowly comes to a very Nurgly fruition.
I’ve been playing Tzeentch on and off for about 18 months, drawn to the spells, summoning and shenanigans this faction is known for. I was originally hoping to go with a Kairos and Lord of Change list, but when the 3rd edition battletome came out, there wasn’t really any reason to start the battle with 2 of these big birds. I say start, because my most successful lists were those from the Guild of Summoners, with the gimme battle tactic to go along with the gimme Grand Strategy. Grand Strategies are gone, Guild of Summoners are gone but there might be a viable reason to have that Kairos and Lord of Change build from the start.
Who are the Disciples of Tzeentch?
An excellent question and one for which the answer is always changing. Tzeentch is one of the four original Chaos Gods, focused on change and manipulation of his own servants and those of others. These subtleties put him at odds with Khorne, with the latter’s hatred of sorcery consolidating the enmity between these two factions. It is never clear exactly what Tzeentch’s end goals are as their machinations are as likely to have their worshippers be defeated at the right time and place as to march to victory after victory. The only consolation is that it is ‘All as planned’.
There are two factions within the Disciples of Tzeentch that vie for their master’s favour: Daemons and the Arcanites. Daemons are the stuff of magic itself given form, with the ability to twist and shape raw chaos to their will, resulting in magic spells or blasts of wyrdflame to ignite their foes. Arcanites are the mortal followers of Tzeentch, including the mutated Tzaangor and the Kairic Acolytes who use magic to reshape their own bodies.
Why play the Disciples of Tzeentch?
Disciples of Tzeentch is a faction that heavily relies on magic, not necessarily for damage dealing directly, but to further their subtle plans for victory on the battle field. They do not have the raw combat power of a Destruction army nor do they have the ranged prowess of many Order factions. What they do have is a range of tools that can be selected to take on a variety of challenges and, Tzeentch willing, come out on top.
Battle Traits
Masters of Destiny
One of the Disciples of Tzeentch’s most notorious ability, Destiny Dice, returns in 4th edition. In the deployment phase, you roll 9 dice and can use the outcome of these dice to use instead of a dice roll. These can include casting rolls and charging rolls, though you do need to spend 2 of these dice to do so. These can be hugely influential, guaranteeing a charge when really needed (though not a counter-charge), making a 6+ save to an attack that could wipe out a key piece or making sure an important attack wounds its intended target. 4th edition sees an interesting change to this mechanic because while there is (almost) no way of returning Destiny Dice, which was very straightforward in 3rd, there is also no need to hoard dice in order to get the Grand Strategy at the end of the game.
Conflagration of Tzeentch
The defining ability of the index for Tzeentch is the ability to light an enemy unit up, literally. If a weapon with the Wyrdflame weapon ability does damage, that unit is now burning. There are also a couple of ways of adding burning in the combat phase too. Importantly, only one unit per phase can have the burning debuff added. Potentially, you could cast a Wyrdflame spell in your opponent’s turn; shoot them with a Wyrdflame weapon with Covering Fire; fight them with your combat source of burning and then do all of that again in your turn for 6 potential units per battle round. Realistically, if you could get 3 units burning, that’s good going.
Burning Wyrdflame
So what does the Wyrdflame do? At the end of every turn, on a D3 roll of a 2 or 3, a unit takes that much damage but on a 1, they manage to put themselves out and are no longer burning. Yes, it’s only D3, but that could be enough to swing an objective or complete a battle tactic. If you do manage to get a good spread of burning going, these could all add up. If you take the Wyrdflame Host battle formation, you are probably better off choosing NOT to activate the D3 roll so as to keep the debuff applied.
Quenching the Flames
In addition, Wyrdflame shuts down any healing, with the healing ‘quenching the flames’ instead. This would shut down the prodigious Soulblight healing as well as making Rally a 1cp – please put me out, I’m on fire command ability.
Battle Formations
Tzaangor Coven
Screeching Warflock is a passive that means that every time a friendly Warflock (anything Tzaangor related) uses Rally, you roll an extra 3 dice. Obviously the more Tzaangor you take, the better this is, but you can expect to be able to bring back 2-3 normal Tzaangor, but the extra 3 dice pushes you up the point at which you’ve been a little unlucky not to being a Tzaangor Enlightened on Disc or Skyfire back. The Enlightened on Disc aren’t what they were, but they’re still a good unit and with access to this recursion, can be quite a tricky one to get rid of.
Wyrdflame Host
Mutagenic Inferno is another passive that subtracts 1 from wound rolls made by attacks from Burning units. The utility of this one will be determined by how hard you choose to lean into the Wyrdflame mechanic. Choosing Pinks as your screens, choosing the Lore of Change (see below) and even your artifact choice can make the enemy significantly debuffed, throwing off the expectations your opponent may have from that hammer unit that has just charged you.
Arcanite Cabal
Another passive, Sinister Counter-hexes, allows you to add 1 to unbinding rolls for friendly Arcanite units and, if successful, that unit can immediately use Magical Intervention without a CP being spent. Again, economies of scale will be important here, although taking Kairos alongside a Curseling is quite a potent anti-magic duo. The only potential downside is that if you face off against a faction without magic…you have wasted your battle formation choice.
Change Host
The only battle formation with an active ability allows you to remove a Daemon unit from combat on a 3+ and set it up again but still in combat with the enemy units it was in combat with. I may be missing something huge here, but there aren’t really any Daemon units that you want in full on combat and even if you do, why would you want to essentially do a fancy pile in with them and only on a 3+. All the other battle formations seem to offer a lot more.
Heroic Traits
Cult Demagogue
Similar, but different is how I would describe Cult Demagogue. The downside is that if you roll a double (that is not a miscast) then you only get +3 to cast instead of the cast not being able to be unbound. The upside is that, if you have a two cast wizard, it works on both casts. With Destiny Dice being the best way of getting that double on the cast and Destiny Dice being less commonplace, this is probably an overall positive change.
Illusionist
Amazing on a first-read, until you see the word ‘wholly’. It is -1 to hit while units are ‘wholly’ within a unit’s combat range, i.e. 3”. I was initially very excited until I remembered how to read as, sadly, most of anything you’ll want to protect with this has a base size of greater than 3” or a footprint larger than this. There’s still some play with it and it is not just shooting but combat too, so maybe a Curseling or a Ogroid Thaumaturge might get a little extra survivability with this.
Nexus of Fate
Roll a dice in Your Hero Phase an replace one of the Destiny Dice with the roll. With the loss of battleshock as a phase, there isn’t a lot of use for Destiny Dice of 1, so this may help make these a bit more useful. If Destiny Dice are key to your plan, this is a good one to pick and, if you don’t want to risk getting losing a good Destiny Dice…you still have good Destiny Dice!
Artefacts
Ambition’s End
An artefact that is itself lacking in ambition as it can do D3 damage to a wizard the bearer is in combat with and subtracts 1 from casting rolls for the rest of the battle. Rest of the battle is great, but better to just kill the wizard and not be able to cast for the rest of the battle. Hard pass.
Nine-eyed Tome
Adding 1 to casting and banishment rolls is always good and consistently so. Combine the Curseling, Arcanite Cabal and Kairos with this artefact and the Curseling could have +3 to unbind, which is not to be sniffed at and then could immediately cast back with +2 to cast. Solid artefact and likely to be the default pick.
Wyrdflame Blade
If you are going all in on Wyrdflame, this artefact can allow an enemy unit to receive the Burning keyword if any damage points are put through. Don’t put this on an Ogroid as they can already add Burning in combat, but if a Curseling has it, they can add Burning in each of the three main phases of the game.
Spell Lore
Lore of Change
Tzeentch has the choice of two spell lores, with one great spell in each, one decent spell in each and one spell that you would never choose if you didn’t get the other spells with it.
The great spell for the Lore of Change is Fold Reality, which gives Tzeentch a teleport, something they were lacking for all of 3rd – Ephilim the Unknowable’s spell does not count! It goes off on a 7, but with Kairos nearby and/or casting it, it’s a pretty reliable spell and movement is always great. While units set up this turn cannot score tactics such as Take their Land or Take the Flanks, putting a hammer unit within 9” and being able to guarantee a charge with Destiny Dice is pretty good. Typically, about two months after I put all my Enlightened on Foot on discs!
The good spell is Bolt of Tzeentch, which is a straightforward D3 damage spell with an 18” range and a generous casting value of 6. Crucially, it has the unlimited keyword, so can be cast by every wizard and it is Wyrdflame, so you will want this spell if you are focusing on Burning.
Transformed to Spawn is the meh spell and that is being kind. 12” range is really short and you might be able to bring a Spawn in, that you still have to pay for. Spawns are pretty awful, so why you would want to pay for one to use with this spell, I do not know. Bring in a Manifestation instead, which is much better than a Spawn AND free!
Lore of Fate
Shield of Fate is the best spell in probably both lores as it gives the target a 5+ ward AND -1 to hit (if you have 4 or more Destiny Dice), both of which last until the start of your next turn. This is a great spell and a good candidate to be cast in your opponent’s hero phase using Magical Intervention. Lasting for potentially two player turns is also fairly uncommon, adding to the value of this spell.
The okay spell, good would be going too far, is Infernal Gateway, which is a 12” range damaging spell, where you roll the number of dice equivalent to the number of Destiny Dice you have (minimum 4), which each 4+ being a mortal wound. If there was a way of getting dice back (without running out entirely first) this would be good, potentially great. As it is, it is a good spell for the start of the game that either requires you to not use your Destiny Dice or to get gradually less effective as time goes on.
Glimpse the Future asks you to put aside your Destiny Dice of 6 and then gamble with the others. This could be a great way of getting out of a sticky situation and getting something usable to play with, but it only give you an actual dice back once you have none left at all. And if you don’t have any left at all, Infernal Gateway is toothless and Shield of Fate is only the 5+ ward. Not a good spell.
Despite Shield of Fate being so good, the utility of teleporting and the ability to maximise Burning units means that the Lore of Change gets my vote unless you have something very particular in mind, for example, assassinating a 5 wound character with the Changeling and a lucky dice roll T1.
Manifestation Lore
Burning Sigil of Tzeentch
The first of two static manifestations is the Burning Sigil of Tzeentch, which goes off on a 5 and needs to be placed wholly within 12” of the caster. Every movement phase it is on the board, you roll 2 dice and choose one outcome to apply to all units with 9”, friendly and otherwise, ranging from reducing move, subtracting from hit or wound rolls or, causing D3 damage, but making that unit angry and adding 1 to their attacks characteristic. As it is a static manifestation it can be placed within 9” of the enemy and even into their combat ranges. Potentially this could shut down counter-charges, but will cost the Sigil as it only has a 5+ save and a 6+ ward with 6 health.
Daemonic Simulacrum
The good news is if the Daemonic Simulacrum hits a Slann, it will have 7 attacks, 4s/3s, rend -2 for D3 damage, which gives it a pretty good chance of eating the frog. Into anything else, it’s just 4s/3s, rend -1 for D3. It is a manifestation with a 9” move so it does need to be set up outside 9” of the enemy and 12” of the caster. However, if you choose the Lore of Change, a caster could potentially teleport close enough to an enemy wizard that they can put the Simulacrum down within 9” and then use Destiny Dice to guarantee a charge as they do have the Disciples of Tzeentch keyword. With pretty much everyone taking a wizard to get access to manifestations, this is worth a look.
Tome of Eyes
The second static and third manifestation is similar, but different, just like the Cult Demagogue heroic trait. Instead of just a +1 to cast, Tzeentch generals can choose to add 1 or 2 to the casting roll for a wizard (and it can be multiple) within the combat range of the Tome, and then roll the number of dice equivalent to the buff i.e. for +2, you roll 2 dice. For each 1 or 2, allocate 1 damage point to the caster. What’s great about this and the timing of various abilities is that you can cause 2 damage to a unit and then rally them, practically guaranteeing they are back at full health. In this way, you can see the 1cp as adding +2 to cast. Put Kairos nearby and that’s +3 to cast.
Krondspine Incarnate
It’s also worth mentioning here that if you do take Kairos (and you probably will want to) then Kairos’ Mastery of Magic passive means that you only need to roll one 4 on 2d6 to summon the Incarnate. This still works on your opponent’s turn as he gives the +1 to cast to himself too.
Units
This won’t be an exhaustive list, but one that looks to highlight the units that will probably become the core of your army with one or two reasons why you might want to choose them.
Kairos Fateweaver
The biggest of the big birds has several things going for him. He retains Mastery of Magic, which makes the lowest D6 of a casting roll the same as the highest D6, so a roll of a 1 and a 6 turns into 2 6s. Added to his Beacon of Sorcery ability to give +1 to casting AND unbinding, you’ve just cast something on a 13. Bonuses to unbinding are very uncommon, so it makes him a very potent wizard and a Wizard (3) at that. He also has one of the most powerful spells from 3rd edition as his warscroll spell, Arcane Suggestion. While it does go off on an 8, with Mastery of Magic this is going off 75% of the time and allows you to choose one of the following debuffs: the target cannot use commands; subtract 1 from hit and wound rolls; subtract 1 from save rolls.
However, this combination of abilities is overshadowed by his Oracle of Eternity ability. Kairos can, once per battle, do one of two things. Either choose a battle tactic that has already been completed OR choose two battle tactics you can try to achieve without burning that second tactic. This is huge. Scoring 5 battle tactics is really hard to do in 4th so being able to double up on Take the Flanks with 200 points of Screamers for 8 points is a great position to be in. In my opinion, this is the path to victory for Tzeentch: score all 5 tactics and hold 2 objectives all game for 40 points (in most cases). Debuff the enemy sufficiently that they drop a couple of tactics and don’t take objectives and that should be enough to win.
Lord of Change
In the introduction I mentioned that I wanted to have the opportunity to run both of these units in the same list and Disciples of Tzeentch have followed the pattern for Chaos that the named Greater Daemon has abilities that fit the lore and then the unnamed ones largely do the same thing – return units in lieu of summoning. For one Destiny Dice (so this is what those 1s and 2s can be used for) a Lord of Change can return a Daemon unit at half strength, wholly within 12” and outside of 9” of the enemy. The best candidates for this are probably 20 Pink Horrors or 6 Flamers. The slightly lesser big bird also throws out a -1 to hit debuff when targeting Daemon units in combat wholly within 12”. Couple this with the Wyrdflame debuff if you choose Wyrdflame Host and your opponent will be at -1 to hit AND wound, and potentially unable to do anything about it because of Arcane Sacrifice from Kairos. It has lost access to the Mastery of Magic ability, so casting is a little harder, but if you take the Nine-Eyed Tome, cast the Tome of Eyes and are wholly within 12” of Kairos, that’s +4 to casting rolls. The spell, Tzeentch’s Firestorm is fine, generally doing D3 mortals, with the potential to spike for more, but it is unique and it does have Wyrdflame to add this debuff. What also has Wyrdflame is the Rod of Sorcery, which is the option you want to take on the LoC, with 2D6 shots at 18”, 3s/3s, rend -1 and 1 damage.
Changecaster
While the Herald on Disc has gone to Legends, the Changecaster is a plastic model, so survives! The first of two reasons you would want to take these are for 3 extra dice when rallying when wholly within 12”. From 9 dice (appropriately), it’s reasonable to expect 4 health back, which could be two Pink Horrors or two Flamers. Flamers are particularly interesting as they shouldn’t really be in combat, so rallying in both turns to get 4 back for 2cp feels pretty decent. The second reason is that you can add 1 to hit rolls that target a Burning enemy unit when the Burning enemy unit is within 12”. While there aren’t really any Daemon units that can take advantage of this (though Screamers would help) it would also apply to any variety of Tzaangor you might be able to throw in, who are more dangerous in combat.
The Curseling
For 170 points, The Curseling is a good investment of points as a 2-cast wizard that cannot always be targeted as he is a foot hero of only 6 health. He also has a 3+ save, so is relatively tanky for a Tzeentch hero. His ranged attack crucially has the Wyrdflame keyword for its D6 attacks and his melee profile, while a little underwhelming, can potentially do 15 damage at rend -2. His other ability, Disrupter of the Arcane, allows him to reduce the power level of a wizard by 1, to a minimum of 0, until the next Tzeentch turn. It is only on a 4+, but with the Arcanite Cabal battle formation and Kairos’ +1 to unbinds, the odds are that spell is being stopped. With Arcanite Cabal, The Curseling would then immediately be able to cast a spell without spending a command point. Finally, to get another phase where Wyrdflame could be added, the Wyrdflame Blade is probably best on The Curseling if you are taking it.
Ogroid Thaumaturge
A quick mention for the other ‘combat’ hero as a decent ranged attack has been added, though sadly without the Wyrdflame keyword, but the Ogroid’s combat attacks do add Burning. While 3 attacks, 4s and 2s is a little swingy, if the Ogroid has lost any health (and not just in that phase or turn), he gets +1 to hit and wound. On the charge, the Great Horns and Cloven Hooves also do 3 damage. There is also the staff in combat that would be 3s and 2s for D3 if damaged.
Tzaangor Shaman
The final hero that I’m going to take a look at here as it features in one of my lists below is the Tzaangor Shaman. Being only a Wizard (1) it isn’t going to dominate the hero phase nor does it have its own warscroll spell. What it can do is to give a Tzaangor unit on foot run and charge, which can be really handy on Enlightened on Foot, one of the more efficient warscrolls of the index. The other ability synergises well with the Tzaangor Coven battle formation as it can bring up to 3 models back to a unit. If you can get this off in range of some Enlightened on Disc, that could be 170 points this is bringing back to your army AND it can be done by multiple Shamans AND at the end of every turn.
Pink Horrors
Pinks are significantly different to what they were in 3rd. They can split, but only if they join a nearby blues and brims unit that has taken enough casualties for the extra blues to fit in the unit and not take over its starting strength. And if you combine the points cost for pinks and blues at their current value then they are the same cost (260pts) as pinks were at the end of 3rd. Pinks on their own, however, are only 140pts and they do have 20 wounds in a unit of 10 instead of just the 10 and they have a 6+ ward as standard. So they can be a bit of a tarpit, as 40 wounds in a reinforced unit is not nothing, particularly if you choose the Lore of Fate and add Shield of Fate. Set the unit attacking you on fire with their Wyrdflame attacks and throw in All out Defence, 40 wounds on a 5+ save, 5+ ward and -1 to hit and wound is actually quite survivable. If a melee hammer does come over and kill them all, on a 4+ you can inflict 1 mortal damage on a target that is in combat with them…then bring half back with a Lord of Change!
Flamers of Tzeentch
A reinforced unit of 6 has 18 attacks, 3s/4s, -1 against infantry for D3 damage and +1 to wound against targets that are already burning, which could be decent. They are, however only 12 wounds on a 5+ save, 6+ ward, so will go down quite quickly. On the bright side, if a Changecaster uses the rally command on this unit then you’re probably bringing 2-3 back. They’re also quite fast too, with 9” move, so they can potentially hide somewhere relatively safe before accelerating forward to shoot (and then probably die!)
Burning Chariot of Tzeentch
While we’re talking about setting stuff on fire, a quick mention for the Burning Chariot as for 20 points more than 3 flamers, you get 4 Wyrdflame shots at 16” instead of 12” and 12 attacks (admittedly pretty poor ones!) in combat. However, if you were to take the Chariot, it would be for its ability to give the Burning keyword to an enemy that it moved over in Your movement phase on a 3+. Probably a few too many hoops to jump through for me, but worth mentioning as another source of Burning.
Screamers of Tzeentch
With the Beast keyword, these will not be able to snatch anything but an uncontested objective, but they still do have some uses. They are only 100 points, with a 5+ save and 6+ ward with 3 health, so they are not entirely trivial to get rid of and their 14” move can be really handy for Seize the Centre, Take the Flanks and Take their Land. If you have Kairos in your list then they could score one of these twice, making a 200 point investment for 2 units good sense and worth including in most lists.
Tzaangors
From the heady heights of Hoarfrost-induced murder at the end of 3rd, Tzaangor have take a bit of a fall from grace. They now only have 2 attacks, 4s/3s, rend -1 for 1 damage, but do get Crit (2 Hits) if the unit is wholly within enemy territory…if they live that long or Reality if Folded to teleport them across the board. A unit of 20 is only 300 points though and, in a Tzaangor Coven with Shaman support, those 40 wounds could hang around a bit.
Tzaangor Enlightened on Foot
Point-for-point, this is as efficient as it gets for Tzeentch as for only 10 points more than their speedier brothers on disc, you get twice the number of spear attacks AND they have kept the shut down commands ability that all Enlightened had in 3rd – albeit on a 3+ and only when charging. Compared to 10 standard Tzaangor, they are only 2 fewer wounds and they’re on a 4+ save rather than a 5+. Their problem always used to be the delivery mechanism you would use to get them into combat and with Fold Reality as a spell plus Destiny Dice to guarantee a charge this is no longer a problem. If you’re starting a Tzeentch army for 4th and you’re into goats, 6 boxes of these will only be 540 points of models for the most efficient ¼ of your army. In fact, you could practically create a whole army just using this kit…
Tzaangor Enlightened on Disc
Much faster than their footslogging kin, they also have a couple of D3 damage disc attacks too. They are also damage 3 when the Tzeentch player goes second OR is the underdog. Having at least one unit to zoom around the board assassinating choice targets is definitely a build option particularly when coupled with…
Tzaangor Skyfires
The same speed and defensive profile of the Enlightened above, but with two 18” bow attacks that ignore any modifiers to hit and to wound. A unit of 3 can do the same skirmishing job of 3 Screamers, while still being able to do some damage at range. Where they truly shine, however, is that they give +1 to hit rolls made by friendly Warflock units that attack the unit the Skyfires did damage too. There is no limitation on how many times this is used, so two Skyfire units patrolling the flanks could mark targets for their melee cousins, bringing the Enlightened on Disc up to 3s and 3s on their 3 damage spears.
Sample Lists
For the sample lists, I’ve brought a Daemon variant and an Arcanite one.
Disciples of Tzeentch – Daemons
Wyrdflame Host
Kairos Fateweaver 440
[General]
– 1 x Changecaster, Herald of Tzeentch 140
– 20 x Pink Horrors 280
– 20 x Pink Horrors 280
Lord of Change 360
[Nine-Eyed Tome]
[Illusionist]
– 6 x Flamers of Tzeentch 240
– 3 x Screamers of Tzeentch 100
– 3 x Screamers of Tzeentch 100
Lore of Fate
Manifestations of Tzeentch
1940/2000pts
2 drops
This list is trying to debuff as much of the enemy as it can with Wyrdflame while scoring 5 tactics, manipulated by Kairos. The choice between Lore of Change for the D3 Wyrdflame spell and teleport and Lore of Fate and the 5+ ward and -1 to hit was tough, but getting the extra resilience for the pinks won out in the end. Each Tzeentch movement phase, one unit of Daemons can potentially come back at half strength, so up to 500pts or so of recursion available in this list if the Lord of Change’s illusionist ability keeps him alive.
Disciples of Tzeentch – Arcanites
Tzaangor Coven
Tzaangor Shaman 160
[General]
– 6 x Tzaangor Enlightened 180
– 6 x Tzaangor Enlightened 180
– 20 x Tzaangors 300
– 20 x Tzaangors 300
Tzaangor Shaman 160
– 6 x Tzaangor Enlightened on Discs of Tzeentch 340
– 3 x Tzaangor Skyfires 170
– 3 x Tzaangor Skyfires 170
Lore of Change
Krondspine Incarnate
1960/2000pts
2 drops
This list doesn’t have access to the -1 to wound debuff or Kairos’ Oracle of Eternity, but it does have access to lots of rally rolls and 2 Shaman to potentially bring 6 models back per turn. The 5+ ward, -1 to hit spell would be great on the 20 Tzaangor blocks, but the teleport of the Enlightened of Foot is probably more important to try to eliminate threats instead of surviving them. With only two casts and no bonuses in this list, the Krondspine is the choice of manifestation to get rid of any enemy manifestations while the goats kill the actual enemy.
The Disciples of Tzeentch are a faction within the Chaos pantheon in Warhammer Age of Sigmar. Dedicated to the Changer of Ways, Tzeentch, they embody the essence of change, magic, and manipulation. Led by powerful sorcerers and daemonic entities, they seek to unravel the fabric of reality and reshape it according to their whims. With a focus on sorcery, cunning, and intricate schemes, the Disciples of Tzeentch manipulate events from the shadows, often orchestrating complex plots that span years. In battle, they employ a diverse array of arcane powers and otherworldly creatures, leveraging their mastery over magic to outmanoeuvre and outwit their foes. However, their allegiance comes with a price, as Tzeentch is known for his ever-shifting plans and unpredictable nature, making loyalty to the Changer of Ways a precarious endeavour.
Battle Traits
Starting with the Battle Traits, Disciples of Tzeentch have a range of powerful and flavourful rules that really help define your army and shape list building. The first one, Arcane Armies allows an auto-cast of Tzeentch Endless Spell and it cannot be unbound until Turn 2 at the earliest. While somewhat out of sequence, it’s a good opportunity to go through those Warscrolls now to decide how good this rule actually is.
Tome of Eyes
The cheapest is also the one that I think is the best, due to the change to Chronomantic Cogs during 3rd edition. For 40 points, you can reroll casting roles (only) and thrown in is a spell that can do D3 mortals wounds and reduce bravery by 1 for the rest of the battle. For most efficiency, put it on Kairos and get to re-roll all three of his spells, potentially useful for a particular Book Battle Tactic. The Endless Spell follows around the model it is ‘bound’ to, so can also be used to sneakily screen off a portion of base, preventing all melee attacks being able to get in.
Burning Sigil
Next up, is the Endless Spell that I think is the coolest: Burning Sigil. It has a range of 18” and then at the end of the movement phase, you roll a dice for every unit within 9”, even friendly units. On a 4+, the unit takes D3 mortal wounds and if a model dies, you can add a spawn within 3” of the unit (only once per activation though). This is fantastic for shutting down shooting units as they find themselves in combat and have took overkill the spawn instead. It can be amazing to shut down charges too: I once popped a spawn down within 3” of a unit of Brutes, a Mawkrusha and some Pigs that were about to ruin my screen. Instead, they just ate a lot of magic next hero phase. It is pricey, at 70pts though, and with some armies, it’s practically useless. Face Beastclaw Raiders and it’s doing nothing as they have too many wounds; Khorne might die but a) they might ignore, earning Bloodtithe and b) they’ll kill the spawn quickly anyway…stop me if you’ve heard this one, earning Bloodtithe!
Daemonic Simulacrum
Again for 70pts, you have an Endless Spell that probably does 3 mortal wounds (9 dice and 5+s) or 5 mortal wounds to wizards (9 dice and 4+s). Waste of a slot – take Aethervoid Pendulum or Ravenak’s Gnashing Jaws instead.
Summoning
Disciples of Tzeentch are a summoning army, with summoning or Fate Points being earned whenever a spell is cast, friendly and enemy. This can have an interesting effect on armies that depend on casting as if they do go through with the cast, they make summoning easier but at the same time, it might also make the Tzeentch player allow some spells to be cast for the same reason. There are several Daemon units that can be summoned, but the three you are most likely to see are 10 Blue Horrors for 10 Fate Points; 10 Pink Horrors for 20 Fate Points; a Lord of Change (the generic one, not Kairos!) for 30 Fate Points. There is a sub-faction that allows for Lords of Change to be summoned on a 9 the first time and then on an 18 each time after that BUT you can only summon Lords of Change. Lore-wise, the Guild of Summoners (the sub-faction in question), aims to summon NINE Lords of Change at once to bring about something appropriately apocalyptic. At 2k points and 5 turns, the most you can get on the table is 8, so look for a Guild of Summoners mirror match to check the veracity of the prophesy! The summoning is fine, but is severely overshadowed by Seraphon Starborne summoning as they get summoning points for existing and for casting their own spells and unbinding the opponent’s.
Change Covens
I’ve mentioned one of the Change Covens or sub-factions already, so let’s dive into those now, starting with the Big Bird fans, Guild of Summoners.
Guild of Summoners
GoS is definitely one of the competitive options, allowing you to summon and almost 400pt model, relatively easily for only 9 Fate Points. Many GoS lists feature Kairic Acolytes as battleline, and they can cast a spell each; with a certain Command Ability, you get an extra 3 Fate Points and then the spell in Arcane Armies counts too – that’s 8 Fate Points already. In addition, there’s a Book Battle Tactic for doing this. However, there are a couple of buts. The biggest one is that only Arcanite (i.e. mortal) wizards can summon. Lose those and no more summoning. Having the space to fit those big bases in can be tricky too. The other catch is that the Lords of Change are casting from the same pool of spells and they are not good in combat, even with a sword and flaming weapon. Therefore, take the Rod of Sorcery for some shooting chip damage and an Endless Spell like Aethervoid Pendulum or Ravenak’s Gnashing Jaws.
Host Arcanum
The other competitive option, and the one you take if you want to take the very cool Screamers as battleline and be able to summon in Horrors (among other units, but mainly Horrors) is Host Arcanum. Another bonus from Host Arcanum is that you can unbind a spell without rolling dice rounds 1, 3 and 5. And why those three? What does 1+3+5 make?
And the rest…
Host Duplicitous has a cool gimmick where units can’t fall back and can bring 5 Pinks back on a 4+ once per game. Theoretically, 30 Pinks could tarpit a whole army as it would 150 wounds BUT that costs almost 800points and 10 Chosen fully buffed could take that out in a couple of combat phases. Eternal Conflagration gives extra rend to magical ranged attacks and have Flamers as battleline. 9 Flamers will put you back about 600 points and will die to a stiff breeze. The last two are Kairic and Tzaangor based and unless you have a particular army in mind for verrrrry casual games, skip these.
Coalition Options
Disciples of Tzeentch can play nicely with Slaves to Darkness, able to take two units out of every four from the other battletome and get along with Beasts of Chaos okay, able to take one out of every four from this book. As to the units you would want to take, they’ll probably all be melee units as melee is somewhere that Tzeentch can struggle with, though various hues of Tzaangor do have a good punch still.
For Slaves to Darkness, six Varanguard are an excellent choice, with some Chaos Chosen also being an option. Six Ogroids can also do tremendous work with their great axes and look really cool alongside an Ogroid Thaumaturge. 20 Chaos Warriors can be a decent anvil if you don’t want to use Pinks, especially as all of these units will be able to receive the Shield of Fate spell buff, giving them a 5+ ward and a potential spell ignore too. With Mystic Shield, All out Defense AND a 5+ ward, those Warriors will be tricky to remove. Having a melee threat is really important as there are lots of matchups that can neutralise the magic threat, for example, Khorne. A couple of more techy pieces from the S2D range include the Cockatrice to potentially mean that enemy melee only hits on 6s and the Mindstealer Sphiranx for fight last (though to make that worthwhile you’re going to want two melee threats!). Of the Warcry Warbands, Corvus Cabal are good for deepstriking as Tzeentch has (almost) no way of teleporting short of Soulscreen Bridge. Untamed Beasts could be useful to look at for a pregame move. Last but not least, for those people who have more friends than they know what to do with, there is Belakor. His spells will add to Fate Point generation, and there’s always The Dark Master ability aka ‘Belakor says no’ to potentially shut down unit activations.
For Beasts of Chaos, melee hammers such as Dragon Ogres or Bullgor certainly have a place and Ungor can do a good job as a screen at a very reasonable price.
Locus of Change
Pretty handy rule here for keeping your Daemon units alive in the form of Locus of Change. Really straightforward in as much as if a Daemon unit is wholly within 12” of a Daemon hero (e.g. Lord of Change or Gaunt Summoner) then they are -1 to hit in melee.
Master of Destiny
And the final Battle Trait is Mastery of Destiny which gives you Destiny Dice. You roll nine at the beginning of the game and then you can use the result of one of these dice INSTEAD OF rolling. They can’t be used for every dice roll but can be used for:
Casting
Unbinding
Dispelling
Run
Charge
Hit
Wound
Save
Damage characteristic of missile or magic weapon (not for magic damage, sadly)
Battleshock
For the above rolls that need two dice, you need to use two Destiny Dice and your Coalition units cannot benefit from them at all.
In terms of gaining more dice, Kairos allows you to add one at the start of each hero phase; there is a spell that adds one; there is a relic that gives and extra dice for unmodified hit rolls of a 6; there is a command ability that allows a dice’s value to be changed; there is a relic that allows you to roll a dice each time a Destiny Dice is used and on a 5+, you can roll a new one. This last relic (The Eternal Shroud) can be useful for doing something with the 1s and 2s you have rolled as you can use them for run rolls or any other roll that doesn’t really matter to try and generate a better outcome. However you are generating them, the number you have cannot exceed nine. Therefore, a good trick if you’re going second is to find a pre-text to use a low roll up, such as for a save roll you couldn’t make anyway or by taking a battleshock test that won’t result in models running, even on a 6. Then, when Kairos activates his ability to generate a dice in the Hero phase, you get another try at rolling for a better dice.
Managing your Destiny Dice is key to victory as Tzeentch, particularly as the Grand Strategy, Master of Destiny, needs you to have a total of nine or more on Destiny Dice at the end of the game (e.g. a 2, a 3 and a 4). They can be tremendously powerful when used at the right time. I’ll share two examples to illustrate this. In a game against Beastclaw Raiders, I think I’ve screened well enough, but a Stonehorn manages to get into Kairos and would have turned him into a puff of feathers if not for Destiny Dice. I slow rolled the first couple of saves (i.e. one at a time) and then used almost half of the rest of my Destiny Dice to save the rest. Kairos lived (well, for a couple more turns at least!). An aggressive example is with Tzaangor Enlightened on Disc, who move 16” with fly. My opponent had screened quite well, but because I had a couple of high Destiny Dice, I could guarantee an 11” charge to rip apart several key support characters that shifted the whole game in my favour.
Battle Tactics
Tzeentch are blessed with some pretty good Book Battle Tactics that can all be achieved, albeit with some list construction choices needed to allow them to happen.
Call for Change
To achieve this tactic you need to summon a Lord of Change, which is very difficult for most Covens as it costs 30 Fate Points but simple for Guild of Summoners as they only need nine Fate Points. Being able to achieve this tactic so easily is one of GoS’s strengths competitively and you will complete this tactic if you take this sub-faction.
Mass Conjuration
Casting three spells that are not unbound with the same character is what is required here. It doesn’t specify Kairos Fateweaver as the character as, when the book came out, Wizards could take the Arcane Tome as a relic to get an extra cast, meaning that there were a few options to achieve this tactic. As things currently stand, however, it is Kairos only who can achieve this. There is a bit of risk with this one, but if Tome of Eyes is attached to Kairos and he is out of unbind range, it’s a relatively safe bet.
Ninefold Dismantlement
Kill a unit with nine or more models or a hero/monster with a wounds characteristic of nine or more. Very straightforward one as even if you only do the final wound to a 10 wound model, the battle tactic is achieved.
Tides of Anarchy
Take an objective from an opponent with nine or more models. Again, really easy to do unless you are pinned in your deployment zone for the whole game.
Reckless Abandon
You need to successfully complete a charge with a mortal Tzeentch unit that started the turn 18” away from all enemy units. I have completed this one before, but the only unit that can really do it is a Magister on Disc and then the Magister gets squished shortly afterwards. Don’t bother with this one.
So in summary, two all sub-factions will be able to do; three that one of them will; one that Kairos can do but is situation dependent and one that’s just too much of a faff. Many armies would kill for an array that good!
Grand Strategies
Dominate Arcane Nexus
Don’t choose this.
Preponderance of Fate
Don’t choose this.
Realm of Magic
Don’t choose this.
Master of Destiny
Choose this! Having nine on your Destiny Dice at the end of the game is ENTIRELY uninteractive as your opponent can do nothing to stop you. If you fail this strategy, Tzeentch is throwing you into the Well of Eternity next.
So to bring Battle Tactics and Grand Strategies together, a Tzeentch player is positioned to score well on these, with an expectation, short of an early tabling of scoring 10+ points on these. The challenge, therefore, is in the primary scoring of holding objectives, so make sure you build your lists with that in mind.
Command Abilities
There are two flavours on offer here, Daemon heroes and Mortal ones, with there being a few good ones but maybe Mortal Command Abilities just edging it.
Daemon Heroes
Arch Sorcerer
Know two extra spells from the Daemon spell lore, Lore of Change. Lords of Change/Kairos know all of the spells anyway and the Lore of Change is the weaker of the two, so give this one a pass.
Daemonspark
Once per game 3 Fate Points, which sounds underwhelming, but can help guarantee turn 1 summoning. If you have a Daemon general, this is probably your choice.
Incorporeal Form
5+ spell ignore…meh. You’re Tzeentch: unbind the spell!
Nexus of Fate
Can re-roll the result of a Destiny Dice at the start of each hero phase. Lots of fun, but there are better options.
Arcanite Heroes
Arcane Sacrifice
Add 9” to spell range by inflicting a wound to a nearby friendly unit. 27” cast is great, especially with some of the amazing spells from the Lore of Fate…but it’s only one spell and how long will you be 27” away from your target? One turn?
Arch Sorcerer
Same as above but for Lore of Fate. Now, Lore of Fate is the better spell Lore but Gaunt Summoners exist and knowing two is not the same as casting two. Best on a Cursling if you’re going to take it as he does have two casts.
Cult Demagogue
If the FIRST casting roll is a double, even a double 2, the spell is successful, regardless of the casting value and cannot be unbound. In addition, you get 2 Fate Points for this spell. Spells that cannot be unbound are absolute money, so this is probably the pick of the bunch. Rolled a bunch of 2s for your Destiny Dice? Despair not if you have Cult Demagogue!
Illusionist
Subtract 1 from hit rolls that target your general. The most robust character that can take this has 8 wounds on a 4+. This Command Ability won’t save him.
Nexus of Fate
Copy and paste from above with same comments.
Soul Burn
Unmodified rolls of a 6 in meleedo one mortal wound on addition. Could not be more underwhelming. No model has enough attacks to make this proc often enough and you don’t want your characters in melee.
Artefacts of Power
As above, one basket for Daemons another for their Mortal summoners.
Daemon Heroes
Beacon of Mutability
Add 1 to wound rolls for Daemon units wholly within 9” of the bearer. Screamers are the only Daemon unit we want in combat and they go 16” and potentially charge another 12” into the distance. Simply won’t come off enough for the investment of an artefact.
Blade of Fate
Pick one of the bearer’s melee weapons…skip! Even Lords of Change with swords are decidedly mediocre and you’d need to hit with an unmodified roll of a 6 to be able to generate a Destiny Dice.
Nine-Eyed Tome
Re-roll casting, unbinding and dispelling. Fantastic value on a Gaunt Summoner to get to re-roll two casts; pop Tome of Eyes on Kairos and that’s 5 spells you’re re-rolling. It’s almost like Cogs never changed!
Pyrofyre Staff
Pick one of the bearer’s melee weapons…skip! Even worse that Blade of Fate so don’t waste your time with it.
Eternal Shroud
Each time a Destiny Dice is used, on a 5+, you can roll another dice and put it back in. Very good and the go-to when Chronomantic Cogs still offered full re-rolls. With Kairos, the Destiny Dice Spell and this, you can legitimately expect to have access to 15+ Destiny Dice per game. Definitely worth a look.
Warpfire Blade
Pick one of the bearer’s melee weapons…skip! In the Lore for Lords of Change it explains how they basically kite opponents, hurling spells at them as they fly backwards, desperately trying to stay out of melee range…so I am clueless as to why half the Daemon relics are versions of combat weapons. In comparison, one (ONE!) of the eight Blades of Khorne relics, Daemon and Mortal alike, features “pick one of the bearer’s melee weapons.”
Mortal
Ambition’s End
Once per battle, a Wizard within 1” of the bearer takes the battle round number of wounds. Rubbish.
Changeblade
Pick one of the bearer’s melee weapons…seriously?!
Daemonheart
Ambition’s End but for all units and not just Wizards. Slightly less rubbish, but still rubbish.
Secret Eater
Pick one of the bearer’s weapons…I’m going to actually consider this one for a moment before rejecting it as it can be a missile weapon and the Cursling has a D6 attacks missile weapon. Roll an unmodified hit roll of 6 and roll yourself up a Destiny Dice if you have fewer than nine. But is it better than re-rolling spells or getting Destiny Dice back just for spending them (on a 5+ anyway)? No.
Spiteful Shield
Two mortal wounds back on an unmodified save roll of a 6. Great on a melee hero, of which Tzeentch have none…
Timeslip Pendant
Fight for a second time but at the end of the phase. Unlikely to need to kill something enough while that unit will not kill you when they activate. Not terrible, but same problem as Secret Eater – nowhere near best-in-slot.
TL;DR your command trait is likely Daemonspark or Cult Demagogue and your artifact is probably Nine-Eyed Tome.
Spells
This is where a lot of the flavour comes from with Tzeentch, with a huge variety of spells to consider. The Tzeentch Endless Spells have already been looked at, but with look at the Tzeentch Spell Lores, Notable Warscroll Spells and Notable EndlessSpells too.
Lore of Change (Daemon Spells)
Lords of Change and Kairos know all of these, which gives a lot of flexibility. Also worth mentioning at this point that if you are wholly with 18” of a big bird, you get +1 to casting, unbinding and dispelling and it stacks.
Bolt of Change
18”, CV7, D6 MWs. Bread and butter mortal wound spell and will be one of your most commonly cast spells. Really useful for popping heroes that are otherwise hidden by the Look Out Sir character targeting rules. Only slight downsides are the inherent variability of a D6 damage roll and the Lore of Fate has the same spell and you can only cast Bolt of Change from one of the disciplines and not both.
Fold Reality
18”, CV7, Recursion spell. Do you have Screamers in your lists in units of 6 or 9? If so, you want this spell. If successfully cast, choose one Daemon unit wholly within 18” and visible and roll a dice. On a 1, everything went wrong and the unit is sent back to whence it came. But on a 2+, you get this many models back. On a unit of nine Screamers that your opponent has whittled down to one or two, bringing back six with this spell is pretty crushing (and low risk for you as the 1 in 6 chance of being destroyed isn’t that impactful if there is only a single model left anyway). It does work on Horrors, but only Brimstones so only useful on them in very fringe circumstances. No restrictions on whether you are in engagement range either, which is another strong positive.
Treason of Tzeentch
18”, CV7, Damage/debuff spell. Pick a unit with two or more models (as they have to turn on each other, see) and roll the number of dice that there are in the unit and every 6 is a mortal wound. In addition, subtract 1 from hit rolls for this unit. It’s fine, but probably either a very situational spell or one that you use in Guild of Summoners when all of the other spells have been cast!
Tzeentch’s Firestorm
12”, CV8, Nine dice; 6s D3MWs. Really exciting spell on paper…that almost always does 2 mortal wounds. Cast Arcane Bolt and then charge instead!
Unchecked Mutation
18”, CV6, D3MWs and then maybe +D3MWs. An alright spell here and one that far outshines Tzeentch’s Firestorm at least on the one or two wound models that will proc the second D3MWs.
Lore of Fate (Mortal Spells)
The Gaunt Summoner (both varieties) know all of these, despite being a Daemon and having their chosen spell have to come from the Lore of Change, or any spells specific to a season of AoS. The spells are generally very good, which is why I almost always start with a Gaunt Summoner in my lists.
Arcane Suggestion
18”, CV8, Debuff Variety Pack
Arcane Suggestion gives you a range of debuffs to inflict. Either not being able to issue it receive commands; -1 to hit and wound; -1 from save rolls (note that this does not change armour characteristic or AP of a unit so can stack with rules that do affect those). Great spell and one that you’re likely to want to cast every turn. Turning off Inspire Bravery for key units is massive; -1 to hit and wound, potentially coupled with Locus of Change so that even All out Attack doesn’t cancel the -1; reducing saves is always awesome.
Bolt of Tzeentch
18”, CV7, D6 MWs. As above, but the Mortal variant that cannot be cast with the Daemon version.
Glimpse the Future
CV7, Gain a Destiny Dice. Great fill-in spell for when there’s not a particular spell effect you want, but you DO want the Fate Points. Why not grab an extra Destiny Dice!
Infusion Arcanum
CV5, Buffing spell. +1 to hit +1 to wound for attacks made by the caster. Actually very cool and works great on the Cursling as it takes him to 2s/2s on missile and main melee profiles…but it’s not worth missing out on the others for, unfortunately.
Shield of Fate
18”, CV6, Varying strength buff. If you have 1-3 Destiny Dice, a selected unit gets a 6+ ward. If you have 4-6 Destiny Dice, a selected unit gets a 5+ ward. If you have 7-9 Destiny Dice, a selected unit gets a 5+ ward AND a 4+ spell ignore. Just like Arcane Sacrifice, you will be wanting to cast this one pretty much every turn. Get your sequencing right if you have three or six Destiny Dice and cast Glimpse the Future first, if you can.
Treacherous Bond
9”, CV5, bodyguard spell. Pick a unit wholly within 9” of the caster and can pass off wounds, instead of taking a ward save, on a 3+ when the unit is within 9”. Note the difference: wholly when cast, to one model when effect takes place – just don’t take that one model first!
Notable Warscroll Spells
There are a lot of Warscroll Spells, but I’m just going to look at the ones you’ll find yourself using a bit more often.
Infernal Gateway
18”, CV8, Nine dice, starts on 3+ are MWs. Fantastic fantastic spell that legitimately has a good chance of one-shotting any foot hero unlucky enough to find themselves in range of this. The one downside is that Kairos and Lords of Change now share this as their Warscroll spell, which is why you hardly ever see a starting army with two big birds.
Blue Fire of Tzeentch
18”, CV8, Nine dice, 5+ are MWs. Kind of like Infernal Gateway-lite and cast by the Fluxmaster. The bonus to this spell and why the Fluxmaster was very hard to get hold of for a bit when the book dropped is that for each mortal wound caused you get an extra Fate Point, i.e. 3MWs = three Fate Points from the spell and one Fate Point from the cast. If you have a plan built upon summoning, this spell is hugely helpful to that plan.
Glean Magic
30”, CV4, Copy Homework spell. When the Cursling unbinds a spell, they can immediately cast Glean Magic, even in the opponent’s hero phase and attempt to take a copy of a spell on the opponent’s Warscroll that the Cursling would then be able to cast. For example, you can copy Kroak’s Celestial Deliverance spell (though only cast it once, Tzeentch is not an Order faction) because it just does damage to a unit, but you can’t copy the Alchemite Warforger’s Blazing Weapon spell as this names Cities of Sigmar units as the recipients of the spell. The opposing Wizard still knows the spell, but might see it coming back at them. A fun spell and a good way of earning some more Fate Points.
Infernal Flames
12”, CV7, Damage spell. Not cast very often, but the Gaunt Summoner does have a horde clearance spell that rolls the number of dice in the unit and causes a mortal on a 5+. Not why you’re taking the Gaunt Summoner, but handy to have if you run into 60 zombies.
Choking Tendrils
18”, CV7, Damage and healing spell. The Ogroid Thaumaturge has a nifty variant of Bolt of Tzeentch that also does D6 damage but also allows the Ogroid to heal a wound for each model slain by the spell.
Bolt of Change
18”, CV7, Damage/transformation spell. Both varieties of Magister can hurl out this spell that causes D3 MWs, with the option of turning a model into a spawn if one is killed, in much the same way as the Burning Sigil. They operate independently, however, and you can theoretically generate two spawn a turn with both at your disposal. Think hard about whether it benefits you to have a spawn though. Will it give an enemy unit free movement via a charge? Might it add a Bloodtithe point? Could it be an easy battle tactic for my opponent? Going against Khorne, the answer is almost always yes to all three of these, so such take the wounds and leave it there!
Sudden Warp-portal
18”, CV8, Teleportation spell with hoops to jump through. Even if you know Tzeentch quite well, you’re probably not that familiar with Sudden Warp-portal as it can only be cast by Ephilim the Unknowable, a Warhammer Underworlds release. Hoop number one is casting it as 8 is not straightforward, but then it gets very Tzeentchian. You must pick a unit that is wholly within 18” of Ephilim, within 6” of an objective AND 3” from enemy models. Okay, tricky, but doable, you may be thinking. We’re not finished yet. The unit must then be set up again within 6” of an objective and 9” from enemy models and then cannot move in the following movement phase. If being able to drop a unit in your opponent’s backfield is so key to your plan, take 2 units of Corvus Cabal for the same price and probably greater utility.
Notable Endless Spells
Aethervoid Pendulum
8” + 8”, CV6, D6 MWs. On a 2+, D6 MWs caused on every unit that it flew over or ended with 1” off but it must move in a straight line and it can cause them to friendly units too. Great damage dealer.
Ravenak’s Gnashing Jaws
8” + 3D6”, CV6, Variable MWs. You roll the 3D6 distance (re-rolling if desired – below 10 is a good indicator) and it moves that far and one unit it crosses or ends up within an inch of takes the difference in movement characteristic and the 3D6 roll in damage. Most units move 6”, so on average, that’s 5MWs, which isn’t bad. It’s also a pretty big base for move blocking.
Umbral Spellportal
18”, CV5, Extra range spell. When it is cast, you place one end next to the wizard you want to send a spell through and another in a strategic location that allows you to get range and visibility on a target as long as both ends are wholly with 18” of the caster. Then, when the portal is used the ‘other’ end is where all the measurements happen from. Combos really well with Infernal Gateway but is not cheap, so is not as commonly seen as it once was.
Warscrolls
Kairos Fateweaver/Lord of Change
I’ll look at these two together as you will rarely have both in a starting list and they do have very similar Warscrolls. They both have fly, move 12”, are Daemon monsters and share the same Warscroll spell as mentioned above: Infernal Gateway. They offer a great buff, Beacon of Sorcery, adding +1 to casting, unbinding and dispelling rolls when wholly within 18”, which does stack. They are also excellent at casting and unbinding as, when rolling the casting dice, you can turn the lowest dice into the highest dice, i.e. a 6 and a 1 is actually a 12, +1 for Beacon of Sorcery, making a CV of 13. They can also steal an Endless Spell instead of dispelling it.
Now to the differences. Kairos is a three cast whereas the Lord of Change is only two, so if you plan on attempting the Mass Conjuration battle tactic, Kairos is your guy. Kairos also gives an additional buff in as much as you get to roll an extra Destiny Dice at the start of your hero phase of you have less than nine. Neither are particularly great in combat, maybe able to beat up on a screening or skirmishing unit, but not much else. The Lord of Change, however, does have the option to take a 2D6 ranged attack that hits and wounds on 3s, for -1 and 1 damage, which isn’t terrible and the option you’ll most likely see.
Of the two, I tend to go for Kairos for the extra utility, but if you need to save on points and Mass Conjuration isn’t part of your plans, it’s a good place to make points savings.
Gaunt Summoner (on Disc)
More than Kairos or a Lord of Change, the Gaunt Summoner is my most auto-take and, while the Disc version gives an extra wound, better save and is faster, I usually go for the foot version to save points and be screenable. The reason he is so good is that he is a two cast wizard, with +1 to cast innately, which also stacks with Beacon of Sorcery. You can also be flexible with your casts as he knows all of the Lore of Fate. This combination makes Arcane Sacrifice succeed more often than not, despite being CV8. You also get to choose a bonus spell from the Lore of Change for added flexibility. If you are screening with Horrors, he also adds -1 to hit them from Locus of Change. His Warscroll spell is also notable in that it can be great for Horde clearance. There are two rules that he has that I rarely use: Silvered Portal and Lords of the Silvered Towers. Silvered Portal allows up to two Tzeentch units (so could be coalition unit) to be ‘in’ the Gaunt Summoner to be deployed as reserves at the end of a movement phase, wholly within 9” of the Gaunt Summoner and more than 9” from other enemy models. A Gaunt Summoner on Disc obviously gives you more reach on this, but would be somewhat exposed afterwards. Could be great for getting units forward quickly and, if they are Disciples of Tzeentch, you can guarantee the charge with Destiny Dice. But. You won’t get to buff the unit as they weren’t on the battlefield during the hero phase and, depending on what is inside the Gaunt Summoner, there could be half your points invested in an, at best, 6 wound character on a 4+ save. Finally, while you never want your Gaunt Summoner in combat or having to shoot, he’s not useless. The missile attack is 3 attacks, 3s, 3s, -1, 1 damage at 18” and the melee profile is 2 attacks, 3s, 3s, -2, D3.
Magister (on Disc)
As with the Gaunt Summoner, the Magister of Disc gets extra movement, an extra wound, a better save and one of the coolest models in the Disciples of Tzeentch range. It also allows the battle tactic of Reckless Abandon. It does suffer from the same targeting issues from being on disc, so you’ll probably more often see on foot. The Warscroll spell, Bolt of Change, can turn models into spawn, which is very fun and often strategically useful and he can potentially go from a one cast to a two cast wizard. The first spell has to be successfully cast and not unbound and then you can gamble on casting a second spell. If the second spell is a double, either the Magister blows himself up or turns into a spawn. Probably only use if you have a need for the spell rather than just randomly casting – unless you’re one Fate Point short of a summon you need, particularly if you need a Lord of Change for your battle tactic. At that point, it’s probably best to use Destiny Dice to guarantee the cast and the tactic. Above, I said the Gaunt Summoner is not useless at shooting/fighting… the Magister is! Almost better to save you and your opponent the one minute of your lives you are never getting back by not even rolling the attacks!
Curseling
A very interesting Warscroll, the Curseling. He’s a two cast wizard, with a very unique spell, Glean Magic, that is explained in more detail above. He can also re-roll unbinding and dispelling rolls to make it more likely to get the counter-spell version of Glean Magic off. He’s got good armour, at 3+, but only had 5 wounds and no ward (without buffing spells that probably want to go elsewhere). He’s low-key okay at range, with D6 attacks at 18” 3s, 3s, -1, 1 damage; and has 4 attacks, 3s, 3s, -1 2 damage AND D6 attacks, 4s, 4s, -, 1 damage. If you can justify it, the spell Infusion Arcanum adds +1 to all these hit rolls. Generally speaking, if you have a Gaunt Summoner to take care of your key buff spells and/or you have Endless Spells that need casting or the extra spell bonus from the Command Entourage or Warlord batallions, Infusion Arcanum isn’t as much of a luxury.
Ogroid Thaumaturge
The big, blue angry magic bull! Has a great default Warscroll spell as a D6 damage spell is almost always useful, meaning that his chosen spell can be a bit more buff orientated. Infusion Arcanum is a good potential spell here if you want him to get stuck in, though no range attack to buff as well. Of all the heroes, the Thaumaturge is the one you’d be happiest throwing into combat as he has 8 wounds on a 4+ save and the Warscroll spell can heal him. He’s also a bit of a bully to your more standard battleline, screening units with 3 attacks, 3s, 3s, -1, D3 damage; 2 attacks, 3s, 3s, -2, 3 damage; 4 attacks, 3s, 3s, -, 1 damage. In addition, if any wounds were allocated earlier in the phase, you get +1 to hit and wound. This final ability means that the Ogroid is a good candidate for the Timeslip Pendant as, when he gets to fight again, some wounds were probably taken, meaning that the second set of attacks are more efficient than the first.
Fluxmaster
A Herald of Tzeentch on Disc who is pretty mediocre apart from the speed of the disc, potentially allowing a summons to pop up in an awkward spot or to spread the Locus of Change to some swarming Screamers harassing your enemy’s deployment (and being able to issue them orders as they are not elite) and their Warscroll spell. The spell does cause mortal wounds, but is more of a Fate Point generator than anything else as each wound is an extra Fate Point. If successfully cast, a return of 3-5 Fate Points is not unreasonable, which is close to a Lord of Change across a whole game, even if you aren’t Guild of Summoners. It is a difficult spell to cast, but the Fluxmaster also has a once per game re-roll of a cast with an additional +3 to whatever the outcome is.
The characters so far will be the backbone of most hero slots in most lists, with the Ogroid, Magister and Curseling being particularly key to Guild of Summoners lists as they are where the summoning comes from. Next, are a variety of characters that might have a niche role they can play in your list. I’ll focus on what makes each a bit different.
Changecaster
A relatively easy character to summon who can reduce save rolls by 1 with his Warscroll spell and has the same once per battle re-roll mechanic as the Fluxmaster, who is basically the same character but on a disc.
Fateskimmer
The most VIP of the Heralds of Tzeentch, being pulled on a Screamer Sleigh. Tougher than the Fluxmaster with some combat punch. The spell just isn’t as good as the Fluxmaster as it is an AoE spell from measured from himself and needs to be danger close for it to really work.
Fatemaster
A dude of a disc who can’t cast spells, can’t really fight, but does buff the wound roll Disciples of Tzeentch wholly within 9”. Possibly useful for this mythical Flamer build…but you’re investing so many points in buffing units that won’t hang around long enough to justify the investment.
Blue Scribes
Can choose any spell from Lore of Change or Fate and cast it on a 2+ and it cannot be unbound. Good ability and flexibility, but on a disc, so character screening is an issue.
The Changeling
Can be set up in your opponent’s deployment 3” away from enemy models, but has no Warscroll spell, despite being a two cast wizard, and can choose to debuff hit rolls and halve the movement of a unit. 5 wounds on a 5+ means that he’ll be The Deadling next turn though.
Tzaangor Shaman
Cheap and mobile with a spell to potentially increase numbers of standard Tzaangor units. If you have lots of these, maybe worth it. Can be used for Guild of Summoners summoning too.
Ephilim the Unknowable
If you’re taking him, it’s for the Sudden Warp-portal teleport spell described above.
Vortemis the All-seeing
Magister with a worse Warscroll spell. Don’t bother.
Pink Horrors
Probably one of the most iconic and maybe most hated units in AoS! You start with 10 Pinks as standard and those can split into 20 Blue Horrors, who then split into 20 Brimstone Horror bases. So in total, that’s 50 wounds. Very awkward unit to shift by trying to chip away at it as there end up being more of the unit than there was to begin with. Also, nothing counts as being slain until Brimstones start being lifted off the table. This is actually good news for opponents of Tzeentch as it means that you can only Rally Brimstones and not Pink Horrors!
The problem they’ve had more recently is that there are plenty of units who can just go in and clear 50 wounds on, at best, a 5+ save ignoring rend -2 and a 5+ ward, even if the attacking unit has -1 to hit and wound from Arcane Sacrifice. Might be better off with a unit of, for example, Kairic Acolytes, who will die MUCH quicker, but you can have two separate units for about the same price, meaning that the whole unit isn’t wiped out in one phase.
But what else can they do? Well, on a 3+ for each banner you get a Fate Point for free; they have a lot of shots, with the Eternal Conflagration sub-faction adding rend -1 to those attacks. With some additional spell support that could be even better. The highest volume of shots you can get is when you have all Blue Horrors, with all Brimstones being the ‘best’ (in heavily inverted commas!) combat option.
They can do great work and if your opponent has a couple of hammers that you can cripple early on, then it does become difficult to shift them. In addition, if you can get to 20 Fate Points and return 10 Pink Horrors to the board, the colour will drain from your opponent as they have to chew through those wounds again.
Theoretically, they can be taken in units of 30, but it becomes difficult for a Daemon character to stay wholly within 12” for Locus of Change and it’s a big investment in one unit that isn’t realistically going to cause much damage. It is 150 wounds, but please don’t underestimate how tiring it is, swapping Pinks to Blues and Blues to Brims. Depending on table height and battleplan, you might need a chiropractor over the weekend. And speaking of deliberately inflicting pain for fun, watch out for Pink Horrors vs. Slaanesh. They will be on maximum Depravity in no time at all as the chew through 50 wounds of Horrors in double quick time!
Kairic Acolytes
The other and probably more common battleline option for Disciples of Tzeentch are cheap, a little bit shooty and a little bit fighty. When at 9 or more models they can cast a spell that adds -1 rend to their shooting attacks. This can be cast multiple times by different units and be passed onto another Kairic Acolytes unit. For example, with three Kairics as your battleline, two outer units could buff a central unit that buffs itself for -3 rend shooting attacks. It is only one attacks, 4s, 3s, -, 1 damage though. You do get Fate Points from these spells though and your opponent will be unlikely to attempt to unbind them, so useful to cast at the start of the Hero phase to track Fate Point generation. A smart opponent will simply try to kill a couple from each unit and that’s the casting done with though. Most times they are build with shields for a 6+ ward, but don’t rely on these guys hanging around too long on a 5+ save. They can fight a little bit, but the ceiling on damage is 13, with everything hitting, wounding and going through.
Tzaangors
Currently the most effective way of running these is with a Pair of Savage Blades along with a couple of mutants. With their run and charge ability, this generates 33 Savage Blade attacks on 3s, 3s, -, 1 damage (though only 1” range, even on the Greatblades, so you’ll struggle to get this efficiency). On top of this, there’s 20 beak attacks on 4s, 3s, -, 1 damage. They’re also 2 wounds on a 5+, so while not tanky by any stretch of the imagination, adding Mystic Shield, All out Defense and Shield of Fate has them at 4+ ignoring rend +1 with a 5+ ward. Also debuff the unit most likely tasked with killing them with Arcane Sacrifice, and they’ll hang around for longer than your opponent would like. Their final ability is a nice bonus on top. Ornate Totems allows you to pick a unit within 18” and then roll as many dice as there are Wizards (friendly and enemy) within (not wholly within) 9”. On 4+, you do a mortal wound. If you have three such banners in range of your more than likely 3-5 Wizards…that’s probably about 8 mortal wounds to something that probably isn’t screening very well any more. There’s also no targeting restrictions, so a foot character within range is probably not long for this world! It is done at the start of your hero phase so can be done before battle tactics are chosen.
Jade Obelisk
The last of the standard battleline options is a Warcry Warband whose gimmick is that have a 4+ save that cannot be modified up or down. They still only have 10 wounds though and their other ability, smashing an enemy terrain feature to rubble is a bit too niche to justify these. I have not experimented thoroughly though, so maybe a unit of 20 could do some damage with their Mason’s Tools and their double Obelisk Bearer to bring back a model each at the end of the combat phase.
Screamers (Host Arcanum)
Super-fast skysharks that also cause mortal wounds when they fly over another unit (move, charge or fallback), Screamers are the best one of the better melee options that Tzeentch have. They can do great work as 16” move objective grabbers and harassers in minimum sized units, with 3 attacks each that hit and wound on 3s at -1 rend and 1 damage. As conditional Battleline in a double reinforced pack of nine is where they can start to do some damage. Passing over a target unit with all nine should do 4-5 mortal wounds, and then when you charge (which can be turbocharged by Destiny Dice) you get to do another 4-5 before the attacks even start. With 27 attacks coming in, while -1 rend may bounce off tankier units, they will shred anything on a 5+ or even 4+ save. They’re also not easy to wipe out in one go as there at 27 wounds in a unit of nine. Just be careful if you need to issue them orders as they’re not elite and don’t have a champion, so it will need to come from a hero. If your opponent does manage to kill most of them, the Fold Reality spell can bring up to six of them back allowing them to go again with close to maximum efficiency even if the unit is left with only one alive (very worthwhile having a sneaky Rally here first).
Flamers (Eternal Conflagration)
Every Tzeentch player at some point looks through their Battletome and looks at the Flamer Warscroll and starts to wonder whether it can do work. At maximum efficiency, with a Fatemaster for +1 to wound, an Exalted Flamer for an extra attack and the rend -1 stacked with another buff, Arcane Sacrifice, for example, to make the attacks effective rend -2 you get: 36 attacks at 18”, hitting on 3s, wounding on 2s, -2 rend and D3 damage. But what I’ve just described takes half of your army to pull off, so it should be pretty good! You can also use Fold Reality on this unit and bring Flamers back…if they aren’t all wiped out in one attack as they’re only two wounds each on a 4+ save. So enjoy that shooting phase…it’s probably the only one you’re going to get!
Burning Chariots/Exalted Flamer
Both of these buff Flamers with an extra attack when in range and are similar to each other in as much as the Burning Chariot is an Exalted Flamer on a Disc that is pulled by two Screamers. The ranged attack is similar to that of Flamers, but is 4s and 3s rather than the other way around, which is slightly better and the Screamers do most of the melee work for the Burning Chariot variety. It would be cool to see these on the table but they are about the same price if not more than a Stormstrike Chariot at half the wounds, worse save, weaker combat and shooting and no mortals on impact.
Chaos Spawn
You’ll get more use out of an Endless Spell. If you want some spawn, bring them in via spells – don’t make them part of the original army. If you want something cheap that can get on points and can’t fit in Screamers, add coalition Furies.
Ephilim’s Pandaemonium/Eyes of the Nine
These come with their respective characters, Ephilim and Vortemis – you’re not taking them for their own Warscrolls.
Tzaangor Enlightened/on Disc
The Disc bird/goat-kin get most of the headlines and rightly so, but the on foot variant are worth considering too. Both types of Enlightened have 3 attacks with their 2” spears, hitting on 4s, wounding on 3s, rend -1 and damage 2. However, if you are going second in a battle round, they wound on 2s. They are also elite, so can issue All out Attack for themselves. Time for their next ability – they prevent command abilities being received within 3”. This is huge as it means that the rend -1 is effectively rend -2 and maybe even rend -3 if Arcane Sacrifice was successfully cast on the target unit. It also helps make the unit more survivable too. They also both get a beak attack each that isn’t anywhere near as good, but could chip a wound away here or there. The Disc version gets fly, 16” move, an extra wound and an extra D3 Disc attacks that hit on 4s, 3s, -1, D3 damage. With Destiny Dice helping with charges, that’s a potential 28” threat range for the Discs and 18” for the on foot. Clearly the Disc versions are better but are they 100% better? At the time of writing, the on Foot versions are exactly half the points of the Disc versions, which really start to ask some questions about which ones should be in the list or not. Or just take both! The Discs for an early raid behind enemy lines and the on Foot version for lurking behind screens, ready to compete with their faster kin ones the screens part ways.
Tzaangor Skyfires
In a unit of three, you get four shots at 24” from a Disc that moves 16” that hit on 4s and ignore negative modifiers, wound on 3s at rend -1 but ignore positive modifiers to saves (i.e. the save is, at best, at rend -1) for D3 damage. Any hits of 6 automatically go to D3 mortal wounds. The way that Destiny Dice interact with these is worth going through. Let’s imagine that we have a six wound character that we can shoot at (we’re ignoring the -1 from Look Out Sir, but are close enough to ignore other rules) and we have a 6 and two 5s in Destiny Dice at our disposal for this attack. We slow roll the hit rolls and if we have no 6s by the fourth roll, we use our 6 to cause D3 mortal wounds. We cannot use a 5 to make this 3 mortal wounds. The Destiny Dice rules say that we can use them for the damage of missile or melee attacks. No wound roll or save roll was made to allocate damage with, so Destiny Dice can’t be used. However, we roll a 4 for two mortal wounds, two saves were failed and after rolling for one damage with the first dice, we use one of the 5s to make second damage, damage 3. In total, 6 wounds and the character is dead. Before the changes to targeting, Skyfires used to be a lot stronger, but on balance, I think Tzeentch players are happier not having their characters levelled by Thunderers from 18” away!
Sample Lists
List 1 – Classic Tzeentch
Army Faction: Disciples of Tzeentch – Subfaction: Hosts Duplicitous – Grand Strategy: Master of Destiny – Triumph: Indomitable
LEADERS Gaunt Summoner of Tzeentch (230)* – General – Command Traits: Daemonspark – Artefacts of Power: Nine-Eyed Tome – Spells: Unchecked Mutation Ogroid Thaumaturge (170)* – Spells: Infusion Arcanum Fluxmaster (180)** – Artefacts of Power: The Eternal Shroud – Spells: Fold Reality Kairos Fateweaver (440)** Magister (140)** – Spells: Glimpse the Future
BATTLELINE Horrors of Tzeentch (Pink) (260)* – Iridescent Horror – Pink Horror Icon Bearer – Pink Horror Hornblower – Split and Split Again Horrors of Tzeentch (Pink) (260)* – Iridescent Horror – Pink Horror Icon Bearer – Pink Horror Hornblower – Split and Split Again Kairic Acolytes (120)* – Kairic Adept – Cursed Blade and Arcanite Shield – Scroll of the Dark Arts – Vulcharc – 3 x Cursed Glaive and Arcanite Shield
ENDLESS SPELLS & INVOCATIONS 1 x Umbral Spellportal (80) 1 x Tome of Eyes (40) 1 x Ravenak’s Gnashing Jaws (70)
When I first started playing Tzeentch, this is very similar to what I was playing. Lots of casters generating a tonne of points, with Umbral Spellportal getting into awkward places and the Jaws chomping anyone they could get near. 20 Pinks for strong early screening and Host Duplicitous to be just within engagement range of enemies so they couldn’t run away, while being within 18” of the magical maelstrom that was about to be unleashed!
List 2 – Guild of Summoners Melee Twist
– Army Faction: Disciples of Tzeentch
– Subfaction: Guild of Summoners
– Grand Strategy: Master of Destiny
LEADERS
Gaunt Summoner of Tzeentch (230)*
– Artefacts of Power: Nine-Eyed Tome
– Spells: Unchecked Mutation
Magister (140)*
– Spells: Glimpse the Future
Ogroid Thaumaturge (170)*
– General
– Command Traits: Cult Demagogue
– Spells: Shield of Fate
BATTLELINE
Horrors of Tzeentch (Pink) (260)*
– Iridescent Horror
– Pink Horror Icon Bearer
– Pink Horror Hornblower
– Split and Split Again
Kairic Acolytes (120)*
– Kairic Adept
– Cursed Blade and Arcanite Shield
– Scroll of the Dark Arts
– Vulcharc
– 3 x Cursed Glaive and Arcanite Shield
Kairic Acolytes (120)*
– Kairic Adept
– Cursed Blade and Arcanite Shield
– Scroll of the Dark Arts
– Vulcharc
– 3 x Cursed Glaive and Arcanite Shield
OTHER
Tzaangor Enlightened on Discs of Tzeentch (360)*
– Aviarch
Varanguard (560)*
– 6 x Fellspear
ENDLESS SPELLS & INVOCATIONS
1 x Tome of Eyes (40)
CORE BATTALIONS
*Battle Regiment
TOTAL POINTS: 2000/2000
As more and more of the meta became anti-magic, I started to look at options where I could leverage damage in good matchups, but the heavy lifting could be done by my own melee units that I could target with buffs. Here, we have a one-drop list that is looking to take second turn and use the Enlightened’s bottom of the turn buff to delete something important. No Lord of Change to begin with, but looking to summon one in either turn one or two. Varanguard a speedy threat ready to be fully buffed up and sent in do some heavy work and screening while magic missiles come from the rear. Should also be able to score three book tactics without much effort.
List 3 – Screamers
– Army Faction: Disciples of Tzeentch
– Subfaction: Hosts Arcanum
– Grand Strategy: Master of Destiny
– Triumph: Inspired
LEADERS
Gaunt Summoner of Tzeentch (230)
– Artefacts of Power: Nine-Eyed Tome
– Spells: Fold Reality
Curseling (200)
– General
– Command Traits: Cult Demagogue
– Spells: Shield of Fate
Ogroid Thaumaturge (170)
– Spells: Infusion Arcanum
BATTLELINE
Screamers of Tzeentch (330)
Screamers of Tzeentch (220)
Screamers of Tzeentch (110)
Horrors of Tzeentch (Pink) (260)
– Iridescent Horror
– Pink Horror Icon Bearer
– Pink Horror Hornblower
– Split and Split Again
OTHER
Tzaangor Enlightened on Discs of Tzeentch (360)
– Aviarch
ENDLESS SPELLS & INVOCATIONS
1 x Ravenak’s Gnashing Jaws (70)
1 x Tome of Eyes (40)
TOTAL POINTS: 1990/2000
No big bird in this lists either to be able to get the full 18 Screamers into the list. One unit of nine that is the focus for Fold Reality and defensive buffs, with smaller units able to bully threats on the flank. Enlightened with their 28” threat range always ready to pounce on any opportunities. Not Guild of Summoners, so summoning of extra Screamers or Horrors is an option.
Conclusion
So there we have it – Disciples of Tzeentch. A challenging army to play well, but one with plenty of options available to a player willing to dig through the Battletome (and that of Slaves to Darkness and Beasts of Chaos) for some good combinations to work. An extremely strong Grand Strategy and good Book Tactics mean that if you can score the primary, you’ll be in most games, with a magical double turn potentially able to cripple your opponent. And, if you do lose a battle, smile enigmatically and simply repeat the Tzeentch motto, “just as planned”!
As we approach the halfway point of the current GHB, it’s natural to think about what might be coming next season. But instead of just a new GHB, we’re expecting to see 4th Edition Age of Sigmar and all that brings. Will Malerion and Umbraneth make an appearance? Will Armies of Renown continue to be a thing? And will Bonesplitters actually make it to 4th edition at all?
I don’t have the answers to any of those questions, but get your tinfoil hats at the ready as I take a deepish dive into what the lovechild of 3rd Edition Age of Sigmar and 10th Edition 40k might look like, at least in terms of how you win games.
While the games of 40k I have played so far in 10th have convinced me that AoS is by far the more fun, better balanced and cooler way to play Warhammer, I have really enjoyed the randomness of drawing cards for secondary objectives and the gameplay that goes along with that. Big Waaagh is currently undergoing a Renaissance at the moment because of how easy it is to build into scoring 5 battle tactics, but what might AoS look like with cards for battle tactics that are drawn each round?
As a ‘Greatest Hits’ of sorts, I went back to the battle tactics for previous GHBs, dumped Endless Expropriation for being rubbish, and the result was 24 battle tactics, 9 focused on killing and the other 15 focused on manoeuvring:
Name
Description
Gaining Momentum
Pick 1 enemy unit of the battlefield. You complete this battle tactic if that unit is destroyed during this turn and you control more objectives that your opponent at the end of this turn.
An Eye for an Eye
You complete this battle tactic if 1 or more friendly units were destroyed in the previous tun and 1 or more enemy units are destroyed during this turn.
Desecrate their Lands
Pick 1 terrain feature or faction terrain feature that is partially or wholly within enemy territory. You complete this battle tactic if you control that terrain feature at the end of that turn.
This One’s Mine
Pick 1 enemy unit on the battlefield. You complete this battle tactic if that unit is destroyed during this turn by an attack made by the model picked to be your general.
A Matter of Honour
Pick 1 enemy 9 wound or less hero on the battlefield. You complete this battle tactic if that unit is destroyed during this turn by an attack made by a friendly 9 wound or less hero.
Lead the Assault
You complete this battle tactic if at least 2 of the objectives you control are in enemy territory and are each contested by a friendly 9 wound or less hero.
United Offence
Pick 1 objective controlled by your opponent. You complete this battle tactic if you control that objective and 2 or more friendly 9 wound or less heroes are contesting that objective at the end of the turn.
Cunning Manoeuvre
Pick 1 friendly 9 wound or less hero on the battlefield that is more than 3” from all enemy units. You complete this battle tactic if, at the end of the turn, that 9 wound or less hero is more than 3” from all enemy units and is contesting an objective you control that is wholly outside your territory.
Intimidate the Invaders
You complete this battle tactic at the end of your turn if there are more friendly units wholly outside your territory than there are friendly units within your territory.
Reprisal
You complete this battle tactic if an enemy unit that destroyed a friendly general earlier in the battle is destroyed in this turn.
Magical Dominance
You complete this battle tactic at the end of your turn if a friendly Wizard unit successfully casts 1 or more spells and none of the spells cast by any units in your army were unbound.
Magical Mayhem
Pick 1 enemy unit on the battlefield. You complete this battle tactic if that unit is destroyed by damage inflicted by a spell or the abilities of an endless spell.
Bait and Trap
You complete this battle tactic if 2 or more friendly units retreated this turn and 2 or more different friendly units made a charge move this turn.
Led into the Maelstrom
You complete this battle tactic if 1 or more friendly Heroes and 1 or more friendly Battleline units each made a charge move this turn and at least 1 of those units is within 3” of an enemy unit at the end of their turn.
Surround and Destroy
Pick 3 different friendly units on the battlefield. You complete this battle tactic at the end of your turn if each of those units is wholly within 6” of a different battlefield edge and 2 or more of those units are wholly outside your territory.
Barge Through Enemy Lines
You complete this battle tactic if there are 2 or more units from your starting army wholly within your opponent’s territory at the end of this turn.
Broken Ranks
Pick 1 Battleline unit from your opponent’s starting army on the battlefield. You complete this battle tactic if that unit was destroyed during this turn by a Monster.
Conquer
Pick 1 objective marker on the battlefield that your opponent controls. You complete this battle tactic if you control that objective marker at the end of this turn.
Slay the Warlord
You complete this battle tactic if the model chosen to be your opponent’s general is slain during this turn or was slain on a previous turn.
Ferocious Advance
Pick 3 different units from your starting army on the battlefield. You complete this battle tactic if all of the units you picked run in the following movement phase and finish that run within 3” of each other.
Bring It Down!
Pick 1 enemy Monster on the battlefield. You complete this battle tactic if that enemy unit is destroyed during this turn.
Aggressive Expansion
Pick 2 objective markers that are not wholly within your territory. You complete this battle tactic if you control both objective markers are the end of this turn.
Monstrous Takeover
Pick 1 Monster from your starting army on the battlefield. You complete this battle tactic if that Monster is contesting an objective marker that you control at the end of this turn and that objective marker is not contested by an enemy Monster.
Savage Spearhead
You complete this battle tactic if there are 2 or more Monster wholly within your opponent’s territory at the end of this turn.
In addition to these, the Faction Specific battle tactics would also be added for a ‘deck’ of 30 battle tactics that could be drawn.
As with 40k, you would draw three in your first hero phase and at the start of any hero phase where you had less than three. You would be able to spend a CP OR a heroic action to redraw one card at the start of the hero phase. Any tactics scored from the above list would score you two points; any Faction tactic would score you one point. At the end of your turn, you would be able to discard any or all of your cards for a single CP and could hold on to any cards that you wanted. If you could complete all 3 battle tactics drawn every turn, that would result in 30 secondary points, but the cap would be 25 points. For the primary scoring, we could use the standard Hold 1, Hold 2, Hold More, Kill 1, Kill More, for a maximum of 25 points. The maximum score in each game, therefore, could be 50 points…or would it?
One of the mechanics 10th Edition 40k has introduced is the idea of a Gambit – an all or nothing play to turn around a one-sided battle. Now Sigmar already has a similar mechanic built in – the potential double turn – but I think that Gambits could work in AoS too.
As with 40k, a player could choose at the end of turn 3 to forgo scoring any more points on the primary and instead, try to score their Gambit for 15 points. Building on the rules already in place, the Gambit would require the player to choose two Faction Grand Strategies and achieve both at the end of the game. If they do, then their maximum score is 55 as there are 5 more points available to a Gambit than 2 more turns of maximum primary points. The situations where players may choose to do this is if they are down on the primary or secondary scoring or, if they may be even, but can see that their opponent will start to dominate the board as the game goes on and would rather risk 15 points for the Gambit rather than maybe only eke out another 6 or so points through turns 4 and 5.
But what if you don’t want to rely on drawing cards and want to know what tactics you want to play at the start of the matchup? Instead, you could choose two tactics from either your Faction tactics or the standard pack and aim to try and achieve them each turn for 2 points each to a maximum of 20. This does mean that you cannot score as highly as if you’re willing to take a gamble but you are more in control of these. A Skaven friend of mine suggested that he would have 3 Plague Priests run in a circle holding hands for five turns (i.e. Ferocious Advance) while constantly chanting at each other (Crescendo of the Diseased Choir) to get the full 20 points available. And while hilarious and quite on brand for those crazy Pestilens rats, you would only need to kill one of those Priests to stop both tactics being scored.
I’ve decided to hijack Kieron’s article with some of the rumours I’ve heard as well. Why not go all in on the salt now….
Essentially, the starter box next year may be Stormcast against Skaven and will also be in conjunction with a range refresh for Skaven ala Seraphon, Cities and Flesh-eater style. Perhaps we’ll finally get those plastic Gutter Runners? Part of me suspects they’ll change the style slightly to perhaps differentiate from any Old World Skaven, much like we’ve seen with Kharadron and Fyreslayers. But like I said, Salt.
Chorfs (Chaos Duardin/Dwarf) could well see their little fat feet stamp into the Realms next edition as well. Perhaps not near release, but maybe a year or so into the edition.
So there we are. The possible future for AoS or a fever dream of nonsense that not even tin-foil hats can keep you safe from? Let us know in the comments below!
The Six Nations AoS Teams Tournament is coming up soon, where England, Ireland, Northern Ireland, Scotland, Sweden and Wales will compete against each other and the lists have just been released. To give you an overview of the kinds of matchups that will be coming up and what we can learn from the submissions of these national teams, we’ve come up with six takeaways from the lists.
Of the Six Nations, all countries took a Khorne variant apart from Scotland, underlining how powerful Khorne are in the current meta with their ability to march across the board and stomp their authority on any game. Prayers are clearly going to be a key part of the Khorne strategy alongside the ubiquitous Murderlust for those out of phase movements. Only one Skarbrand out of the five lists, but lots of Wrathmongers and Flesh Hounds with one Bloodlords list with waves of Bloodletters. Other popular lists included Soulblight Legion of Night with Manfred appearing in three of the four lists; Seraphon Fangs of Sotek with double Ark of Sotek Bastiladon; three King Brodd’s Stomps, with three bigs and three littles and three Disciples of Tzeentch Guild of Summoners lists with 12 Enlightened on Discs.
Give me ALL of the Primal Dice!
While there are lots of battle regiments in the lists as expected, the next most common battalion is Andtorian Acolytes for those extra Primal Dice. In most cases, the lists in question could not fit into a single battle regiment, but rather than going for a second battle regiment, those extra Primals seemed to be worth going to a three drop list minimum. Alongside a high frequency of Merciless Blizzard, the potential for a single hero phase to turn around what should be an easy win to a loss (or vice-versa) is definitely there. Even just being aware of the threat will impact on the opponent’s strategy, which might be enough to get a positive result for your team.
Fight me, you coward!
We are clearly in a combat-heavy meta at the moment, with the vast majority of lists focusing on winning the battle by fighting in combat as opposed to relying on ranged shooting attacks. Both Daughters of Khaine lists have eschewed the Bow Snakes for the Fighty Snakes; there are no Lumineth Sentinels at the event; even Kharadron Overlords are much more focused on fighting out of a Frigate rather than Thunderers blasting away from range. There are a couple of exceptions, with all of the Idoneth lists having a healthy amount of shooting, with even the Namarti-heavy list having 40 Reavers and the Shark lists having a huge number of attacks that will also explode on 6s. It will be interesting who these will be matched up with because the lack of return shooting from their opponents could really swing the matchup in the fish-elves favour!
OB – Where?
One of the more underrepresented armies of the top echelon recently are Ossiarch Bonereapers, with only two nations choosing to collect the Bone Tithe and both of these being Null Myriad lists. The points increases on Immortis seem to have done the trick as there are only two units at the event, with Deathriders and Mortek picking up the slack. Perhaps this isn’t surprising as only a quarter of the armies at the event are heavy magic-users and the pairings process can potentially avoid a single anti-magic army. Other notable missing armies include Beasts of Chaos, Ogor Mawtribes and Kruleboyz – just kidding! As recently as a few months back, there would be less variation than we have represented, with nineteen of twenty-four battle tomes in attendance, showing how healthy the meta currently is.
An Age of Heroes.
Across the lists, there is definitely a flavour of what unique heroes can bring to an army, not only narratively, but competitively too. Named characters who will be fighting it out include Gobsprakk, Katakros, Skarbrand, Brokk Grungsson, Kairos Fateweaver, Manfred Von Carstein, The Glottkin, Severith, Morathi and everyone’s (least) favourite angry dwarf, Gotrek. One of my favourite aspects of AoS is how cool it looks on the tabletop to have these centre-piece models battle it out and there will be ample opportunities for epic showdowns across the event with this array of heroes.
Skewl List, bro!
Most of the lists submitted are relatively close to a take-all-comers singles list too, but there are a couple of more skew lists that look really interesting that will cause absolute headaches for whoever gets paired into them. The IDK shark lists come close to this, but they’ve become a bit more mainstream, with several players running this list successfully. What might become more of a meta-list after this event and with the arrival of Belthanos on the scene is Andreas Angermund’s 18 Spiterider and 6 Seeker list. Firstly, respect to Andreas if he is transporting that many models with fragile and awkward wings but then to also give your opponent the dilemma of having these 24 flies be able to pre-game move 12″ before the game even starts…yikes! Another interesting list that could very quickly get across the table and punch you in the mouth is Greg Shelton’s 30 Black Knight list. Black Knights appear in several of the Soulblight lists, but no-one has gone as hard in as Greg has. If all three Black Knight units make a charge, Greg will be rolling 60 dice and expecting at least 20 mortal wounds as his return – scary stuff indeed.
So that’s six takeaways from the Six Nations lists. Best of luck to all competitors at what I’m sure will be a great event. Are there any interesting combos that I’ve missed? Please comment below if I have and let us know which list(s) you think will do the most work!
With the new GHB having a magic focus and with two magic focused armies on my shelves, Seraphon and Tzeentch, I got thinking about which one is on top.
For the purposes of this article, when I say Seraphon, I am referring to Starborne, as opposed to their Coalesced Cousins as magic is more of a buff to them rather than the bread and butter of Starborne. In addition, because both factions have access to them, I am only commenting on Endless Spells if there is something more impactful for Seraphon than Tzeentch or vice-versa.
Spell Lore/Warscroll Spells
Damage Spells
Seraphon
The choices for Seraphon here are much better for sustained D3 damage on a variety of units, with Comet’s Call being a staple, along with Kroak’s Warscroll spell, Celestial Deliverance. However, if all of these go off, then 5D3 damage to 3 units is more into the burst damage category than the sustained. There are two other spells that are quite similar, one for Slann and the other for Skinks: Stellar Tempest and Cosmic Crush. They are both roll a number of dice equal to number of models spells, with Tempest better into pure chaff as it is an unmodified roll of a 5+ that does a mortal wound, with Crush being better into units with a higher armour save – 20 Chaos Warriors would likely take 10+ mortal wounds with this spell. And of course, Seraphon also have access to Merciless Blizzard… Most Endless Spells are equally effective in Tzeentch or Seraphon, but a special mention must be made for Malevolent Maelstrom as the Astrolith allows the Maelstrom to be placed 14” away initially and the Drain Magic spell could potentially be used to set off the D3 AoE early instead of waiting for the number of spells/models killed to tick up to 6.
Tzeentch
Tzeentch is much more focused on single-target damage than spraying mortals everywhere like Seraphon. Starting with Warscroll spells we have Kairos’ and Lords of Changes’ Infernal Gateway that, at top bracket, does MWs on a 3+ with 9 dice being rolled. The odds say that a 6 wound character without a ward should be popped every time with this spell, so is very powerful. The Fluxmaster has a similar spell, with the effect only being on 5+s, but with the added bonus of every MW caused gives an extra Fate Point, that is, if you roll 3 5+, the spell does 3 damage, but generated 4 Fate points. Sticking with single-target for the time being, the Ogroid Thaumaturge has a D6 damage spell and both types of Magister have a D3 damage spell that, if it kills a model, can create a spawn. The Gaunt Summoner (again, both types) have their own version of Stellar Tempest, doing mortals on a 5+, with the added mention that a monster counts as 5 models. Into the spell lores, there’s lots of damage dealing here too. Bolt of Tzeentch is a D6 mortal wounds spell; Treason of Tzeentch is a ‘number of models’ spell that also debuffs the enemy if mortal wounds are caused; Tzeentch’s Firestorm does D3 MWs for every 6 that is rolled from 9 dice (sounds horrific, but actually not that good as you’ll probably only get 2 MWs from this!); Unchecked Mutation can cause D3 and, if a model is killed, on a 3+, another D3 is caused (good for the last few chaff models in a unit). As with Seraphon, Tzeentch also have access to Merciless Blizzard with the additional consideration that, using the command ability Cult Demagogue, the Tzeentch player can use any double that is not a miscast to auto-cast it and prevent it from being unbound. Finally, Tzeentch also have a couple of damage dealing Endless Spells, but these are both quite expensive for not a huge number of mortal wounds.
The winner is…Seraphon.
It’s very close between these two, especially as one has the ability to position for Blizzard really well and the other has the ability to guarantee it goes off. The deciding factor was Kroak’s warscroll spell, combined with the Astrolith Bearer, which is just too strong to not give Seraphon the win here. However, if the Tzeentch player took Spellportal and put Infernal Gateway into the Astrolith Bearer…much closer!
Debuff Spells
Seraphon
Some excellent debuff spells are available that can blunt even the most determined of attacks by a hammer unit. Mystical Unforging from the Slann reduces rend to ‘-‘, the Oracle can shut down run or retreat near a terrain feature or objective, the Starseer can shut down wards and the Starpriest can give -1 to hit to a specific unit.
Tzeentch
The notable Tzeentch debuff spell is Arcane Suggestion, with a choice of 3 debuffs: cannot issue or receive commands; -1 to hit and wound for ALL attacks; -1 save. It’s a great spell, but that’s about it for debuffs, apart from Treason of Tzeentch’s -1 to hit secondary spell effect. The spawn effect of Burning Sigil of Tzeentch could be seen as a debuff in certain match ups. For example, if a unit of 30 Bloodletters in poised to make a charge, but by popping a nearby Bloodreaver, a spawn could shut down that charge and the imminent death accompanying it, although not for the spawn, which is about to be thoroughly murderised.
The winner is…Tzeentch.
Although only one spell, the three effects of Arcane Suggestion are so powerful and flexible to the match up and the game state, that it has to go to Tzeentch for this one.
Both of the above types can be ignored by Khorne on a 5+ initially while also providing Blood Tithe points that can be used for summoning or even to improving the spell ignore to a 4+ then a 3+ and even a 2+ by turn 4. On top of this, Null Myriad can ignore spells within 9” of a Mortisan Hero on a 2+. Therefore, the above range of spells is awesome, but in specific matchups, they will get shut down hard.
Buffing Spells
Seraphon
Buffing spells, however, go on your own unit and therefore are not affected by spell ignores of any kind. Tepok’s Beneficence is a great start from the Slann discipline, with a Skink unit being -1 to wound. If you can add in Mystic Shield and then Blazing Starlight from a Starpriest, you could have a Skink unit (probably Chargers give best efficiency for this combo) on a 4+ save, ignoring rend -1, -1 to wound and with -1 to be hit IF the unit chosen for Blazing Starlight is attacking them. Speed of Huanchi is another spell that Chargers love, giving them a free move in the hero phase. Before you send them off into the beyond, however, having the option of giving them Rend -3 with Hoarfrost is a great one too. The Slann Starmaster has a couple of tricks in the buff category too, with Celestial Equilibrium giving +1 to casting rolls for everyone but himself, with the potential for Drain Magic from the Slann spell lore giving -1 to unbinds for an effective +2 swing.
Tzeentch
Tzeentch Warscroll spells are all about damage, except for the strange case of Ephilim the Unknowable (Vortemis can get in the sea!) who has an extremely conditional teleport spell. The restrictions are considerable and it’s expensive at 190pts, but if you need to teleport someone in Tzeentch and have the teleport complete in the hero phase, this is the way to go. Of course, Seraphon just have this as a heroic action…. Other buffing spells include Fold Reality, which enables you to bring back a number of daemon models to a unit equal to the roll of a D6, with a 1 destroying the unit. Note: this can only be used on Horrors when they are brimstones, but could be useful if you need a few more bodies contesting an objective. Its main utility is with Screamers of Tzeentch. A unit of 6 or 9 can be quite survivable as long as they aren’t trying to fight 10 Chosen on their own or similar, so being able to then bring back up to 6, while they are still in combat, is very strong. The strongest overall is probably Shield of Fate, which gives ward saves and spell ignores based on the number of Destiny Dice you have remaining. More often than not, this will be a 5+ ward. Throw this on 10 or even 20 Pinks, have a Daemon character within range to cause -1 to hit and also debuff the attacking unit with Arcane Suggestion, and watch as that Pink unit stays around a lot longer than your opponent wants. There is also a spell for passing off wounds to a mortal (probably Kairic) unit, +1 to hit and wound, which is particularly helpful with the Curseling’s shooting attack as well and then a buff of sorts is Glimpse the Future, which gives an extra Destiny Dice. As with Seraphon, there is always Hoarfrost and a unit of basic Tzaangors is not a bad target for this spell, taking their 30 paired blades attacks up to rend -3.
The winner is…Seraphon.
This one again was very close, but came down to the units available to put Hoarfrost on. For Seraphon, any one of Raptadon Chargers, Bastiladon with Ark of Sotek, Saurus Warriors, Saurus Guard, Kroxigor or Aggradons can make use of Hoarfrost well. For Tzeentch, it’s Tzaangor, Tzaangor Enlightened and Screamers. If Screamers could be summoned in units of 6, this would probably be a tie, but otherwise, Seraphon take this one as well.
Casting
Seraphon
In order of plusses to cast through warscrolls and abilities, Kroak has +2, Slann have +1, the Astrolith adds 1 within 12”, Celestial Equilibrium can add +1 and Drain Magic can -1 from enemy unbinds. At maximum efficiency, this makes Kroak +5, Slann +3, other casters +2. Rolling 2D6 makes the average cast for Kroak 12, Slann 10, other casters 9. In addition, numerous Seraphon spells are only successfully cast on 5s or 6s, making casting very successful on average. Finally, the heroic action to teleport a Seraphon unit when wholly within 12” of a Slann means that a caster can potentially be moved out of unbind range before casting, making these spells even more likely to go off.
Tzeentch
Both Kairos and Lords of Change have the Tzeentch Master of Magic ability that allows the lowest dice to change to the highest dice in the original cast (Primals can be added as modifiers, but they do not interact with the Master of Magic rule), giving an average cast of 9.9 after considering the Beacon of Sorcery bonus that each of these units also give out. Gaunt Summoners have +1 on their warscroll, combined with the +1 from Beacon makes an average cast of 9. So far, Tzeentch slightly behind Seraphon. However, with the nerf to Cogs, re-rolls to cast are extremely rare and often once per battle when they do exist. Tzeentch can take the Daemon artefact Nine-eyed Tome for full re-rolls, which could be good for a Lord of Change or Gaunt Summoner (particularly a Gaunt Summoner with an extra cast for going second in this GHB) and/or the Endless Spell Tome of Eyes for re-rolls to cast only. Tzeentch also have the Cult Demagogue command ability to make a spell auto-cast on a double and not be able to be unbound and there’s always Destiny Dice to guarantee a cast, though these are the final modified result of the cast and, as such, are not affected by Primal dice. The final consideration for Tzeentch is if Kairos rolls a single six on a cast (and with Tome of Eyes, he might have two chances at this), the use of any Primal dice makes it a Primal Super-cast that cannot be unbound – just remember that it will be the last spell you’ll cast in that hero phase!
The winner is…Tzeentch.
While Kroak’s spells are so low as to almost be auto-casts, Tzeentch have several ways of auto-casting and can really exploit Primal dice with Master of Magic. Combine the fact that there are two ways of getting full casting re-rolls gives Tzeentch the edge.
Unbinding
Seraphon
If you are taking Kroak and a Slann (and, let’s be honest, with Starborne, you are) you will have 7 unbinds anywhere on the table that get +2 and +1 respectively to the unbind roll – the Astrolith only helps with casting. Add Primal dice in where necessary and a couple of back up unbinds from a Skink wizard and that’s a lot of unbinds. Not only that, but as the Order side of the Magic Doms, Seraphon get summoning points for unbinding their opponent’s spells, with the Slann potentially getting 2 Cosmic Power Points with the appropriate Command Trait. Tzeentch As with casting, Kairos and Lords of Change can combine Master of Magic and Beacon of Sorcery to have an average unbind of 10. The Nine-eyed Tome allows re-rolls to unbinds as does the warscroll of the Curseling, who has two unbinds. A fairly standard combination of Kairos, Curseling and Gaunt Summoner with the Nine-eyed Tome could have, on average, 3 unbinds of 10, 2 re-rollable unbinds of 9 and 2 re-rollable unbinds of 8 and then there’s always Destiny Dice that can be used – but all need to be 30” away.
The winner is…Seraphon.
As it probably should be, lore-wise, Seraphon win the unbinding battle as despite not having access to re-rolls, being able to unbind anywhere on the table is immensely powerful and shuts down , or at least makes them think twice, anyone planning on using Magical Dominance (cast a spell and not be unbound anywhere) as a T1 battle tactic.
Summoning
Seraphon
Seraphon have a great range of summoning options that don’t cost much: 8 points for Skinks, 22 points for 10 Saurus Guard or, my preference, 16 points for Raptadon Chargers. Combined with the fact that Seraphon get Cosmic Power Points for just existing – one for each wizard, each Astrolith and one for a Realmshaper, then it is very easy to summon every turn. A list with Kroak, Slann with the Lord of Celestial Resonance trait (2 CPP every time instead of one), an Astrolith and a Starseer – the standard load out – can have up to 17 CPP if they go first, with the potential to go much higher if they go second and have the chance to get some unbinds too. The Slann will more than likely also have the Spacefolder’s Stave too, which means that the first unit summoned can be positioned 7” away from an enemy instead of 9”.
Tzeentch
Tzeentch get Fate Points from every spell that is cast, friendly or enemy, and can give themselves a bit of a headstart with the Daemonspark Command trait giving 3 Fate Points. This option would lock you out of the Cult Demagogue auto-cast option though. Going first, in combination with Daemonspark and having a successful magic phase, Tzeentch should be able to expect 10 Blue horrors for 10 Fate Points. 10 Pinks are 20 Fate Points and can be a real hammer blow to an opponent who may have taken a couple of turns clearing Pinks away. Summoning options are almost always going to one of these two, unless you go with Guild of Summoners, which can only summon Lords of Change, with the first being at the bargain price of 9 Fate Points. Subsequent Lords of Change are 18 Fate Points instead of 30 like with non-Guild of Summoners sub-factions.
The winner is…Seraphon.
This is the first one where it’s not even close. Seraphon summoning is significantly superior to Tzeentch in every way possible: easier to generate points; key units are cheaper; greater variety of units; can be deployed closer to the enemy.
Plan B
Plan B is how do these armies react when they get matched up into Khorne or OBR Null Myriad in particular or even another army set up to shut down magic – Gobsprakk + Primal dice in Kruleboyz/ Big Waaagh anyone? In other words, if magic is not going to win you the game directly, what have you got?
Seraphon
The best Plan B for Seraphon in my opinion is two-fold. Firstly, make sure you have some Chargers in your list, pour all the buffs possible into them, hoping for -3 rend on Hoarfrost, and hurl them at the enemy like an Endless Spell that can claim objectives. Your aim is to try and take out or cripple a major enemy unit or the source of spell ignores/magic resistance. In addition, pinning your opponent in can allow you to score on the Primary while scoring more movement based battle tactics such as Surround and Destroy or Intimidate Invaders. Once you get to 16 Cosmic Power Points, you have a decision – would 5 more Chargers finish off the main obstacle to winning, or would D6 mortal wounds from each wizard or Astrolith bearer and Realmshaper do it? Each unit can only be affected once, but D6 wounds plus D3 from the Realmshaper’s ability that are not spells can be a really sneaky way of getting around spell ignores, hopefully crippling your enemy and making it easier to assert magical dominance again.
Tzeentch
The best Plan B for Tzeentch is to ignore killing the enemy and to score battle tactics instead, using your casts to generate Fate Points to try and summon enough to slow your opponent down. Intimidate the Invaders, Magical Dominance, Surround and Destroy, Tides of Anarchy and Call for Change (if taking Guild of Summoners) are 5 battle tactics that don’t need to have a single wound caused to an enemy to score. Add in a Grand Strategy that requires you to be able to count to 9 for another 3, then that’s 13 points that are pretty safe from the outset. Spend the rest of the game playing keep-away while scoring at least two objectives and you’ve got a shot against any opponent. The more interesting Plan B might be a unit of 6 Tzaangor Enlightened on Foot, that, while only 6” movement, have a threat range of 18” with Destiny Dice and can seriously do work with either hitting on 2s with spears or rend -3 on them as they shut down command abilities in combat. Combine this with -1 save from Arcane Suggestion and the fact that they can fight in a line of 6 due to coherency changes, then that’s a punchy unit.
The winner is…Tzeentch.
If you can keep your discipline and your opponent is not super aggressive or deadly, the range of easy battle tactics and Grand Strategy for Tzeentch should be enough of a Plan B. Just need to not either over-extend and lose too much too early or under-extend and get pinned back in your own territory, unable to score Primary objectives.
Overall
Round 1 – Damage Spells: Seraphon
Round 2 – Debuff Spells: Tzeentch
Round 3 – Buff Spells: Seraphon
Round 4 – Casting: Tzeentch
Round 5 – Unbinding: Seraphon
Round 6 – Summoning: Seraphon
Round 7 – Plan B: Tzeentch
Final Score:
Seraphon 4 – Tzeentch 3
A very narrow win for the dinosaurs that really went back and forth. Tzeentch having a better Plan B kept it close as a 5-2 victory for Seraphon would have been quite convincing, which is appropriate as when not facing Spell Ignores, having 2 battle tactics for killing something with magic is a huge boon for Seraphon. In a head-to-head battle pre-Trog Bomb nerf, if would be Seraphon all day, but with that change, it’s much closer. With Starborne Seraphon likely to be more of a focus for any other nerfs in Seraphon due to the more uninteractive nature of mortal wound spam instead of a combat unit that puts out 30 damage, but at least you get to roll saves for, the gap is likely to get even more wafer thin. Both armies are great fun to play and look great on the tabletop and despite Primal dice maybe giving an edge to anti-magic, what better GHB to start one of these two powerhouses of magic.
Are any armies missing from this comparison? How would Lumineth Realm Lords fare, for example? How do Arkhan the Black and his boss, Nagash, fit into this conversation? And, for the Destruction Bros out there, is this the GHB of Gobsprakk? Please comment below.
Woehammer Winner: The Power of the Waaagh! is the undisputed champion in this slot and is one of the reasons that Big Waaagh! army that is Ironjawz + Wurrgog is arguably stronger that pure Ironjawz. At eight different points in a battle round, your army can earn Waaagh! points:
D6pts at the start of your hero phase
2pts at the start of your hero phase if a friendly Warchanter is on the battlefield
1pt at the start of your hero phase if a friendly Bonesplitterz Wizard (i.e. probably a Wurrgog Prophet) is on the battlefield
1-5pts as a heroic action in your hero phase
1pt in your charge phase for each friendly Orruk unit that finishes a charge move
1pt at the end of your combat phase for each friendly Orruk unit that is within 3” of an enemy unit
1-5pts as a heroic action in your opponent’s hero phase
1pt at the end of your combat phase for each friendly Orruk unit that is within 3” of an enemy unit
Arguably I’ve duplicated those last two, but I think it’s worth it to point out that if you lean into it, the points can mount up quickly. As for what you get for these points, they start at 8pts for +1 to run rolls; 10pts for +1 to charge rolls; 12pts for +1 to cast, dispel and unbind; 16pts for +1 to hit in melee; 20pts for +1 to wound. And here’s the magic: they are cumulative, so you get ALL the buffs at 20pts. At 24pts, you can release the Power of the Waaagh! which you should NEVER IN ANY CIRCUMSTANCES DO! The reason for this is that your Waaagh! points revert to zero for the pathetic buff of +1 to attacks characteristics for ONE combat phase. Hitting and wounding on 2s is better than having one extra attack that hits and wounds on 3s. In addition, there is a battle tactic that requires you to have at least 24 Waaagh! points at the start of the turn and then have at least 30 by the end of the turn. If you release the Power of the Waaagh!, you give away one of the easiest, if not the easiest battle tactic in Age of Sigmar.
Honourable Mention: Although you don’t get the full benefits from each sub-faction when you include them as part of Big Waaagh!, you do get some of the juicy rules with Kunnin’, Brutal and Savage. Namely, you get Venom Encrusted Weapons for any Kruleboyz units (see Part 1 for more details); Mighty Destroyers for any Ironjawz units (see Part 2 for more details); Warpaint for any Bonesplitterz units (6+ Ward). This helps to give a little extra flavour and efficiency to each of these units, which is important as…
Warclans
…you don’t get any! The point of Big Waaagh! is that all the Orruks come together from many Warclans so there aren’t any rules for separate Warclans.
Command Traits
Woehammer Winner: There are lots of command traits available for your Big Waaagh! general, but it does depend on which sub-faction (Kruleboyz, Ironjawz or Bonesplitterz) your general comes from. Who your general is probably depends on what else your army is trying to do, so there are a few ways you could go here. Assuming that we’re going with either an Ironjawz Warchanter or even a Megaboss on Mawkrusha, Touched by the Waaagh! not only has Waaagh! in the name (so it must be good), but also allows an Ironjawz Wizard (thanks Arcane Tome!) to do D3 wounds to a unit within 6” of itself and add that to the cast roll. Once you’ve got to 12 Waaagh! points then that’s D3+1, allowing a relatively straightforward cast of your key spell: Da Great Big Green Hand of Gork.
Honourable Mention: Maybe you have Chronomantic Cogs to help with spells going off or maybe you want to go full aggro, but an honourable mention is Supa Sneaky from the Kruleboyz part of the tome, probably put on a Mirebrute Troggoth with Fast ‘Un. Just as with Kruleboyz, this means you can put this very angry trog 9” away from the enemy and then move them 5” forward for an almost guaranteed charge. You can potentially combo this with Da Great Big Green Hand of Gork and Mighty Destroyers to start movement phase one with the Mirebrute and six Gore Gruntas 4” or less from your opponent’s front lines, possibly with a Mawkrusha about to move an extra 12” to be able to absolutely decimate your enemy. The caveat with this combo is Big Waaagh! lists often want to have multiple artefacts and/or mount traits so you may not have the option of who goes first, which puts your general at a disadvantage if you do Supa Sneaky him. However, if you stick with just one artefact (Glowin’ Tattooz), take a Weirdnob Shaman for Da Great Big Green Hand of Gork in place of Arcane Tome and the other options listed above, you can get to a double battle regiment, two-drop list.
Artefacts
Woehammer Winner: If you’re taking the Wurrgog then you need to take Glowin’ Tattooz to improve the Ward save of a hero to 4+ instead of 6+. For your opponent, this takes the Wurrgog Prophet from a threat to an absolute nightmare to get within 12” of, knowing that it can kill absolutely anything in the game.
Honourable Mention: Almost every Big Waaagh! list will feature Da Great Big Green Hand of Gork and almost none of them will feature a Weirdnob Shaman to cast it. Instead, the Arcane Tome fills in, allowing a Warchanter or Megaboss to ping any Orruk unit (i.e. not just Ironjawz) 9” away from the enemy.
Mount Traits
Woehammer Winner: By this point, you can probably guess what’s coming…that’s right, it’s Fast ‘Un! One of the reasons for going Big Waaagh! vs. Ironjawz is to be able to take the Wurrgog Prophet, but almost as compelling is the ability to take the Breakaboss on Mirebrute Troggoth. And as Glowin’ Tattooz is practically compulsory on a Prophet, Fast ‘Un is practically compulsory on a Mirebrute. It’s obviously also amazing on a Mawkrusha and even a Sludgeraker as a budget version of the Mawkrusha.
Honourable Mention: As command traits are at an absolute premium and you won’t be taking Hulking Brute over the options above, the next best option is Smelly ‘Un for that extra survivability on (likely) your Mawkrusha. With a 3+ save base, add in -1 to hit when not charging, +1 to saves from Their Finest Hour, All out Defence for an extra +1 and even Mystic Shield, that Mawkrusha is not going down short of getting in trouble with Kragnos and it will hit back tremendously hard, possibly clearing the unit that had the temerity of attacking it, ready to move on to some fresh victims!
Spell Lore
Woehammer Winner: It has been mentioned several times already, but Da Great Big Green Hand of Gork is the first spell that should be on your army list. Mawkrushas and Gore Gruntas are relatively quick without it, but practically everything else you’ll be taking in Big Waaagh is slow. Add in the combination explained in Part 2 of these reviews where you Hand of Gork Gore Gruntas 12.1” away from an enemy and then Mighty Destroyers it 9” in the hero phase, circumventing Redeploy, then you’ve got a winning combo. It also works on anything with the Orruk keyword, not just Ironjawz, so throw those Boltboyz in danger-close or even some Big Stabbas.
Honourable Mention: There is a very strong case for Nasty Hex taking this slot, particularly in the current meta with lots of ghosts and gross flies wafting around the place. But you do need to either take a Swampcalla Shaman to access it or put the Arcane Tome on a Kruleboyz character. It is much more likely that you’re going to have access to a Bonesplitterz wizard as the Wurrgog is also a wizard when there’s nothing to stare to death within 12” at the start of the hero phase. The spell you’d go for in this case, would probably be Gorkamorka’s War Cry in order to make an enemy unit fight at the end of the phase. Losing out on the Kruleboyz Waaagh! and Smashing and Bashing means that the fight phase is not in your control as you would ideally like. War Cry goes some way to redressing this balance in the favour of the Orruk player.
Grand Strategies
Woehammer Winner: Applying the same logic as I did with the Command Traits, then Waaagh! has to be the option here and it’s definitely worth considering if your general is a Mawkrusha and/or you have taken a big unit of Brutes that can be dropped in by Gork. In almost all games, your Mawkrusha (if you take one) will be wanting to do work in your opponent’s territory and even on foot, Brutes (or even 15 Ardboyz) should be able to make it across the battlefield in five turns!
Honourable Mention: With the manoeuvrability of Big Waaagh! then an honourable mention is No Place for the Weak, particularly if you have included either a Warlord or Command Entourage battalion because then you’re not winning the drop game and you may as well also make the Gore Gruntas you take (and you will want at least six) to be bounty hunters. With a Warchanter buff on them, that’s 3 damage vs. Galletian Veterans, making those battleline units disappear very quickly. Alternatively, if you’re playing a bit more cagey in the first couple of turns with a Mawkrusha, then by turn three, anything that is a genuine threat to your big angry cabbage might already be dead, allowing him to roam the board, chewing up and spitting out any battleline he can find.
Battle Tactics
Woehammer Winner: As alluded to earlier, Big Waaagh! have a book battle tactic that is ridiculously easy to pull off with Wait For It, Ladz. You need to fulfil the following to conditions: have at least 24 Waaagh! points at the start of the turn; have at least 30 Waaagh! points at the end of the turn. It is very likely that you will be at 24 Waaagh! points by the start of battle round 4 and it’s practically guaranteed to be there by battle round 5. If you ever start a battle round with 30 Waaagh! points, then it’s already scored…even if you are tabled!
Honourable Mention: With Wait For It Ladz being our likely turn 5 battle tactic, Barge Through Enemy Lines is a great choice for turn 4 as Big Waaagh! is a melee-centric faction with the buffs from the Power of the Waaagh. Therefore you probably have one Galletian Veterans unit relatively close to enemy territory by this turn and a sneaky Hand of Gork could pop another one in, scoring not only the battle tactic, but the bonus point too.
Warscrolls
Woehammer Winner: The core of your Big Waaagh! list will most likely be Ironjawz as they have the best battleline and Gore Gruntas are great. The warscrolls we’re going to focus on are the two warscrolls that are the most common non-Ironjawz units chosen: Wurrgog Prophet and Breakaboss on Mirebrute Troggoth. Please check out Part 3 of the Orruk Warclans book for more information about what the Wurrgog does and why he’s so fun, but I’m going to give you an example of what he can do with Big Waaagh! If you also have a Mawkrusha in your list, then it is a high-value target that your opponent will want to take out, but sufficiently tanky that something quite substantial needs to be committed to remove it from the board. If you have a Wurrgog Prophet within 12” of your Mawkrusha, your opponent can still charge, but then you’re perfectly placed to ‘Hard Stare’ that unit out of existence if they succeed with the Mawkrusha. You could even point this out to your opponent to check to see if they really want to take that risk. If they choose not to charge, you win. If they choose to charge and the Mawkrusha destroys them, you win. If the Mawkrusha dies, then you win as you then get to play ‘Whose head will blow up first?’, which is fun whichever head pops first! Just don’t try this with Morathi as she ruins all our fun.
Honourable Mention: The other unit is the Breakaboss on Mirebrute Troggoth. You’re not going to find a much more efficient way of delivering up to five damage 2 attacks and ten (!) damage 3 attacks than the Mirebrute. With the Supa Sneaky or Hand of Gork + Fast ‘Un combo, you’re almost guaranteed to get into combat and then he can do some severe damage. In your opponent’s turn, popping Their Finest Hour and All out Defence can make him hang around longer than he really should and if (when) he dies, who cares! He was only 180pts and he probably wiped a fairly premium unit and held your opponent up a turn while potentially a Mawkrusha and Gore Gruntas hammered the other flank.
Final Thoughts
Big Waaagh! is what you choose if you like Ironjawz, but want a few more techy options; or if you like Kruleboyz but want to be a bit tougher and faster; or if you like Bonesplitterz but fancy having a big monster run around the place. It’s also a really fun army from a hobby perspective as you can take all these disparate sculpts and bring them together as a cohesive whole with which to stomp the enemy with. It’s also quite a rare army to see out in the wild, so if you have a few Ironjawz, half a Dominion box and some Savage Orcs from Warhammer Fantasy Battle, then maybe give them a try.
This is the last part of the Orruk Warclans Battletome Review. Is there anything that we missed? Any combos not mentioned? Are any of our choices just plain wrong?! Please leave a comment below, in the Woehammer Discord or even contact me at @yeliabnoreik on Twitter. There’s just one thing left to say and that’s: WAAAGH!
This is the Top Three AoS Lists for Hammerfest 2022 Grand Tournament that took place in Texas, USA on the 17th and 18th September. It involved 88 players vying to be crowned champion in a 5 game tournament.
Before I jump into the Top Three AoS Lists, I wanted to remind everyone of our friendly Discord server where you can join in the conversation with the Woehammer crew and suggest articles or series for the website.
If you like what we’re doing, why not join our Patreon and help keep it going?
Also if there’s a one day or two day tournament you’d like us to cover drop us a comment on this post and we’ll have a look at it for you.
The Top Three AoS Lists
Allegiance: Sylvaneth – Glade: Harvestboon – Season: The Dwindling – Grand Strategy: Take What’s Theirs – Triumphs: Inspired
Leaders Warsong Revenant (305)* – General – Command Trait: Spellsinger – Artefact: Arcane Tome (Universal Artefact) – Lore of the Deepwood: Treesong – Bonded to Incarnate
Battleline 5 x Tree-Revenants (110)* 5 x Tree-Revenants (110)* 6 x Spiterider Lancers (420)** – Reinforced x 1 6 x Spiterider Lancers (420)** – Reinforced x 1
Units 5 x Skaeth’s Wild Hunt (110)* – Lore of the Deepwood: Verdurous Harmony
Behemoths Krondspine Incarnate of Ghur (400)* – Allies
Danny: A big win for Sylvaneth at a time they’ve still got something to prove on the competitive circuit! Some patterns are beginning to emerge for the evil trees – Warsong Revenant is rooted in place, and Skaeth’s Wild Hunt (a good value and mobile wizard+retinue with a tasty +1 to wound spell) have come out of retirement – if you can find them!
Zach here however eschews evilest single tree Durthu for 2x 6 Spiteriders, again slightly unusual given the tanky and self-healing Revenants were seeking the position of ‘meta bug cavalry’. It makes sense though – Spiterider Lancer’s 14″ movement and fight first on the charge allows for a devastating weight of rend 2 attacks. In Harvestboon they gain a 12″ pre-game move too, which is huge for establishing board control or setting up the alpha.
With the usual brace of Tree revs for teleport based scoring and the unfortunately ubiquitous Spinedog to pin stuff in place while the Warsong bombs you with MWs, this is a potent list that took down some very challenging armies en route to first. I think even with the Spinedog nerfed into oblivion (or, at least, a shallow hole) it’s still a capable core – kudos to Zach for leafing with gold!
Army Faction: Legion of the First Prince – Grand Strategy: Take What’s Theirs – Triumphs: Inspired
LEADER 1 x Kairos Fateweaver (435)* – Spells: The Master’s Command 1 x Bloodthirster of Insensate Rage (280)** – General – Command Traits: Ruinous Aura – Artefacts: Armour of the Pact 1 x Slaves to Darkness Daemon Prince (210)** – Hellforged Sword and Malefic Talons – Mark of Chaos: Khorne 1 x The Contorted Epitome (245)** – Artefacts: Fourfold Blade – Spells: Flaming Weapon, The Master’s Command – Bonding: Krondspine Incarnate of Ghur
BATTLELINE 5 x Flesh Hounds (105)* – Gore Hound – Burning Roar 10 x Bloodletters (110)* – Gore-drenched Icon Bearer – Hornblower – Bloodreaper 5 x Flesh Hounds (105)*
BEHEMOTH 1 x Krondspine Incarnate of Ghur (400)*
ENDLESS SPELL 1 x Umbral Spellportal (70) 1 x Chronomantic Cogs (40)
Danny: Legion are enjoying a bit of a twilight resurgence since their nerf – although ‘rumour’ (i.e. leaks) have it that their current format will drastically change in the new year.
In the meantime, this is a still-excellent version of the army that employs the favoured combo of Kairos (for spellz!) a Bloodthirster (for many MWs in an 8″ aura on 6s!) and a Daemon Prince – who until the new Slaves book is still rocking Blood Slick Ground for that really quite sweet halves-charges aura. Flesh hounds provide great value screening and utility – their free unbind/dispel attempt is an added bonus – aaaaaaaaand of course there’s a Krondspine for even more of that sweet, sweet control.
You may also notice there’s no Be’lakor in this list – I guess he’s learned to delegate? Taking down DoT, Nurgle, NH and the board control of SBGL is no mean feat so big up to Matt for this swan song – this list is not long for this world.
Allegiance: Sylvaneth – Glade: Heartwood (The Burgeoning) – Mortal Realm: Ghyran – Grand Strategy: Take What’s Theirs – Triumphs: Indomitable
Leaders Alarielle the Everqueen (840)* Arch-Revenant (120)* – General – Command Trait: Warsinger – Artefact: Seed of Rebirth
Battleline 6 x Kurnoth Hunters with Kurnoth Scythes (500)* – Reinforced x 1 3 x Kurnoth Hunters with Kurnoth Greatbows (230)* 3 x Kurnoth Hunters with Kurnoth Greatbows (230)*
Danny: These successful Sylvaneth lists are sprouting up everywhere eh? And this one brings big ol’ thunder thighs herself! She’s backed up by the obviously strong combo of 2×3 Kurnoth bows backed up by Arch-Rev for +1 to wound even to their shooting – and in Heartwood they’ll also be naturally at +1 to hit three chosen targets meaning you don’t lose out by splitting the squads as AoA isn’t necessary. A big blob of Scythes absolutely blend and survive most attacks before getting a model or two back from Rally or the Verdurous Harmony spell.
That’s it really – a hugely tough and killy Kurnoth core escorting Alarielle for all sorts of spell casting and utility, screening and turning terrain into Overgrown for teleporting shenanigans. I’m happy to see a list with her in do well as, personally I think they did her scroll dirty but she deserves to be seen on top tables.
Allegiance: Kruleboyz – Warclan: Big Yellers – Grand Strategy: Waaagh! – Triumphs: Indomitable
Leaders Gobsprakk, The Mouth of Mork (280) Killaboss with Stab-grot (110)* – Artefact: Mork’s Eye Pebble Swampcalla Shaman with Pot-grot (105)* – Lore of the Swamp: Choking Mist Snatchaboss on Sludgeraker Beast (315)* – General – Command Trait: Egomaniak – Artefact: Arcane Tome (Universal Artefact) – Mount Trait: Smelly ‘Un – Lore of the Swamp: Sneaky Miasma
Battleline 20 x Gutrippaz (360)** – Reinforced x 1 20 x Gutrippaz (360)** – Reinforced x 1 10 x Hobgrot Slittaz (80)** 9 x Man-skewer Boltboyz (360)* – Reinforced x 2
Danny: Those plucky Kruleboyz! Sitting pretty in the bottom 3 of win-rates, going 4-1 – meaning it was actually in a tournament winning position – and losing only to Sylvaneth who an army like this just can’t really interact with at all is really impressive and cool to see.
James here opts not to use the recently buffed Grinnin’ Blades to go all in (ish) on Boltboyz in Big Yellerz – bringing a big blob of 9 which really should punch through an awful lot of targets in the game. They’re commanded by no less than Gobsprakk himself – an ever-controversial pick who can nevertheless play mind games with enemy casters and generally fly around issuing double-commands to stuff and casting from the actually great Kboyz lore.
Wonderfully, he’s joined by the humble Killaboss on FOOT (not to mention his trust stab-grot, the real MVP of any list) – presumably a budget way to access All Part of Da Plan – to essentially make the 2x 20 blobs of Gutrippaz immune to battleshock. The shaman and Sludgeraker round off the ‘fishing for 5s/6s’ synergy package, with the latter rocking Egomaniak (essentially turning the hobgrotz into ablative bodyguard wards) making it super durable, with Arcane Tome and Sneaky Miasma for casting a hero-phase move on himself.
It’s a lovely list that can put out an eye-watering number of MWs up close and actually packs some real board control chops. It’s got overlapping synergies and plenty of movement options, and about as much durability as Kboyz can manage. Real big up to James for coming so close – can’t wait to see what he does with the faction after the Battlescroll!
P.s. according to the new Woehammer scoring metrics that take army win-rate into account, this was the winning list of the event!
Woehammer Winner: We’ll get to Warclans and Warscrolls later, but anyone who has been following the Bonesplitterzance recently will be expecting to see at least some Savage Big Stabbas in the list. The allegiance ability that helps to maximise their output is Spirit of Gorkamorka. Each melee attack that hits on a 6 scores 2 hits, so with a unit of two Big Stabbas, it’s reasonable to expect at least one of these to go off each combat, if not two, especially if All out Attack is also ordered. In real terms, this means that you should be expecting 5 rend -2 damage 2 attacks to get to the wound roll.
Honourable Mention: I’m going to steer clear of the Rules as Written (RAW) vs Rules as Intended (RAI) debate on this one, but Tireless Trackers is key either way it is played. After deployment but before the first battle round starts, half the units in the army (rounding up) can move up to 5”. With minimum sized unit (MSU) Big Stabbas being quite popular, this can be a lot of movement that can be used to get on objectives early or, as some people argue, repeatedly move a Wurrgog Prophet right into ‘Hard Stare’ range. It’s also worth noting that units can move 5” backwards too, encouraging ranged units to deploy so they can pepper your Savage Orruks at range, only to step just outside of their threat range.
Warclans
Woehammer Winner: In what is a theme running throughout the whole Orruk book, there are two good ones that have strengths and weaknesses and then one that everyone forgets about and you’ll hardly ever see. The winner is the more common choice and the more successful one that is hovering around mid-60% for the current GHB as per the Honest Wargamer Stats: Drakkfoot. Drakkfoot is fantastic in the current meta that has a high number of Nighthaunt and Nurgle armies as it ignores Ward saves. To put this in context, your Big Stabbas will put a Pusgoyle Blightlord to a 6+ save and prevents the 5+ Ward save Nurgle is famed (and cursed!) for. Throw in a Purple Sun nearby…any damage goes straight through.
Honourable Mention: My personal favourite is second and is perfect if you’d like to re-enact the charge of the Rohan at Pelennor Fields from Lord of the Rings, but put the greenskins on the cavalry! Icebone has a toned-down version of Venom EncrustedWeapons from Kruleboyz in as much as if the wound roll is a 6, that wound is converted to mortal wounds and the attack sequence ends. But the key draw form Icebone is that Boarboyz are Battleline in an Icebone army. Not only does this avoid giving up an Galletian Veterans related points, but means that practically your whole army can be mounted with a 12” move for over 50 hunks of bacon going forward at high speed. Those few characters you don’t have on boarback can take advantage of Tireless Trackers to get a bit of a head start getting stuck in.
Command Traits
Woehammer Winner: Easy one for the winner here as it synergises well with several strategies mentioned above and that is Great Hunter. What this allows a Bonesplitterz army led by a general with this command ability to do is to add 3” to the Tireless Tracker battle trait so that it’s an 8” move before the first turn begins. If you want to go full Riders of Porkhan then this means that the few characters you have on foot can actually be 1” further up the board than your 12” mounts, positioning them well to join the charge turn 2.
Honourable Mention: It’s boring, but probably the next best one here would be Master of Magic to help with some of the buffs available to your casters as the other options for Bonesplitterz don’t really do much for them.
Artefacts
Woehammer Winner: Really simple one for the winner and it’s Glowin’ Tattooz to improve the Ward save of a hero to 4+ instead of 6+. This is decent on its own, but it’s when you put it on the Wurrgog Prophet that it truly shines, or should that be glows? We’ll get to the best mini-game in AoS in a moment, but suffice to say Glowin’ Tattooz lets your Wurrgog play the game of chicken longer and practically double the threat caused by this single character.
Honourable Mention: There’s a meme-able option with Mork’s Boney Bitz to potentially be up to +10 to cast vs. Adam Mumford’s (in)famous Cockatrice list, but the second best option is Dokk Juice to heal D6 wounds in the hero phase. What is great is that there aren’t the restrictions of being outside of 3” to this heal as there is to Heroic Recovery. Great on any character, but a fantastic back up for a second Wurrgog Prophet who couldn’t get their tattooz ready for the battle!
Mount Traits
Woehammer Winner: A somewhat of a restricted list due to the restricted number of units that can take a mount trait, but the winner (again!) is Fast ‘Un – it’s almost like movement is really important in Age of Sigmar! Really handy to get a Maniak Weirdnob where they need to be for a subsequent hero phase or to sneak round and grab an objective.
Honourable Mention: However, with only a 6+ save and Ward on your Weirdnob and a very economical 6 wounds, if they find themselves in combat after not charging then Smelly ‘Un might help them make it through to be able to attack back or even survive until the next turn. Maybe.
Spell Lore
Woehammer Winner: If you’ve gone Icebone with lots of mounts with lots of tusks and hooves flying everywhere then the first spell out of the Lore of the Savage Beast you want your wizards to be learning is Glowy Green Tusks. This spell gives Rend -2 to the mounts only of one unit of boarboyz, which is great. One of the big draws of Big Stabbas is that it gives you the rend that this army so lacks, so a spell that gives you that is a big deal and it only casts on a 5 as well.
Honourable Mention: There are shooting options in Bonesplitterz, but since losing access to Curse and the mortal wounds associated with it in the new 3rd edition book, Bonesplitterz are a melee army. Managing the flow of the combat is something that Ironjawz can do with Smashing and Bashing; Kruleboyz can do with their Waaagh and Bonesplitterz can do with Gorkamorka’s War Cry. Although a tricky cast with a short range, if successfully cast, an enemy unit has to fight at the end of the phase, allowing all your boyz to have a go at taking down whatever they’re fighting before getting hit back, enabling you to hang on to the Bonesplitterz Waaagh of a 4+ Ward for a combat phase for a whole extra turn.
Grand Strategies
Woehammer Winner: Waaagh again would not be a bad pick, but because of the fact there are restrictions associated with who scores it, Get Dem Bones! is also a decent choice. To succeed with this Grand Strategy you just have to control a nominated terrain feature wholly within enemy territory at the end of the battle. Potentially this could be one to avoid if Realmstone Cache is in the mission pack as the territory for that battleplan might mean there isn’t terrain wholly within, but usually you should be okay and it can be scored by your Maniak Weirdnob late game with their 12” hero phase Fast ‘Un move, followed by another 12” move and then an auto-run of 6”.
Honourable Mention: Just as with Ironjaws, Take What’s Theirs is your GHB only best-pick as you’re going forward anyway.
Battle Tactics
Woehammer Winner: With the new GHB, gone are the points for killing monsters…unless you’re a Bonesplitterz general. They have access to Kill Da Big ‘Un if an enemy monster that you choose is killed by any attacks by a friendly Bonesplitterz unit, meaning it could be melee, ranged or magic…or even a ‘Hard Stare’ from a Wurrgog. It might seem a bit of a risk as the Wurrgog, as we’ll see shortly, can be swingy, but due to the wording of the Wurrgog’s ability, there is a work-around. The Wurrgog ability must be used at the beginning of the hero phase, which rules out any shenanigans in Big Waaagh of teleporting the Wurrgog into ‘Hard Stare’ range. However, in Bonesplitterz (and Big Waaagh, though to less utility) it means that you can do the attacks with the Wurrgog before you choose a battle tactic. If the monster’s dead, you pick this tactic and score it; if not, you can evaluate whether or not to go ahead. There is an argument to make the Wurrgog your general to take advantage of this sequence to guarantee This One’s Mine.
(UPDATE: Thanks to Calvin from AoS Coach who has rightly pointed out that because the Wurrgog’s Laser Eyes are an ability and not an attack, sadly means that you cannot score either of Kill Da Big ‘Un or This One’s Mine. Thanks Calvin! Potentially you can still use the work around of ‘stare first; battle tactic later’ with Outmuscle, Gaining Momentum, Eye for an Eye or Against the Odds as these don’t specify attacks. Realistically, you probably don’t need out-of-sequence jank in these circumstances though.)
Honourable Mention: Returning to the Orruk book, we have Time to Get Stuck In! that synergises really well with Icebone and their speedy boarboyz as you score it if all models are within (not wholly within) an enemy unit at the end of the turn. The only restriction is that this needs to be scored in the first or second turn only. If book tactics aren’t being used, then Barge Through Enemy Lines is similar in its philosophy and should be doable with some of your mounted troops.
Warscrolls
Woehammer Winner: The most famous of all Bonesplitterz units and the one that plays a large part in a good proportion of Big Waaagh lists being Ironjawz plus one Bonesplitter is the Wurrgog Prophet. Firstly, though quite an old sculpt, the model is awesome and really conveys the glee of this crazy Orruk dancing around before and during the battle. Where things get real is with the Wurrgog Mask mini-game. Instead of casting, you can pick 1 unit with 12” of the Wurrgog and visible to it. On a 3+, that enemy suffers D3 mortal wounds. So far, so alright. However, you can then choose to play again and go for another 3+ roll. If you make it, another D3 mortal wounds are coming your opponent’s way; if you roll a 1 or a 2, then the Wurrgog takes D6 mortal wounds – this is where Glowin’ Tattooz comes in to ignore half of those. You can keep playing this mini-game until one of three things happens: The Wurrgog stops staring The enemy unit is destroyed The Wurrgog blows his own head off Fortunately, the Wurrgog starts with 7 wounds, so you can gamble at least once. It is very swingy and it does take some skilful positioning to get the Prophet in range, but if you do, you can kill anything in the game that can die, regardless of what other layers of protection they have. As mentioned above, you can also stare before you choose a battle tactic, allowing some Kruleboyz-esque sneakiness to creep in.
Honourable Mention: While I’m very much Team Icebone, we can’t not mention the Savage Big Stabbas. They come in units of two, giving you an 8 wound unit with 6 attacks, hitting and wounding on 3s with Rend -2 for 2 damage. Any hits of a 6 explode into 2 hits and each time on of these is killed in melee, they do D3 mortal wounds to a unit within 3” on a 4+. If this is a monster, it’s a 2+. And then there’s the points cost…80 points. They’re an absolute steal and can set up some great ambushes where a unit is screening 2” in front of one or several Big Stabbas. The screening unit may or may not survive, but the Stabbas can’t be touched by the charging enemy unit…but the Stabbas can certainly hit them back with the 3” range on the weapon!
Final Thoughts
Bonesplitterz are in a really interesting place. Their meta representation is pretty tiny, in the bottom 5 overall, but their win rate is 63%, which is top 5 (thanks again to the Honest Wargamer Stats team of Rob and Ziggy for this info). There’s a good chance that you may not see Bonesplitterz in action much, but they have been seen on Season of War, with Michael Simeon running them, so check out that battle report if you want to deep-dive everything boney in the Orruks’ book.
The final part of the series, Part 4 of 4 will be Big Waaagh, the pick ‘n mix of the battletome, where the best bits of all three allegiances come together for a good old ruck and features a battle tactic that even Daughters of Khaine players would look down upon for being too easy!
Peter: Kieron has had parts 1 through 4 written for a good while now and it’s only my own schedule that’s prevented me from posting these for him. For those who enjoyed Part 1: Kruleboyz and have been waiting for the others, I can only apologise. Part 3: Bonesplitterz will be posted this time next week. With the final part: Big Waaagh! Coming a week later. If you want to read them earlier they’ll be available on our Patreon site
Allegiance Abilities
Woehammer Winner: How can Ironjawz reliably get three turn 1 charges off, even when their opponent is hiding back in their territory? The defining battle trait Mighty Destroyers is the answer. This amazing ability allows a unit that receives this command to make a normal move if they are outside of 12” of an enemy; attempt a charge if they are within 12” of an enemy unit; or pile in 3” if already in engagement range. Combine that with a Megaboss on Mawkrusha, who can issue the command to three different units and you could have two units of Gore Gruntas moving 18” and then charging. That is to say nothing of the Mawkrusha itself who can also receive the command, moving 12” due to Mighty Destroyers, 12” if they have the Fast ‘Un mount trait followed by a move of 12” and then a charge of up to 12”! Just a casual 48” threat range then on this monster! If your opponent doesn’t screen well, the heart of their army can be ripped out before they can respond, especially when considering…
Honourable Mention: …Smashing and Bashing. This ability means that if the first unit activated in the combat phase kills and enemy unit, instead of your opponent being able to hit back, you choose a second unit to activate. If that unit wipes out an enemy, the Ironjawz fight again and so on until either there are no units in combat or an enemy is not destroyed. Combined with Mighty Destroyers, it is not unusual for an army facing the Ironjawz to be at least three units down while doing no damage in return AND to be pinned in their own territory.
Warclans
Woehammer Winner: This is incredibly close and depends what sort of army composition you are planning. If you want to lean into speed and mobility while avoiding fielding any Galletian Veterans then you are probably wanting to take Gore Gruntas as battleline and Bloodtoofs lets you do that. In addition, if a Gore Gruntas unit is still in engagement range at the end of the combat phase then they can pile in an additional 3”. Even better is that Gore Gruntas that fought but are not within engagement range can either make a normal move or attempt a charge, further increasing the range of these now turbo-charged pigs who may have moved 9” in the hero phase, 9” in the movement phase, 12” in the charge phase, piled in 3” and then charged an additional 12” for a mindboggling 45” or five times the movement characteristic on their Warscroll.
Honourable Mention: If you are looking to include mostly Ardboyz and Brutes in your army, then Ironsunz is probably the one you want to go for. Their clan trait is that you can charge at the end of your opponent’s charge phase as long as you are not already engaged in combat. Nurgle players know and love this ability (called Blightkrieg on The Glottkin’s Warscroll) but Ironjawz had it first and it’s free for all units to use, including your Mawkrusha. With Ardboyz and Brutes moving a frankly sedentary 4” each, anything that can give them extra movement is helpful, so having twice the number of charge phases helps get your Orruks across the board and where they want to be: in combat.
Command Traits
Woehammer Winner: Whereas Kruleboyz players probably want to take at least two if not all three of their versions, the Ironjawz ones are somewhat lacklustre in comparison. The winner is definitely Mighty Waaagh! Leader, which allows you to re-reroll charges for Ironjawz that are wholly within 12”, which is quite big area once you factor in the Mawkrusha’s huge base. With the Waaagh adding 1 to charges and adding a much needed pip of rend to weapons, the last thing you want it for charges to fall short and for this once per battle ability to have gone to waste.
Honourable Mention: There is a possible combo with the Arcane Tome as an artefact and either Touched by the Weird and Master of Magic to help a spell (Hand of Gork – see below) be cast, but I’m going to stick within the book for this one and go with Hulking Brute. Hulking Brute adds D3 mortal wounds once the general has completed a charge on a 2+ to one enemy unit. While not incredibly inspiring on its own, if the general on Mawkrusha also takes Mean ‘Un as a mount trait, then Stomp goes to D6 instead of D3 and there are no more pesky Hunters of the Heartlands left to stop you! Add in the Warscroll ability Destructive Bulk and not only are another 3 mortal wounds (at top bracket) added to the damage, but if a unit is then destroyed, the Mawkrusha can immediately pile in D6” and Stomp again for another D6+3 mortal wounds. Add in the impact hits from Gore Gruntas who are probably fighting alongside the Mawkrusha, ten wound screens are at serious risk of just making charges shorter and not actually achieving any screening at all.
Artefacts
Woehammer Winner: As mentioned above, there is a combo with Arcane Tome available, but I’m going to stick to the Ironjawz Artefacts of Power here with Armour of Gork being the winner of the three. Armour of Gork gives a 6+ ward and adds 1 to hit rolls, but with a penalty of 2” from the model’s movement characteristic. On a Megaboss on foot this results in a hilariously bad 2” move, but on the Mawkrusha, that’s still a 10” move that can get up to 20” once per battle with Fast ‘Un. A 6+ ward also makes the Megaboss effectively 21 wounds rather than 18 and offers some measure of protection against mortal wound spells and shooting.
Honourable Mention: A close second and probably the one you’d give to a Megaboss on foot (though see why this might be different for Big Waaagh in Part 4) is Destroyer for a once per battle +3 damage to the bearer’s melee weapons. Combine with the Warchanter’s +1 damage buff for between seven and eight 6 damage attacks depending on which flavour of Megaboss is carrying this artefact.
Mount Traits
Woehammer Winner: To give the option of a first turn angry Orruk cabbage charge, there can only be one: Fast ‘Un. The base that the Mawkrusha sits on is huge and while this can be a good thing, it can also make manoeuvring difficult, meaning that an extra move can be really helpful to get in exactly the right place for that charge, be it on the first turn or not. It’s also a great combo with Armour of Gork to offset the movement penalty that comes with this artefact.
Honourable Mention: As referenced above, taking Mean ‘Un can maximise the damage done on the charge and through stomps by your Mawkrusha, making it your second choice. Double Mawkrusha lists have taken down many events in the past (and have done so even in 2022-23 Season 1) so Mean ‘Un could be a choice for a second mount trait if you go down the Warlord/Command Entourage Battalion route. Then you need to ask whether the D6 damage vs. D3 damage on the Stomp every turn is worth more than Destroyer as a second artefact? Probably not, but it’s quite a fun option.
Spell Lore
Woehammer Winner: If you are not using herds of Gore Gruntas and Mawkrushas to get across the board, then the mobility of your foot troops is one of the biggest challenges as an Ironjawz general. Step up Da Great Big Hand of Gork to solve all those problems. For a mere casting value of 7, a unit that is not in combat and is wholly within 12” can be redeployed any where on the battlefield 9” from the enemy, but cannot move in the following movement phase. At this point, if Gork is throwing Brutes across the board, you can then Mighty Destroyers the Brutes to get them to attempt a 9” charge, with another two attempts possible in the charge phase if you don’t make it first time. However, if you want to channel that other Orruk god, Mork and be cunningly brutal, you can use Da Great Big Hand of Gork on a unit of Gore Gruntas and then place them outside of 12” (that is, 12.1” away). When Mighty Destroyers in then used, they can make their normal move of 9”, ending up with a 3” charge away from the enemy, getting around the restriction on moving after using Hand of Gork as it’s out of phase and preventing enemy redeploys for the same reason. (You could use the same trick with Brutes too, especially if you plan on calling the Waaagh that turn to get +1 to charge rolls in the charge phase, making it effectively a 7” charge.)
Honourable Mention: While Foot of Gork is hilarious, potentially causing enough wounds to one-shot a fully tricked out Gargant, second place goes to Bash ‘Em Ladz! It is quite tricky to get off, with a casting value of 8, but Touched by the Waaagh! can help with that and it gives a buff of +1 to wound for ALL Ironjawz units wholly within 16” of the caster. Bonuses to hit are fairly commonplace, but there’s a reason that Inspired is the best Triumph you can pick – often there’s no other way to get this buff. Now imagine this on a Mawkrusha and two units of 6 Gore Gruntas…Destruction Grand Alliance indeed!
Grand Strategies
Woehammer Winner: More so than with Kruleboyz, Waaagh is a fantastic Grand Strategy for Ironjawz by virtue of the fact that your general is probably flying around the place and looking to stomp enemies in their own territory anyway and, if you chose the Bloodtoofs Warclan, then a single Gore Grunta can score this for you.
Honourable Mention: For the second choice, if you are going GHB only, the Ironjawz best pick is the opposite to Kruleboyz with Take What’s Theirs as your whole battleplan involves getting right in your opponent’s face and killing their army in their own territory and this Grand Strategy plays right into these strengths.
Battle Tactics
Woehammer Winner: Continuing the theme of Battle Tactics with interesting spellings (or should that be spellinz?), Ironjawz have access to Squish Da Puny Gitz. There needs to be at least one Battleline unit left on the battlefield and there needs to be none left at the end of the turn. With the amount of output possible from Ironjawz, particularly Bounty Hunter Gore Gruntas doing up to 3 damage per attack against Galletian Veterans, this should a fairly straightforward one to get.
Honourable Mention: With such an absolute beat-stick as a Megaboss on Mawkrusha as your general, This One’s Mine is a total no-brainer. Find it. Kill it. Score points. ‘Nuff said.
Warscrolls
Woehammer Winner: This unit has been mentioned repeatedly throughout this review, so it has to be the Megaboss on Mawkrusha. Not only does he allow three uses of Mighty Destroyer a turn and have a huge base for sharing this command and other buffs (e.g. re-reroll charges), but he can be absolutely devastating in combat too. With the Warchanter buff and if the Destroyer relic is taken, he should do between 5-10 mortal wounds before even fighting and then, with All out Attack and Finest Hour (aka Best Day Ever) and the Ironjawz Waaagh, seven attacks that hit and wounds on 2+ at Rend -2 for 6 damage each followed by eight attacks from his mount that hit and wound on 2+ at Rend -3 with the Waaagh for 3 damage each. Add all those up and it’s a potential of 70+ wounds in a single combat from a unit that may have started over 50” away from you. You can close your jaw now.
Honourable Mention: A very important unit to Ironjawz is the Warchanter, but based on a lot of the combos discussed so far, I’m going to go for Gore Gruntas. They’re significantly faster than other troop options available and movement is absolutely key to this edition of AoS. They also hit pretty hard – not quite Fulminator hard – but plenty hard enough to clean up Battleline in short order and push more elite units too, particularly with the chip mortal wound damage they can do to help make any attack back pretty inconsequential.
Final Thoughts
Ironjawz are a really fun army and a pretty good first army to pick up as they’re relatively forgiving with their tough armour and relatively straightforward gameplay, resulting in quite a high skill floor for new players. There is still plenty of nuance in this army though, with Mork-like sneaky plays with Mighty Destroyers and the Hand of Gork and just because you can charge everything turn 1, it doesn’t mean that you should. Jiwan Noah Singh is a great American Ironjawz player who can be found on streams playing a more considered approach. The thinking being that if you can hold the Mawkrusha back a couple of turns then by the time it is committed, there’s nothing left that can meaningfully threaten it, allowing it to rampage around the board, destroying all it touches. Next up will be Part 3 of 4 of the Orruks book, the weird cousins of both Kruleboyz and Ironjawz that live on a commune to be in touch with nature, usually touching them with a massive stone spear: Bonesplitters.