Category Archives: Reviews

The Old World Tournament Report – Empire of Man at the Alliance Open

Second TOW event in the Netherlands, the support and interest is growing!

Another 1500 points event (the first ones are kind of warm-up events), organised by Stefan from Alliance Open (the Dutch organisation that does lots of events for all kinds of tabletop gaming). Rulespack could be found here: Rulespack & Information AO The Old World April 27th v1.2.pdf

Once more, amazing job by the TO, great venue, great organisation in every aspect. As a former TO myself of many years, I can appreciate the amount of effort that goes into these kinds of things. Especially since Stefan also played in the event as a substitute in case of an odd number of players (which ended up happening). You can see some more photos on their facebook page: https://www.facebook.com/media/set/?vanity=AllianceOpenTournaments&set=a.947550687376175

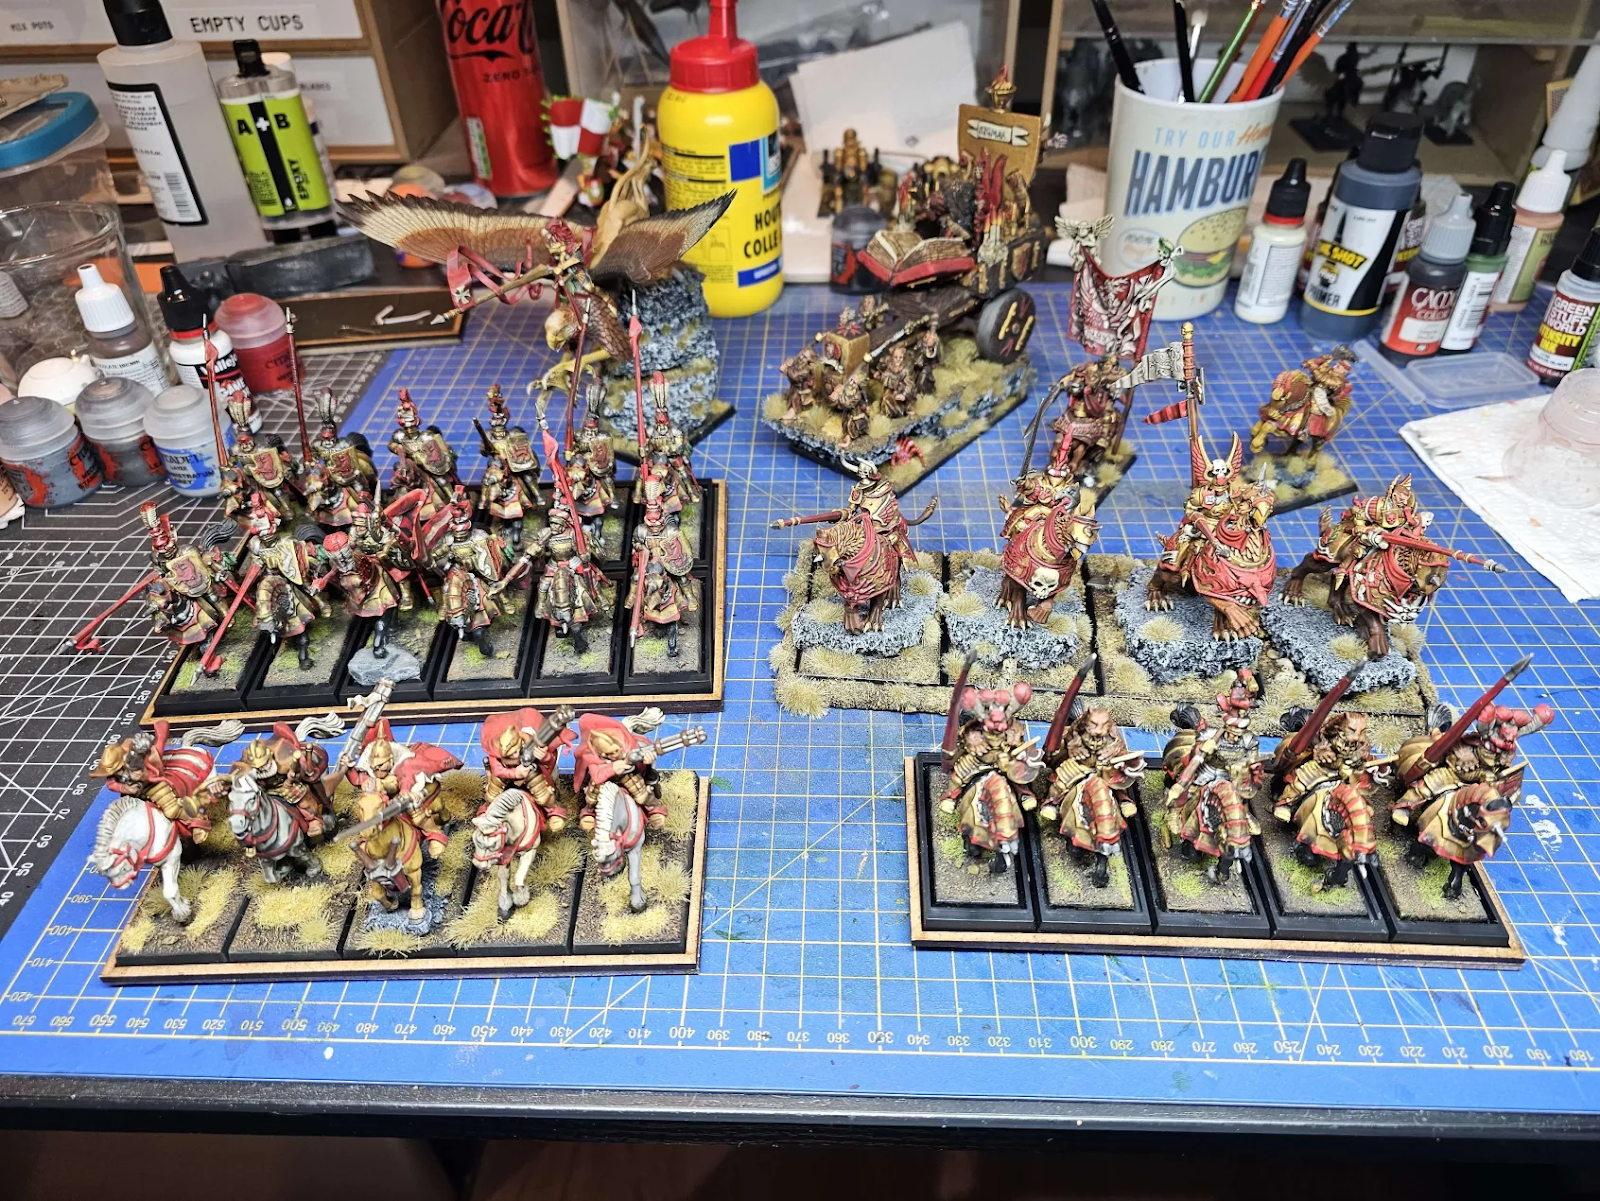
Now, onto my list! I played this all-mounted empire: https://www.newrecruit.eu/app/list/Wfirs

The Empire of Man – All Cav Lector – [1495pts]

# Main Force [1495pts]

## Characters [692pts]
Captain of the Empire [149pts]: Hand Weapon, Shield, Barded Warhorse, Barding, Hand Weapon, Full Plate Armour, Battle Standard Bearer, War Banner, Talisman Of Protection
Captain of the Empire [115pts]: Hand Weapon, Lance, Pegasus, Hand Weapon, Full Plate Armour, Charmed Shield, Dragon Bow
Lector of Sigmar [340pts]: Hand Weapon, Light Armour, War Altar of Sigmar, 2x Barded Warhorse, Barding, Hand Weapon, General, Mace of Helsturm, The White Cloak
Priest of Sigmar [88pts]: Hand Weapon, Heavy Armour, Barded Warhorse, Barding, Hand Weapon, Great Weapon, Charmed Shield

## Core [430pts]
Empire Knights [304pts]: Drilled
• 12x Empire Knight [22pts]: Barded Warhorse, Barding, Hand Weapon, Hand Weapon, Heavy Armour, Shield, Lance
• 1x Preceptor [6pts]
• 1x Musician [6pts]
• 1x Standard Bearer [16pts]: Banner of Duty
Empire Knights [126pts]: Stubborn
• 5x Empire Knight [22pts]: Barded Warhorse, Barding, Hand Weapon, Hand Weapon, Heavy Armour, Shield, Lance
• 1x Musician [6pts]

## Special [373pts]
Demigryph Knights [266pts]:
• 4x Demigryph Knight [63pts]: Demigryph, Barding, Hand Weapon, Wicked Claws, Hand Weapon, Shield, Full Plate Armour, Lance
• 1x Demigryph Preceptor [7pts]
• 1x Standard Bearer [7pts]
Outriders [107pts]:
• 5x Outrider [19pts]: Empire Warhorse, Hand Weapon, Hand Weapon, Heavy Armour, Pistol, Repeater Handgun
• 1x Sharpshooter [6pts]: Repeater Handgun
• 1x Musician [6pts]

A nice photo of the gang at 1:43 AM the night before the tournament 😂

I wanted to try out something new in TOW – a no-magic list, and to see if I can get somewhat reliable buffs from Warrior Priests by including several things:

  1. Include more than 1 warrior priest – this was an epiphany I had earlier that made me want to try this list out – what if you could use multiple warrior priests to force an important LD roll for an important buff? The range of all of the Sigmar Warrior Priests abilities is “This model and one unit in command range”. The nice bonus is that the command range of a general on a war altar is 18”!
  2. Include the banner to reroll a LD test. This is the only way to give a warrior priest a reroll of his ability (unlike undead BSBs, grumble, grumble), which can be used if I fail the test in a crucial turn.

The war altar has a nifty debuff for magic users within his 18” bubble (-2 to cast), MR2 of his own, plus the other warrior priest gives MR1 to the big knight unit. Wasn’t sure if it would work, but I was willing to give it a try.

Now, onto the games!

Round 1 vs High Elves

Opponent’s list was this:

High Elf Realms – Stuff from the Elf shelf – [1499pts]

# Main Force [1499pts]

## Characters [477pts]
Archmage [235pts]: Hand Weapon, Elementalism, Wizard Level 4, Lore Familiar, Seed of Rebirth, Pure of Heart
Noble [242pts]: Hand Weapon, Shield, Full Plate Armour, Great Weapon, Griffon, Heavy Armour, Serrated Maw, Wicked Claws, General, Dragon Helm, Seed of Rebirth, Pure of Heart

## Core [379pts]
Lothern Sea Guard [379pts]: Magic Standard, Veterans
• 24x Lothern Sea Guard [12pts]: Hand Weapon, Light Armour, Thrusting Spear, Warbow, Shield
• 1x Sea Master [17pts]: Enchanted Shield
• 1x Standard Bearer [45pts]: Razor Standard
• 1x Musician [5pts]

## Special [278pts]
White Lions of Chrace [278pts]:
• 14x White Lion [15pts]: Chracian Great Blade, Hand Weapon, Heavy Armour, Veteran
• 1x Guardian [6pts]
• 1x Standard Bearer [56pts]: Banner of Iron Resolve
• 1x Musician [6pts]

## Rare [365pts]
2x Eagle-Claw Bolt Thrower [80pts]: Bolt Thrower, Repeater Bolt Thrower, Sea Guard Crew
Frostheart Phoenix [205pts]: Full Plate Armour, Wicked Claws

His mage chose the Plague of Rust, Summon Elemental Spirit, Earthen Ramparts and Wind Blast. (I didn’t realize before this game that summon elemental spirit and wind blast make a nice combo where you can place the template behind the unit and then push them into the template with the wind blast)

No deployment photo, forgot to take one! Doh! But I remembered to take a lot of photos later on 🙂

He got the first turn and cast Ramparts on his sea guard block with his mage plus shot down some of my small knights (2 down).

On my first turn I moved up with everything to start threatening charges.Outriders on the right side marched to move out of the phoenix’s arc and threaten the charge on the bolt thrower, while demis were hiding behind them to not be easily shot at by the bolt throwers.

His turn 2, he put his Lord on a griffon in front of my knights. I didn’t take that huge knights bus not to charge, so charge I did, while also trying to charge my war altar and pegasus riding captain into the sea guard. Idea being that war altar will do some wounds, and pegasus guy will provide first charge rule and hopefully that would win us the combat. Unfortunately, war altar got 1 and 2 on his dice and didn’t make it, while the pegasus guy did. Egh, not ideal..

On the other flank, bolt thrower shot down 2 outriders who fell their panic test (unfortunately, would’ve been a nice charge there). The phoenix was able to get to the flank of my demigryphs, who then decided their best bet is not to get flanked by the bird. They went full ahead towards the bolt thrower, inviting the birdie into their rear. Outriders rallied, moved a bit and shot pistols at the bird and did two wounds! 

My knights didn’t really do that well into the griffon (as expected). My plan for a lot of knightly attacks (remember, entire first rank can attack with 1 attack each) doesn’t work that well if the enemy challenges, because me refusing the challenge means my opponent can retire my warrior priest and remove my prayer of rerolling 1s. In hindsight, maybe I should have just refused the challenge and strike at him without the rerolls… It was a tough decision.

What happened next is quite a cool moment that opened the doors somewhat for me in the otherwise bad looking game. When my knights were rolling for their break test on my opponent’s turn, they rolled enough to Fall Back in Good Order (FBIGO), but as that is actually a unit broken from combat, it sent a panic wave in 6 inches around him. My war altar failed, and then rerolled the panic due to the war altar’s ability, and failed it again. But then I realized that that’s actually not at all a bad thing. The war altar fled, rallied automatically (because it is also a FBIGO when units fail a panic unless their model count is lower than when they started) and I was able to face the war altar to the griffon rider! And then charge him in my turn! And then bonk him in the face with Mace of Helstrum. Which I did! Huzzah! On the right flank, my demis failed to restrain their overrun move so they went out of the board after killing the bolt thrower.

All this time, my war altar was within 18” of the enemy mage trying to make him not succeed in casting. It did it a few times, but when enemy rolls 5-5 or 4-5 or similar results, -2 doesn’t really help there. But what I realized is that my mage dispelling would also probably not succeed in those rolls. This meant that Plague of Rust was constantly on my big unit of knights. At some point in this, my pegasus dude got shot down by magic and/or shooting. Sea guard with all those shots and AB2 banner is really nice way to get some anti-armour in your list.

Next few turns will be very easily described by the images below… Opposing mage got off Plague on my unit(s) one at a time and then killed and/or whittled down my Lord on the war altar and my big block of knights. Short range barrage of lothloren sea guard with AB2 banner + bolt thrower + some magic will do a number on ya, and a big flying bird can finish off what’s left.

My demigryps came way too late for the party, and in the end there was no point in me doing a turn 6 charge into his white lions, as I couldn’t really do enough damage for any points to be scored as they are stubborn.

Game ended like this.

My kills:

Noble [242pts], general +100, Eagle-Claw Bolt Thrower [80pts]. Total: 422 points

My losses:

Everything but the demis: 1229 + 100 general + 50 bsb banner + 50 knights banner = 1429

Overall: -1007 points difference. End result: 3-17 battle points.  Quite a rocky start. Note that for the tournament, as I was playing against the TO as the stand in, he always puts in a draw in case he wins. So it made my end score a bit better than I deserved.

Some post game thoughts – I’m not 100% sure what went wrong here for me… After I bonked the enemy general I thought I would be in a good shape, but turns out that I wasn’t. My war altar fell REALLY quickly once he focused it. I kind of remember lots of opponent’s spells going off (rolling 8-10 on 2d6 most of the time) and we also (mis)played it so that the AB2 banner works on spells as well (it doesn’t as Armour Bane only works on weapon attacks). But the problems started when I underestimated that unit from the start, and then didn’t get the charge into it via the chariot. No swiftstride really hurts its charge distance as you just need once a bad 2d6 roll and you’re not moving much… And the fact that everything in the battle took place right in front of the sea guard’s short range shooting range didn’t help either. But I was most likely supposed to keep my demigryphs close and get them involved against some infantry sooner. Them taking down a bolt thrower is just down to my bad tactical usage of them.


Round 2 vs Orks and Goblins

Game two was against the greenskins! Finally for me to see what the deal is with those fanatics… 🟢 😢

Opponent’s list was this:

Orc and Goblin Tribes – 1.5k Waaagh! – [1498pts]
Main Force [1498pts]
Characters [592pts]
Black Orc Warboss [342pts]: Full Plate Armour, Hand Weapon, Shield, Wyvern, Heavy Armour, Venomous Tail, Wicked claws, General, Trollhide Trousers, Da Choppiest Choppa
Night Goblin Bigboss [50pts]: Hand Weapon, Light Armour, Shield, Wollopa’s One Hit Wunds
Night Goblin Oddnob [200pts]: Hand Weapon, Wizard Level 4, Waaagh! Magic, Flying Carpet
Core [521pts]
Black Orc Mobs [243pts]: Stubborn
12x Black Orc [168pts]: Full Plate Armour, Hand Weapon, Great Weapon
1x Boss [20pts]: Full Plate Armour, Hand Weapon, Great Weapon
1x Musician [20pts]: Full Plate Armour, Hand Weapon, Great Weapon
1x Standard Bearer [20pts]: Full Plate Armour, Hand Weapon, Great Weapon
Goblin Wolf Rider Mobs [50pts]:
5x Wolf Rider [10pts]: Giant Wolf, Claws and fangs, Hand Weapon, Shield, Cavalry Spear
Night Goblin Mobs [228pts]: Netters
29x Night Goblin [4pts]: Hand Weapon, Thrusting Spear, Shield
3x Fanatic [75pts]: Fanatic Ball & Chain
1x Boss [7pts]
1x Musician [5pts]
1x Standard Bearer [5pts]
Special [185pts]
2x Goblin Bolt Throwas [45pts]:
1x Bolt Throwa [45pts]: Goblin Crew, Hand Weapon, Bolt Thrower
Orc Boar Chariots [95pts]:
1x Orc Boar Chariot [95pts]: 2x War Boar, Tusks, 3x Orc Crew, Cavalry Spear, Hand Weapon
Rare [200pts]
Giants [200pts]:
1x Giant [200pts]: Callowared Hide, Giant’s Club

His mage rolled 3 (de)buff spells and one foot of mork (or gork?).

We played the diagonal deployment scenario and this time I’ve kept my units close. I’ve deployed the outriders so that they can have a good shooting from turn 1, and the pegasus guy so he can go warmachine hunting! I’ve moved the outriders more to the left with their vanguard move, and the first turn was mine.

I’ve moved the pegasus guy all the way to the left of the night gobbos so he can fly over them and get into the bolt throwers, and I’ve shot down the wolf riders (only 3 died) who failed their panic and fled behind the lines. On the right flank, I’ve drilled my unit of knights to do a 21” march towards the enemy. War altar and the demis and stubborn knight chaff unit moved up as well to get into the 18” range of the enemy mage to start using his -2 to cast.

Opponent then released 1 fanatic to try to tackle my pegasus guy, moved the fanatics up. Repositioned his general a bit, and moved his giant and boar chariot in a way so my knights don’t see them from the forest. In hindsight, I should’ve entered the forest a bit with my unit so that I could see through it. But it wasn’t a big deal, as I have counter charge, I can work around that.

Fanatic did just 1 wound to my pegasus dude, but I think a bolt thrower hit him and finished him off. Sad day for him 🙁 The goblin wolf riders rallied and moved to intercept my pegasus dude.

In my turn, I moved up with my knights to see the giant and the chariot, ready to counter charge them, alongside with my plan to drilled into redressing the ranks to bring A LOT of knights into the front rank for attacking. I also had my prayer off for rerolling 1s to hit and to wound. I was ready.

War altar repositioned itself to be able to start charging stuff next round, threatening the BONK to the enemy general, while my stubborn knights were offered to manslaughter to draw out charges and redirect.

On the left flank, I decided I won’t be shooting at the night goblins with my outriders, but I’ll march them to the far left, to be able to stand-and-shoot the wolf unit if they were to charge, and to otherwise charge/harass the back line of enemy’s forces. At this moment I felt good. I’ve lost the pegasus guy, but my outriders in his back, my full frontage is ready to charge – it’s going to be good! Onto the opponent’s turn…  (yes, this is dark premonition)

Opponent was about to declare several charges – his goblin wolf riders (2 models) into my full unit of outriders, his general into my stubborn knights, and his giant and chariot into my knights. However, he started with his giant. Which meant I had a terror test. Which I failed. Doh. But it’s ok, I have my reroll one LD test banner, I’ll just roll it again. Failed again. DOH. Ugh, fine, I guess I’ll flee… Oh, but behind me there’s impassable terrain. So how do I actually flee then? I have to go around the terrain, but I was so close that I can’t wheel to get around it at all… The judge ruled that they won’t pivot directly away from the giant 1” in front of the house, but that they’ll pivot so that they can wheel around the house. I’m not sure if that’s the correct way to do it rules wise… It is definitely in the spirit of “they want to get the fuck outta there” and facing the house without being able to wheel behind it surely doesn’t seem like something you’d do when you’re trying to get out of dodge. But, even with that, my knight rolled INCREDIBLY low, and had to wheel around the house, and the giant rolled 6 on his charge distance and he caught them. BAM! 550 points gone, 2 of my characters and one of my 2 main combat units. Yikes. To top it all off, my general failed a panic test after the giant caught the knights 6” away from his position. But, again, same as last time, this was actually to my benefit as he just got a 2d6 move towards the enemy, ready to charge his general in the next turn.

What also happened is that my knights who baited enemy’s general panicked the demigryphs, who again kind of got a free movement into the enemy (closer to the night goblins).

My outriders killed one goblin rider in stand and shoot and then killed the other one in combat and got a nice overrun move for their trouble, right in front of the enemy warmachines. Nice, some reckoning for that knight bus that got wiped out. 

However, what happened next will surprise no one who has seen fanatics in action already. Holy moly… Let’s begin.

Fanatics get released in command phase (before enemy charges) and then enemy charges through them, suffers damage, and then they move and can move through my charging unit AGAIN?!?! I’M SORRY WHAT?! Yikes!

So, what happened is that 1 fanatic completely wiped out my unit of outriders even though they successfully charged the war machine, and another fanatic did about 7-8 wounds on my Demigryph unit. JUST ONE FANATIC. OK, I rolled terribly on armor saves (I think I saved 0 or maybe 1 on 5+ on 9ish wounds), but still, that’s unbelievable damage output. Even if I knew everything about this, I’m not sure what is the counterplay to this, other than not having high value models near that unit?

Anyways, in other news, my war altar did the thing! He charged the enemy, bonked it, but didn’t kill it. I did 5 or 6 wounds in total (between impact hits and the mace) with the help of reroll 1s prayer. He even broke fully from combat because of my terror, but he fled enough to escape my wrath, and I didn’t flee enough to escape the black orks in my flank. Demis still managed to break the black goblins (even their boss rolled the S10 thingie)

In the opponent’s turn, everything rallied and I got the black orks in the flank of my war altar, which got some wounds on him. But he is stubborn so he was going to be fine afterwards.

He fled through the black gobbos and got even more damage thanks to that I think. But at the end of that flee he rallied (stubborn = FBIGO = rally at the end of the flee move) which YET AGAIN got him into a good position for a charge in my turn. He charged the night gobbos, together with the demigryphs. The gobbos fled and demis caught them, while war altar redirected into the enemy general again. This time I’ll finish him off! I did 6 wounds last time, I just need to finish up the last 2 wounds.

Errrm… nope. My impact hits didn’t do any damage, my mace bonked but was regenerated, and then the Ork general… killed my war altar… So instead of me having a commanding control of that flank with my general and 2 demis, it was just 2 demis surrounded by basically entire enemy army… I did some redirecting with my small knights, but in the end the demis got whacked as well.

In the end, my small knight unit was playing hide and seek with the enemy army and successfully did so. Also to note – other than the pegasus guy at start, enemy bolt throwers didn’t roll a single hit entire game. Still didn’t help me much 🙁

In the end, the result was quite devastating. I killed the gobbo unit and wolf riders, and the hero in that unit, but lost almost everything, lots of banners and general bonus. End result was 1-19 for the opponent.

Some post game thoughts – Well, this was a rough one. I’ve not done the math, but had I not failed that terror test (twice!), my knights would’ve probably killed the giant in a few rounds of combat, right? Lots of knights and horses attacks, rerolls of 1s to hit and to wound… And if that were to happen in a matter of let’s say 4 combat rounds, my knight bus would be in the rear/flank of the enemy causing all kinds of havoc and problems. It would be a completely different game. But even after that happened, I had a chance I think, and if my general managed to kill the enemy lord in the first or second charge it did, I would still be happy with how the game looked…

But, alas… The choice of having the War altar be the general (as a LD8 lord) was a conscious choice I made early in the list building so I could have him as a general so his bubble is 18” instead of 12”. Sure, failing that terror test with reroll was rough odds, but it’s not THAT rough. LD8 rerollable isn’t that great. Maybe I should’ve replaced the BSB captain in that unit with a cavalry grand master (lord or hero choice) to make them immune to psychology as well. Something to consider definitely. Minimize the number of potential failures of the list! Note that also this would’ve been avoided if I had placed one knight in the forest so I could see through it and be able to charge the giant myself instead of counting on counter-charge when he charges me. Small details are often very important…

In other news, if I remember correctly, I felt my magic defense was quite good in this game. Enemy got maybe a few spells off in the entire game (including one wandering foot of g/mork), and magic didn’t really do much in this game.

Round 3 vs Warriors of Chaos

Opponent’s list was this:

===
Order of the Moon [1494 pts]
Warhammer: The Old World, Warriors of Chaos
===

++ Characters [528 pts] ++

Sorcerer Lord [255 pts]
– Hand weapon
– Heavy armour
– Mark of Chaos Undivided
– Level 4 Wizard
– On foot
– Lore Familiar
– Daemonology

Chaos Lord [273 pts]
– Hand weapon
– Full plate armour
– Shield
– Mark of Slaanesh
– General
– Chaos Steed
– Dragon Slaying Sword

++ Core Units [385 pts] ++

5 Marauder Horsemen [92 pts]
– Cavalry spears
– Javelins
– Light armour
– Shields
– Mark of Slaanesh
– Marauder Horsemaster
– Musician

24 Chaos Marauders [233 pts]
– Flails
– Light armour
– Mark of Khorne
– Marauder Chieftain
– Standard bearer
– Musician

5 Chaos Warhounds [30 pts]
– Claws and Fangs (Hand weapons)

5 Chaos Warhounds [30 pts]
– Claws and Fangs (Hand weapons)

++ Special Units [581 pts] ++

Chaos Chariot [120 pts]
– Hand weapons
– Halberds
– Mark of Tzeentch

4 Chosen Chaos Knights [178 pts]
– Hand weapons
– Shields
– Full plate armour
– Mark of Slaanesh
– Champion
– Standard bearer

1 Dragon Ogres [59 pts]
– Hand weapons
– Heavy armour

2 Chaos Spawn [104 pts]
– Flailing Appendages (Hand weapons)
– Scaly Skin (Heavy Armour)
– Spawn of Nurgle

Chaos Chariot [120 pts]
– Hand weapons
– Halberds
– Mark of Tzeentch

The opponent rolled The Summoning, Daemonic Vessel, Daemonic Familiars, Daemonic Vigour.

The deployment was the “square box deployment zone” so all our deployment was quite central. I finished deploying first and vanguarded my outriders on the hill for some shooting action after I inescapably get the first turn.

Except I didn’t… Enemy got the first turn, moved all the hounds to bait/redirect my units, and magicked my outriders a bit (2 models down). I was certain that opponent moved his wolves like that so he can flee and then move my units out of cohesion. I didn’t really mind that for my knights bus, again  due to counter charge. I was happy to simultaneously charge his chosen knights and/or his dragon ogre with my unit. And the rightmost unit of wolves got charged by my small knight unit, who don’t really mind being up front baiting.

I charged, moved up the rest, stayed put with my pegasus guy and outriders to shoot up a bit the spawn unit. The pegasus dude needs 2+ to hit and 3+ to wound, and he hit every time and he rolled a 2 on to-wound roll every time when shooting at the spawn the entire game (this happened 3 or 4 times in total this game).

My knights on the left punched through the dogs and failed to restrain pursuit, so they leapt forward like idiots (which is what would’ve happened if my opponent fled with his dogs in the first place). They then got charged by the chosen knights, lord and the dragon ogre, and they were more than happy to countercharge as well, using this opportunity to drilled-redress-the-ranks and add all but 2 models to the combat! I also had the reroll 1s to hit and to wound in effect, so I finally got what I was looking for there!

My other knights overrun/pursued their dogs as well, causing the enemy frenzied marauders to charge after them. The knights then fled, baiting them out their full charge distance, and they went through the demigryps. While rolling my LD8 rerollable panic test I was having flashbacks to the previous game, but there were no problems of that sort this time.

The spawn unit rolled quite a lot and managed to charge into the outriders! 

Spawns rolled double 1 for their attacks, so they killed only one outrider, but they didn’t do much in return and they gave ground.

Enemy on the left side killed 5 of my knights, but I didn’t do badly myself, I killed one chaos knight and a wound or two on the dragon ogre.

I FBIGOed and my opponent didn’t follow up, so I had the chance to reform and charge the solo dragon ogre in my turn with the knights, and to send my war altar after his chaos lord. My demigryps then charged his infantry unit, and my pegasus guy charged the marauder horsemen.

My knights cleaned up the dragon ogre, but my Lord bounced off the chosen knights (no damage whatsoever I think). My pegasus dude broke the marauder horsemen and decided not to pursue them, hoping they’d run out on their own in this or next turn (and they did in their initial flee, they needed 7 or more).

My demigryph knights charged and did a lot of damage to the marauder dudes, who then FBIGOed 9 inches, which got me ALMOST out of arc of both chariots. One did have an arc in the end and followed up with charging the flank of demis.

What happened next was the prime example of how combats are happening in TOW… Knights bus rear charged the chosen knights who had charged the front of my war altar, and then a chariot charged the knight bus, and things were FBIGOing all over the place. Chariot fleeing in my turn so it can charge back on its own turn, hilarity ensued! Battlefield didn’t move as his knights were sandwiched between my two units, and I kept not hitting with my mace for a while.

On the other side, my demigryphs (supported with 18” reroll 1s to hit and to wound buff from the War Altar) were decimating the marauders, but also getting charged by the chariot, which then bounces back to charge again next turn 🙂 More hilarity! 

Also, my pegasus dude was flying around the spawn unit trying to plink them off with his S6 2Wounds bow, but as you’ve read earlier, he failed to wound every single time! 

I won’t go into the details of every turn, but take a look at the photos below to see what was going on…

Near the end i managed to clear out his chosen, lord and the chariot, whereas he was able to clear out my demigryph unit. For the last turn of the game I gave him my small knights to charge so my big ones could counter charge next turn.

They managed to do that, but they didn’t get the chariot, but I did lose the small knight unit in the process. Not the best choice it would seem.

In the end, the final result was a 13-7 win for me.

Some post game thoughts – I was finally able to do some drilled shenanigans. And it worked! Kinda! My knights were able to dish out some damage and have managed to survive to tell the tale. I think my opponent made a mistake in not attacking my heroes at all, as their damage output and static CR (BSB and warbanner) were quite important. If he focused them down earlier, my bus would be much less potent. My Mace of Helstrum general took a long time (like 6 combat rounds?) to finally BOINK the empire general, and then did just 2 wounds (but I ran him down in that round of combat).

I was quite surprised by the fact that my demygryph knights didn’t chew through the marauder unit with their “reroll 1s to hit and to wound” buff, but it does make sense when I realised that I had a chaos chariot bumping me to my flank every few turns. Bit by bit I lost some wounds and damage throughput. I also “wasted” some attacks on the chaos sorcerer thinking I’d kill him, but after he absorbed 2 full rounds of combat without a wound to his name, I started going to the unit. Demis are good, but not that good.

Best thing I had going for me this game is that chaos lord was equipped with a weapon that my entire army was immune to, so he was relatively harmless for me in the challenge with war altar.

And for the end, some after tournament reflection on the list and the games.

The core empire knights bus is not to my liking in TOW. They lost their biggest asset they had before (from 1+ armour to just 3+ now). Everyone worth anything has at least AP2, and that makes their save 5+ which is just not that good. I much preferred the infantry block with demigryph heroes that I played in the previous list as my core tax unit.

Not enough chaff units. I’m going to start including at least 2 units of archers in my list. They’re 35 points each, and they will help me not lose the game in the deployment phase. I’ll have 2-3 units that can go anywhere and don’t really impact how I play the game and they don’t give away my deployment plan or strategy.

War altar was fine to very good. At no point I felt it was bad or not working. I did however have several times when I REALLY NEEDED those prayers to go off and they did. But what about the times when they don’t? The prayers are really good. Reroll 1s to hit and to wound is great on demigryphs and charging knights, and it’s SPLENDID on Mace of Helstrum (which hits on 4+ and wounds on 2+ in 99% of the cases). Altar has 8 wounds with a 4+ armour and 5+ ward and that serves it quite well I think. Except when it’s at short range of tons of arrows with AB2 I guess 😭

Lack of magic – defensively I think it ends up being the same as having a Lvl 4 dispeller. A lot of times when an opponent rolls average or below average, they fail to cast or roll so I have a chance at a fated dispel. When the opponent rolls 9-10+ on 2d6, well, my level 4 would probably not dispel that either. I want to try to run both and see if I can run this combination without too much interference on my side, while putting all the interference on the enemy side. If my war altar doesn’t have 18, but 12” radius for the effect, it could be possible to get the enemy mage in the bubble, but not my own mage, while still being inside of the enemy mage for dispel purposes.

The bow captasus on pegasus is very MEH to me. If he wants to shoot, he can’t march, and that’s a lot of effects of flying down the drain. If he marches so he can harass and get behind enemy lines, he can’t shoot. His shooting, although in theory good, is very prone to variance as it’s 3 dice rolls (to hit, to wound, enemy armour) that have to all go well, otherwise you’re just wasting points.

The failed terror is definitely making me rethink my LD approach. I don’t think I can play without LD9. I’ve also failed a lot of panic tests throughout the tournament. Why did GW have to nerf the warrior priests LD from 9/8 to 8/7? 🥹I think with 9/8 (lord/hero level characters), as it was before, their abilities would be somewhat consistent as opposed to this wildly inconsistent coin flip. Plus, you wouldn’t have to limit yourself to LD8 for your entire army with Altar as the general.

Things I want to try out next are

General/Mage Lord on Imperial Gryphon and a Steam Tank. Potentially in the same list! To be seen.

Thanks to everyone for reading this if you came to this point. I’m mostly doing this for self-reflection and to see what I can improve with my list and gameplay. If you have any thoughts, ideas, advice, let me know in the comments! 🙂

Total War Warhammer Thrones of Decay – Malakai starting guide and review

Don’t want to read my thoughts about the new DLC and the Malakai campaign and you want to make your own instead? Go purchase a copy of Warhammer Total War 3 Thrones of Decay using our affiliate link and save 10%!

Big thanks to Gamesplanet for providing the copy of the expansion for this review!

If you’re not sure whether you want to try out Total War Warhammer 3 in general, check out my review of the game here.

Thrones of Decay… it’s Malakai time!

So I’m back again in the Realms of Chaos (the smaller campaign that is a part of Total War Warhammer 3)… with Malakai of course. I’m always keen on a faction which leans into war machines and especially so when they get buffed and modded as you progress (I may have some sort of bias being an engineer). I don’t really know his story or any of that (I don’t even know much of Gotrek and Felix’s) but as a character and a faction, it really spoke to me!

It’s got a nice overlap with my Kharadron Overlords from Age of Sigmar which I’ve been getting into painting this year and hope to bring them to the battlefield more soon. Malakai’s army is probably the closest thing to Age fo Sigmar’s Kharadron Overlords that we’ll ever see in Total War. It’s unfortunately got a bad overlap with taking away from my painting time but you win some you lose some (which is also my motto for Total War :D). I do get out the paints sometimes when I start to load a battle and do a colour before jumping back into the game itself .

The start of my new Kharadron Overlords army

First Impressions

Oh that Airship! It is magnificent! Buffs on the map, smashes face on the battlefield, and gets you across mountains and pesky rivers too. The only downside to it is forgetting to use it… quite a lot in my case at least. I didn’t realise until a fair few turns in that I could use it in a similar way to the Underway. Upgrade it as soon as possible, it just gets better and better!

I’ve played a few campaigns as dwarves… oh how I forget that you can’t chase anything down with the army. Although adding more Gyrocopters to my army is helping out there a lot for flexibility.

It’s a nice faction for roleplay in terms of decision making from army compositions, hero skill selections, and dwarves who quickly get pissed off when you aren’t resolving grudges. I’m certainly having fun with them and this feels really different to my other dwarf campaigns in the Old World of Total War Warhammer 1.

Fitts’ guide to the first few turns with Malakai

The first thing I noticed was I didn’t know where I should go at the start… apart from focussing on the aggressive neighbour and quickly taking them out which should be your first job.

Build a few more melee units to hold the line in the first turn and then knock off that first army in the second turn. Then start taking the settlements before they can recover.

Malakai’s starting position on the world map

I was already unsure where to then start expanding. I’m going to cover a whole bunch of mistakes or decisions I regretted and my first one was early and entirely my own fault. When it gives you all the information about Malakai’s adventures… select one. Don’t get distracted by whatever you were doing before that. It’ll save you some potential backtracking later.

Once you’ve activated the mission (and although I initally thought I’d made an error selecting the cannons one first, I think it’s the right choice), then start collecting those tasty bonuses to your unit. By the way, watch out for Grapeshot, you will destroy your own troops if they are blocking the cannons! It feels awesomely powerful though for an early artillery unit once it gets those buffs.

If you’re going for a good game instead of a narrative one, you want to attack and take that last settlement for the region directly south of your starting one which is held by a little Kislev nation… I didn’t and I’m now stuck with that one piece missing in my puzzle. I then headed up towards the coast to take my next region with an eye on being able to move northwards towards the Chaos forces across the river.

And a few one more turns later…

At this point, I realised I’d made the error not to build any oathgold generating buildings and that the other gold generating one locked me out of being able to build it in those settlements. This probably slowed me down a few turns effectively. It’s also when I wanted to build up a second army so it felt quite frustrating!

Malakai crossed the river after knocking off a few more pesky high elves and made a beeline for the old Dwarf Hold which was held by Nurgle forces… he quickly took this while failing to settle enough grudges again and the dwarves back home being all grumpy about it which was about to become a recurring theme at least for a while.

Gotrek and Felix fixing a hydra problem for Malakai

While he was over there knocking off chaos forces, I quickly did one of the Teleport Missions which had popped up and happily and easily walked off with the prize. This is where I started to see the real value of Gotrek and Felix in battles, they’re both really handy combat heroes and they help to plug gaps and deal with “big” problems really quickly.

Just when things were starting to consolidate here, another Nurgle faction, a Khorne faction, and a Chaos Undivided faction all decided that I was looking tasty. Quickly losing a settlement that was part of my starting region, Malakai needed to beat a hasty retreat and leave my newly gained territories. Here I starts to see a shift in the grudges as when they attack you those potential grudge points start to rack up very very quickly!

Here I had one of those nice Total War moments… Nurgle caused a rebellion which quickly took the territory which it had spawned in. Now, I didn’t really like that narratively, so I rewrote it for myself that they were the embattled remnants who have broken away after I abandoned them in their time of need. Allowing me to make a new friend deep in Nurgle territory who will hopefully cause them some issues and slow them down.

Malakai made it back to the capitol in time to face down both Skarbrand and the Daemon Prince who had dared to take one of my territories. This is where Malakai and his army really shone, taking down both decent armies without too much trouble (nothing 2 turns of healing wouldn’t deal with). Gotrek and Felix again really pulling their wreight… but the real stars were the 4 buffed cannons which have started to really chew through the daemons.

Skarbrand was taking a bite out of Felix’s health bar but Gotrek decided to change that

How does Malakai’s faction feel?

Weird actually… but not in a bad way. It’s pushed me in a direction I would not have considered before with the dwarves. It ends up being a really interesting mix for Malakai’s army (where all my focus is). I’ve settled on 4 x Misc Slayers 4 x Pirate Slayers to hold the line , 4 x Gyrocopters, 4 x Cannons, Malakai, Gotrek and Felix, Engineer for now which gives me a really solid castle whilst also being able to harry and distract the enemy with the Gyrocopters.

The grudge system feels much better and I actually like my surly dwarves being effectively my biggest enemy. I also start to feel like I understand the decline in power of the dwarven nations. I do see it changing in my campaign. Losing against some armies rapidly changes how many of those grudge points are there for the taking and that feel right. Also, it gives a bit of a power balance to the faction… when you’re doing well, being unable to fulfil the grudges will slow things down whereas when surrounded on all fronts by enemies there are a lot of bonuses to be gained. I will be focussing my next efforts against those who have the most grudges now and I expect with the forces of Chaos knocking on my door there will be plenty more to be gained.

Having bought most of the upgrades for the airship now has turned it into a real monster on the battlefield. The fact that it can drop in anywhere makes it key for turning around difficult fights! It’s also really fun to use in battle. It feels slow but dominating… perfect for a dwarf!

The review part of the review

Something, something, shouldn’t there be some more traditional review points in this article? Ok, here’s one to finish on:

Is Thrones of Decay value for money? I’d say yes! It’s bringing a new style of campaign to the Total War Warhammer 3 map and it’s been worth it’s money already!

Go justify me writing reviews of this expansion and buy Thrones of Decay for Warhammer Total War 3 using our affiliate link and save 10%!

Do you think I’ve missed some points or there’s some really terrible decisions I’m making? Drop me a comment!

Should you give Total War Warhammer 3 a go? Fitts’ completely biased review

Are you waiting for AoS 4.0 but still want to crash armies against each other? Either grab yourself a copy of Total War Warhammer 3 and jump in or read on and I’ll try to convince you that it’s worth a whirl!

If you do want to give it a whirl, why not purchase a copy of Warhammer Total War 3 using our affiliate link?

Why I play Total War Warhammer games

Total War Warhammer is my guilty pleasure game and one of the hardest to say game titles I’ve ever played. I’ve been jumping in and out of it since the 1st one dropped and I’ve started to lose count of all the campaigns I’ve played, Khemri, Dwarves, Empire, Undead, Lizardmen, Vampire Coast, Skryre (because they are definitely the best clan, so says my 2000 pt pure Skryre AoS army), more Khemri, more Vampire Coast, more Dwarves, and a little bit more Khemri. Playing the campaigns multiplayer has been one of the highlights (shoutout to my mate Samwise who is much better at the game than I am).

Look at all my cute little diabolical ratties!

Looking at the list of the factions I tend to take is also one of the reasons why I come recommending TWWH3, the games bring me a nostalgia hit which I don’t get from any other games (don’t tell Games Workshop but when I thought I was going to start with the Old World minis… I just loaded TWWH3 again instead). Playing on the computer with those armies and those units which I looked at hungrily in the White Dwarfs of old is one of the draw cards. As with each game and DLC before, it expands on the roster available and with some real treats this time around. All the chaos gods are finally represented along with Ogors and a couple of new factions.

  Oh how I wish I’d owned some of these models

Getting started with TWWH3

I went into it thinking I would be starting up a Slaanesh campaign… and I started the tutorial then thinking that Kislev would be an interesting option too. Kislev is a really interesting faction being built upon a few of the units from Empire of old and some of the lore but then really pushing it out into a fleshed out faction that feels like it has always existed that way in the Warhammer universe.

When I came to start up a new campaign though, I found myself drawn to the Jade Empire, Grand Cathay. I hadn’t expected that from the previews but looking at some of the units available and the starting map, I could see a faction that really vibed with how I like to play my armies and campaigns in Total War Warhammer.

The start of Miao Ying’s victorious campaign

That was a lot of waffle to start but I wanted to make sure I covered some of that reflection from the tabletop gamers’ side of things. I’ll keep rambling on and give you some of my experience getting into the meat of the campaign (the good and the bad)….

Finding an army that fits to you makes the game much more enjoyable

Cathay is army that really lends into building up combinations of units that allowed me to adapt tactics and to focus certain armies towards different builds. I loved the look and the feel of Cathay (which to me is probably the most important thing when it comes to an army on the tabletop or in a Total War game). Trying to reflect a little, I had been a bit dubious that this would feel like a Warhammer army within TWWH3… but the inclusion of the massive constructs and a general who can turn into a dragon when you want helped prop that end up.

I remember the days when lizardmen and Lustria were coming into the Old World, Cathay riffs on a different vibe of being a land on the edge of the world… something that has always been there and interacted with the Old World but is also apart and has its own strong identity. The campaign with Cathay was also a blast… although I didn’t feel like the story was woven deeply enough into the campaign mechanics and I would really like to know more about that story. Mechanically, it took me a while to get to grips with the Ying-Yang mechanic but once I had it figured out, it was easily controlled by recruiting the correct heroes. The combination of the mechanics and feel of Cathay was a hit for me.

The unit diversity in this picture will make Kharadron and Fyreslayers players jealous!

The stuff I didn’t really like

This is where I want to get down into the “bad” part of TWWH3, the campaign mechanics can be a bit annoying, in the sense that it forces you to start tending your lands to stop the daemonic incursions in a way which feels more like housework than enjoying a wargame. The fact that these mechanics and the camapign end goals are effectively the same across all of the starter factions was also a real bummer. After being treated to varied and interesting campaign goals across the other games and DLCs this was a real let down.

I finished up my Cathay adventure (or so I’d thought) and I more or less immediately went back to the new campaign screen to try and choose my next faction (maybe Slaanesh). However because of the lack of variety in the campaign I just didn’t feel it and in the end didn’t start a new one. You know what? I think that’s a real shame, it feels like a lot of love and development work went into that map and I hope with the future expansions we’ll be given reasons to go back to it (I still need to do a Kislev campaign… those bears and beards look great).

Getting on with it…

Well, that didn’t last long and later that day I was booting it up to jump into Immortal Empires instead and for the first time ever I jumped back in with the same faction I’d just played (and won with) and got stuck into a grand campaign with Cathay. For TWWH3, Immortal Empires is really where its at, there are a series of quality of life improvements in regards to victory conditions making it feel a bit more like I had some concrete goals and could happily finish a campaign with a Long Victory instead of feeling like I needed to grind and grind to get towards a final victory. I don’t know how they did it but I’ve felt much happier jumping into Immortal Empires in TWWH3 than with the earlier games.

The valiant army of Cathay stand fast against a Tzeentch assault (and the dragon gets covered in blood and daemon juice)

I’ve gotta start wrapping up this review so I can’t get into too many details but I’ve had fun popping in and out of TWWH3. I’ve played a bit of Ogres and lot of Chaos Dwarves since (I won’t get into Chaos Dwarves in detail yet but if you like their vibe, the DLC is worth it at full price. I actually mean that. It is a vastly different faction with in-depth mechanics that feel like they work and the campaign is *chef’s kiss*. Also, hobgoblins and evil dwarves in big hats, and bull centaurs)

How does it play?

Oh, you came here for an actual review and managed to read through all those long sentences up above! The game runs pretty nicely on my 6 year old computer (don’t ask me for the specs). The performance actually felt better than in the earlier entries, I didn’t feel like I was waiting overly long for the transitions from campaign map to battlefield (as has been a problem before for me). The graphics weren’t glitchy (as I’ve also had a problem with) and this really helped keep me immersed.

The small campaign map felt “personal” I really started to form a rivalry with my fellow Cathay empire below me and the threat of chaos trying to break through and wreak havoc felt right. Later on in the campaign, I started to really want to get to grips with the slippery Tzeentch forces.

Immortal Empires gave me this too but on the grander scale that comes with it. When you get into these bigger longer campaigns, in this iteration (and the earlier entries), I really find myself going after personal goals rather than the ones imposed by the game but I never felt I was being penalised or pushed towards doing it differently.

I haven’t tried out the Multiplayer with TWWH3 but have had a blast in earlier versions. Now it’s upgraded to let you play a campaign with up to 8 players and they even made two special campaigns focussed on multiplayer. I’ve heard though that stability is an issue and you’ll want to check out dedicated server options if you want to go down that road.

Time to settle some grudges… with a war zeppelin!

Onwards and upwards

It’s been a while since my last foray into the “Old World” of Warhammer and I’m getting that itch again. My sincerest condolences to Slaanesh though, you’re going to have to wait a bit longer. Next campaign, I’ll be jumping into Thrones of Decay… Dwarven Engineer with a deathwish, pirate slayers, a war zeppelin… I’ll be back soon with a review of the DLC from the perspective of Malakai!

Purchase the DLC on GamesPlanet with the affiliate link

Cities of Sigmar: Battletome Review

Contents

Lore Synopsis

The forces of Order aim to bring peace to the Mortal Realms by stamping out evil. Forces of Stormcast Eternals, known as Stormhosts, would travel across the Realms liberating the pathways between realms known as Realmgates. Cities were then strategically erected around these places of power at the behest of the God-King Sigmar himself. Populated by the Humans, Duardin, and Aelves, these Free Cities came to be known as the Cities of Sigmar. Bastions of Order, these Cities serve as the garrison to crusades launched all across the Mortal Realms. 

Playstyle

The Cities of Sigmar Battletome boasts a strong variety in play styles that include high durability, strong mobility, long range shooting, powerful magics, and formidable melee. What you will enjoy about Cities is being able to have your cake and eat it too. The wide variety inherently within the warscrolls and allegiance abilities will allow you to mix and match all of these archetypes to your heart’s content. Whether you aim to castle up and charge forward the Cities of Sigmar (CoS) will enable you to achieve that and more. 

Allegiance Abilities

The delicious bread and butter for CoS lies in their Orders. Orders are special abilities your CoS HEROES can utilize. At the start of the battle round, you give each of your heroes an order, face down such that your opponent does not know what they are. You can then trigger them throughout the battle round at the appropriate times. This “trap card” style ability allows the CoS player immense flexibility on a turn by turn basis. You can’t have more than 3 of the same order out at the same time, and a unit cannot be affected more than once by the same order in the same phase. At the end of the battle round, you discard any that are not revealed and start anew. 

The first two orders can be given to any CoS HERO. Advance in Formation is revealed at the start of the movement phase. Any unit that starts a normal move within 3” of this HERO gets to add 3” to their move characteristic. This means you get the opportunity to move the hero in range of a different unit that wants to receive the bonus. Castelite units with the Fortified Position ability can use said ability even if they made a normal move as long as they end within 3” of this HERO. We will get into what all that means when we discuss the warscrolls. Counter-Charge is revealed at the end of the enemy charge phase. You pick a unit that is not in combat and within 3” of this HERO. That unit can attempt a charge, and if they make it their rend is improved by one until the end of the turn. Anything that allows you to act in your opponent’s turn is very powerful, a Counter Charge being amongst the best of them. Your opponent can carefully position all they want and you can surprise them with one more unit that they did not intend on fighting. 

The next three orders can only be given to your HUMAN CoS HEROES. Return Fire is revealed when a friendly unit within 3” of the HERO is targeted by a shooting attack. After that attack, a HUMAN CoS unit within 3” of that HERO that is not in combat can make a shooting attack. Any enemy archers will have to think twice about who they shoot! Suppressing Fire is revealed at the start of your shooting phase. Pick one HUMAN CoS unit within 3” of this HERO. If that unit shoots and puts all its attacks into one target, roll two dice against that unit’s bravery adding the number of models slain by that attack. If the roll exceeds the target’s bravery, that unit is suppressed until the end of the turn (meaning it has strikes last). Soften up a target with some missiles before charging in and you may be able to give it strikes last in addition! Engage the Foe is revealed at the start of your charge phase. Pick a CoS HUMAN within 3” of the HERO, not in combat, and has not fought yet in the battle. If that unit makes a charge move, they will get +1 attacks until the end of that combat phase. This will make your melee threats even more threatening on that initial impact. 

The next two orders can only be given to your DUARDIN CoS HEROES. Form Shieldwall is revealed at the start of the enemy combat phase. It allows you to pick a CoS DUARDIN unit with 5 or more models within 3” of this hero to get a 5+ ward and strike last. A surprise jump in durability that can catch an opponent off guard. Grim Last Stand is revealed at the start of your combat phase. It allows you to pick a CoS DUARDIN unit models within 3” of this hero and gives them an explode on death. The explosion is 3” range measured from the unit and causes 1 mortal wound on a 5+ per slain model. This one leaves a lot to be desired as it does not seem to stack up to anything that we have seen so far. 

The next two orders can only be given to your AELF CoS HEROES. Strike Them Down is revealed at the start of the charge phase. One CoS AELF unit within 3” of the hero will get strike first if they charge this turn.  This combos very well with Counter-Charge. A unit can benefit from more than one order in the same phase assuming it is not the same order. Swift Disengage is revealed at the end of the combat phase.One CoS AELF unit within 3” of this hero can immediately make a retreat move. This is a very nice piece of out of phase mobility, and we love abilities that let you do things out of phase. 

Subfaction Traits Summary

There are a whopping 11 Free Cities to choose from as your subfaction! You may find some to be more impactful than others, however each will definitely provide a niche that you may find enjoyable! A number of these will specifically lay out how allies can interact with them. As a reminder, allies will not get the subfaction keyword nor are they CoS which means they cannot have or receive orders. 

Hammerhal Aqsha lets one of your Aqsha HEROES have two different orders instead of just one order. You also get an extra CP at the start of your hero phase if you have an allied Aventis Firestrike on the battlefield. This is going to be outclassed by some of the other cities as getting a single additional order or CP per round does not a subfaction make. 

The Living City enables you to deepstrike up to half of your Living City or Sylvaneth units during deployment. One or more of them are set up wholly within 6” of the board edge and more than 9” away from enemies at the end of your movement phase. If deepstrike excites you and you would like to bring along your Sylvaneth toys, go nuts!

Vindicarum units are able to rally while within 3” of enemies, and your Vindicarum Flagellants can rally on a 5+. This one is not particularly flashy as no other unit will have an improved rally. Large blobs of Flagellants with defensive buffs tarring up the board and exploding on death while rallying back certainly is a choice you can make. However, they are so fragile that they may not survive to see the rally. And with the 10 wound cap on rally, it might be that much more difficult to pull off.

Tempest’s Eye units, Kharadron Overlords skyvessels allies, and the units embarked in said vessels are able to retreat and shoot. This is an alright touch of mobility, and could be exciting for the flying duardin enjoyers that want to bring their lads into Cities!

Greywater Fastness allows you to issue All-out Attack in the shooting phase to three Greywater Fastness units. The first two times you issue it, it does not cost a CP. If you’re a fan of tanks or lads with firearms, this could improve your output in the shooting phase.  

Excelsis gives all your Excelsis monsters an additional wound. It also gives your Freeguild Cavaliers the ability to do some mortal wounds in the combat phase. After they fight, pick any enemy within 3” and roll a die for each model in the Cav unit. Each 4+ will deal a mortal. There are some formidable monsters in the book, so if you wish to beef them up and then sprint around with the very fast Cavalry, this may be the option for you!

Hallowheart stands out as the magical subfaction, allowing your Hallowheart wizards to cast on 3d6 rather than 2d6. If the unmodified casting roll was 10+, they take D3 mortal wounds after resolving the spell. We will review the spell lore shortly but getting the chance to 3d6 cast your critical spells at the cost of maybe D3 mortal wounds is the deal of a lifetime. 

Lethis stands out as the premier PRIEST subaction. Your HUMAN Lethis non-WIZARD HEROES become PRIESTS and gain access to the Lethis specific prayer Morrda’s Embrace which is a 4+ 12” range ward turn off (your Stormcast PRIEST allies will also get this). The range is a bit short, but a ward turn off is a phenomenal tool to have in addition to the generic and Cities specific prayer scriptures. 

Settler’s Gain WIZARDS get +1 to cast and your general will generate an additional CP if they are within 3” of a Lumineth Realm-Lord ally. This is another magic subfaction and while it feels less flashy than Hallowheart, it offers some nice consistency. 

Hammerhall Ghyra allows you to bring 1 additional reinforced CoS unit than normal and make all of your HUMAN units bravery 10 while they have 10 or more models. This one seems like a miss. There are tools that will allow you to deal with battleshock so this just doesn’t seem necessary. 

Misthavn lets you pick 3 Misthavn units at the end of the hero phase that are outside 12” of enemies. Those units move D6”, or 2d6” if they are mounted. This move can end within 3” of enemies. This is a really nice touch of mobility and will give your already speedy cavalry even more room to move. Being able to end within combat has so many implications including shutting off unleash, redeploy, counter-charges, certain commands, and so on! 

Spells and Prayers

There are two spell lores in the CoS tome, one for HUMANS and one for AELVES. The Lore of Collegiate Arcane for HUMANS has a whopping 8 spells. Fireball (CV6 range 18”) is a hordebreaker (roll a number of dice equal to the number of models in the unit and do mortals on x) on 6s. This one is not winning any awards. Mystifying Miasma (CV5 range 18”) is a single target debuff for no running and -2 to charge. This could help slow down some folks that rely on run and charge and the range is really nice. Pall of Doom (CV7 range 18”) is a single target debuff to shut off commands. Some units rely more heavily on commands than others. When they DO rely on it, woof does it hurt to take that away. Pha’s Protection (CV7 range 18”) is a single target HUMAN buff to ignore all modifiers to save rolls. Giving a high base save unit an ethereal save could prove quite useful. Rain of Jade (CV7 range 12”) is a single HUMAN model heal, rolling a dice for each wound allocated and healing it on a 5+. This is only for models, not units. Not sure if you are casting this over the other options but could be ok to heal up a durable monster that is heavily injured. Transmutation of Lead (CV7 range 12”) is a hordebreaker on dice value that exceeds the target’s save characteristic. Shutter in fear bricks of ok save models! Twin-tailed Comet (CV7 range 18”) lets you pick an enemy unit and draw a line to one model in that unit. Any HUMANS that the line touches get bravery 10 for the turn and then that unit suffers D3 mortal wounds. This one is really really niche. Wildform (CV7 range 12”) is a single target HUMAN buff for a 3d6 charge. Yes, I would absolutely take more mobility thank you very much.
The Lore of Dark Sorcery will give your AELVES a less whopping 3 spells to choose from. Sap Strength (CV6 range 18”) is a single target debuff for -1 to wound. Bonuses to wound don’t come sound too often so this one can hurt. Umbral Hex (CV6 range 12”) is a single target debuff to roll 2d6 instead of 1d6 for battleshock tests. Pair this with Pall of Doom and the battleshock phase will be terrifying. Tenebrael Blades (CV7 range 9”) is a single target AELF buff. Any enemy that this AELF unit targets in melee will be treated as having a save characteristic of “-” which means 7+. 

Amongst these two spell lores, there are a number of interesting tools you can utilize to buff yourself or debuff your opponent. With all the casting bonuses you may have access to based on the subfaction you choose, this is a toolbox that you can have at the ready. 

Rune Lore is the prayer scripture with 3 prayers your DUARDIN will have access to. Rune of Unfaltering Aim (CV3 range 12”) is a single target DUARDIN buff with that will give +1 to hit with missile weapons. Copters and Bombers rejoice? Rune of Oath and Steel (CV3 range 12”) is a single target DUARDIN buff that will give enemies -1 to wound in melee against that unit. Yet another durability buff for blocks of DUARDIN. Rune of Wrath and Ruin (CV3 range 18”) is a single target damage prayer. On 6 dice, each 5+ is a mortal wound. On 3 or more mortals, that target cannot benefit from bonuses to save. Two consistent buffs and an inconsistent debuff.  

Command Traits and Artefacts

Your HUMAN generals will have access to four command traits from Sentinels of Order. Diving Champion will make your general a PRIEST and give them access to the prayer Hammer of Sigmar (CV4 range 12”). The prayer is a +1 to wound AoE buff centered on the chanter. +1 to wound is nothing to sneeze at, but you’re still asking for a 4+ without rerolls. Grizzled Veteran is only for your FREEGUILD generals and it makes it so attacks can only wound successfully on unmodified rolls of 4+. This is a significant bump in durability. Master of Ballistics will improve your general’s All-out-Attack, giving +1 to wound in addition to +1 to hit when issued to a CASTELITE unit. If you want to go all in on Fusiliers or Steelhelms, this could be a good consideration. Fiery Temper allows this general to reroll charges. If this general makes a charge move, all other CoS units wholly within 18” also get to reroll their charges. If you live by the ABCs (Always Be Charging) this is a fun command trait for you. 

Your HUMAN HEROES have access to 6 artefacts of power from Treasures of the Cities. Brazier of Holy Flame lets you roll a dice each time a HUMAN model flees from battleshock while wholly within 12” of the bearer. On a 4+, that model does not flee. Could potentially mess up coherency if you are not careful, but between this and all the potential bravery buffs I do not foresee HUMAN bricks running to bravery. Mastro Vivetti’s Magnificent Macroscope (great name) gives +3” to the range of missile weapons used by HUMANS wholly within 12” of the bearer. Steam Tanks and Fusiliers shooting from even father is going to be tough to handle! Shemtek’s Grimoire is a once per battle debuff to enemy wizards. You use this at the start of the enemy hero phase to give their wizards -D3 to cast for that phase. This is very niche, but if you want to go high drops for extra artefacts this is an interesting inclusion to make your army more magically dominant. Sigmarite Warhammer will just give one of the bearers weapons an extra pip of rend and damage. If you like a smashy Griffon, this is your golden ticket. Flask of Lethisian Darkwater is a once per battle D6 heal at the end of any phase. Once per battle abilities need to be REALLY good to keep up with the other options you have access to. D6 is just too inconsistent. Glimmering is a once per phase reroll for a hit, wound, or save roll for the bearer. Not sure why one would take this over some of the other options. 

Your DUARDIN generals will have 3 command traits to choose from Lords of the Mountains. Of Mighty Lineage allows your general to pick an enemy HERO within 3” at the start of the combat phase, giving your general strikes first if they target the enemy HERO with all their attacks. Not sure if Mighty Lineage is going to earn much Mighty Mileage. Insurmountable Resilience allows you to roll a die for each wound allocated to this general at the end of the combat phase, healing the wound with each 3+. The beefiest DUARDIN HERO is 6 wounds on a 3+ save in the Warden King. I am not seeing how you can reliably take advantage of this. Master of Ancient Lore makes your general a PRIEST, and gives them an extra prayer from the scripture if they are already a priest. The scripture is not particularly inspiring. A common theme you may be noticing is that the DUARDIN are looking like they got the short end of the stick, pun intended. 

Your DUARDIN HEROES can pick from 3 artefacts of power from Ancestor relics. Book of Grudges lets the bearer pick an enemy unit while out of combat. On a 4+, DUARDIN get +1 to hit that enemy unit until a different one is picked. The coinflip requirement hurts. Piledriver Gauntlets (best name yet?) allows the bearer to roll a dice for each enemy unit within 3” at the start of the combat phase. Each 4+ will give them strikes last. The bearer must forgo their chance to fight in order to do this. More coin flips, more feels bad. Heavy Metal Ingot allows the user to ignore negative modifiers to their save rolls as long as they have not made a move in the same turn. That 6 wound 3+ save Warden King may be a bit tougher to kill with this, but it is only 6 wounds after all. 

Your AELF generals will have access to 3 command traits from Dreaded Leaders. Unparalleled Duelist will deal 1 mortal wound to an enemy for every hit roll that targets the general and does not produce a hit. Most of the AELF HEROES are not particularly tanky, so this may not be as good as it looks on paper. Secretive Warlock will give a wizard general +1 to cast and unbind. Simple, not flashy, but consistent and can combo with your subfaction. Although, your AELF WIZARDS are only single casters. Draconic Blood-pact is specifically for your AELF HEROES that are riding a Black Dragon. The general can take 1 mortal wound to give the Black Dragon mount attacks +1 attacks. This is alright if you like The Dragons themselves hit on 4+s base. I am not sure an AELF general’s role is to be fighting on the front lines. They have warscroll abilities that may better suit them elsewhere, which we will cover later.
Your AELF HEROES will be able to choose from 3 artefacts of power from Exotic Armaments. Shadowshroud Ring will once per battle allow the bearer to become invisible to enemies outside of 12” until the start of your next hero phase. This may prevent them from being sniped if they didn’t already benefit from Look Out Sir! Venomfang Blade will make one of the bearer’s weapons deal an additional D3 mortal wounds on 6s to wound. Again, not sure your AELF HEROES are sprinting to the front lines to use this. Anklet of Epiphany will add 6” to the range of their spells while they are wholly on a terrain feature or contesting an objective. This one definitely has a use!


Warscrolls

HUMANS HEROES

The Alchemite Warforger is a single cast WIZARD that can choose at the start of the hero phase between +1 to cast or forgoing their spell for +1 to save for all HUMANS wholly within 12”. Their warscroll spell Blazing Weapons (CV7 12”) will give all HUMANS wholly within range 1 mortal in addition on 6’s to hit in melee. This one wizard packs both utility and a pretty banger warscroll spell. If you manage to get this off, your damage will skyrocket.

The Battlemage has a couple of loadouts to choose from. Those options are 2 extra weapon attacks (haha no GW I don’t think so), a 5+ ward, a once per battle casting of an additional spell at the cost of 1 wound, a once per battle 2+ D3 mortals wounds at 12”, 6” extra to the range of its spells, +1 to cast, or +1 to unbind. While these rules are neat in theory, the last 3 seem like the only options you would ever realistically choose for this single caster. And even then, it is probably the range. 

Pontifex Zenestra, Matriarch of the Great Wheel, premier priest and utility piece for the Cities of Sigmar. They get a dispel and a +1 unbind, a 4+ ward, and a 2+ D3 mortal wounds ability within 3” after it fights and at the start of the combat phase. Their warscroll prayer Vessel of Sigmar (CV 3) allows you to pick 1 of three effects: a 5+ ward for all HUMANS wholly within 18”, +2” to the move characteristic of all friendly HUMANS on the field, or 2+ D3 mortal wounds to every enemy WIZARD and PRIEST on the field.  If Zenestra is wholly outside of your territory when they chant this, they get to pick 2 effects. In a HUMAN focused army, Zenestra is an absolute banger pick providing you some immense options to flex between. 

The Freeguild Marshal and Relic Envoy is a cheap order carrier that can once per battle make some of your HUMANS count as two models on objectives. He can make a HUMAN unit receive a free command once per turn and gets a 4+ ward next to the Freeguild Command Corp he deems his retinue. He is quite tanky for a little foot hero and has some utility behind him. Bringing along a cheap and safe hero for orders and investing more points into your units is quite feasible. 

The Freeguild Cavalier-Marshal is nothing to write home about. It can give your Cavaliers +3 to charge when it uses Their Finest Hour and can make your Cavaliers fight immediately after it does. Your Cavaliers are already quite mobile so this may be putting a hat on a hat. 

The Fusil-Major on Ogor Warhulk feels like a bit of a miss. It can increase the range of your Fusiliers’ missile weapons by D6, but with the movement order their effective threat range is already quite high. It can do some damage and has a rule to unreliably kill some models in a target. Your points may be better spent elsewhere. 

Galen and Doralia ven Denst are interesting inclusions. You get two heroes for the price of one leader slot, meaning you get to carry around more orders. You are bound to run into wizards or daemons in most matchups, and they can be quite nasty with those targets as they get double damage against them. They have the added utility of being able to shoot down endless spells, which is nice. They do not have many wounds, so their 5+ ward can only keep them around for so long. 

Haskal Hexbane and Hexbane Hunters can do a respectable amount of damage against the HERO that they target to hunt. Haskal is an additional HUMAN that can carry orders for your HUMAN focused army. That is about the extent of this package’s usefulness. 

The Freeguild General on Griffon is quite the competent fighter and equipping it with the right enhancements can make it both killy AND hard to kill. 14” fly will have this unit screaming across the battlefield. Once per battle it can be given two orders rather than one, which is nice. And this monster can Monstrous Rampage Roar two units rather than one, which is very good. 

The Battlemage on Griffon is equally fast, has exploding hits on the damage 3 beaks,  and bonus damage against monsters which makes this unit somewhat formidable in combat. They are locked into Wildform if they take a spell from the lore, but that is one of the best ones so I am not bothered by this. The warscroll spell (CV7 18”) is a straight line of 2+ D3 mortals which is alright, but the unit has plenty of other things it is good at. 

Battlemage on Celestial Hurricanum is a single caster.  If they choose a lore spell it must be Twin-tailed Comet. In your hero phase you can pick 1 enemy unit within 18” and roll a number of dice equal to the current battleround. Every 2+ is going to be D3 mortal wounds. The Hurricanum is going to give your HUMAN units +1 to hit while wholly within 9” of it.Their warscroll spell Chain Lightning (CV6 range 18”) lets you pick one unit in range to suffer D3 mortal wounds. Then, every enemy within 6” of the target will suffer D3 mortal wounds on a 4+. Essentially, the Hurricanum is just going to spray mortal wounds around the table at a confident range. The unmounted Hurricanum is exactly the same without the warscroll spell for a small discount. 

Battlemage on Luminark of Hysh is a singler caster as well. If they choose a lore spell it must be Pha’s Protection. They have a 30” range shooting attack that will create a straight line and deal D3 mortal wounds to any unit it touches on a 2+. The Luminark is going to give your HUMAN units a 6+ ward while wholly within 9” of it. Their warscroll spell Burning Gaze (CV6 range 18”) will allow them to do D3 mortal wounds to a unit. The damage is doubled against a 10+ model unit or tripled against a 20+ model unit. The unmounted Luminark is also exactly the same without the warscroll spell for a small discount. You already get a ward from Pontifex Zenestra if you are focusing on HUMANS so I am wholly uncertain why one would take the Luminark over the Hurricanum.

Thalia Vedra is reasonably killy, has a 6+ ward, can hold 2 orders, has a fight last monstrous action against enemy monsters, and can issue rally to units in combat while she is also in combat. That rally works on 4+s. While niche, she absolutely has use cases and comes equipped with very neat rules that could provide you with nice tools. 

Steam Tanks are good. The Steam Tank Commander is exactly the same as the Steam tanks except for a couple extra weapons and the very neat ability to double issue commands to Steam Tanks for the price of 1 CP. They are all 12 wounds on a 2+ save. If the Steam Tank Commander is your general, your Steam Tanks will be battleline. They have single shots at 24” and a multitude of shots at 12”. With 8” move and the movement order, these Tanks can absolutely pepper you with bullets at great effective ranges. They also have impact hits and damage 2 attacks in combat which is nothing to sneeze at. They also have a special rule that allows you to roll 2d6 in the hero phase. If you beat the number of wounds currently allocated to them, they can run and shoot/charge or they can get extra shots. If you want to run a giant killy wall of steel forward at your opponent, Steam Tanks are going to be formidable. 

HUMANS UNITS

Steelhelms are your only HUMAN non-conditional battleline. They actually have some very cool rules. They can consecrate an objective they control that has no enemies. Your HUMANS will have a 6+ ward as long as they control it. And when they receive All-out-Attack or All-out-Defense, they can share it with another unit of Steelhelms. Their real purpose is to just fill battleline slots very cheaply and exist a screen with some durability in a 4+ save, which they do well!

Wildcorp Hunters can be taken as a battleline for each unit of Steelhelms that you have. They have a pregame move, which is always really good. They are invisible to enemies while in cover or more than 12” from them and get an extra rend to their missiles while near terrain. They have some shots at 18” range. Altogether, they are alright and can take advantage of all the synergy within HUMAN focused armies. 

Freeguild Cavaliers are battleline if your general is Freeguild. They are a speedy 10” move with a formidable 3+ save. They get bonus rend and damage on the charge, which will make them the perfect starts for your cavalry focused builds. 

Freeguild Fusiliers can be taken as a battleline for each unit of Steelhelms that you have. This unit can shoot at 24” if they are fortified or 12” if they are not. If they move, they are not fortified (unless they benefit from the movement order). While fortified, they ignore negative modifiers to their save from missile weapons. Once per battle, they can reroll their hit rolls. This unit can be menacing with a multitude of shots at a distant range, especially when paired with the artefact Mastro Vivetti’s Magnificent Macroscope and the command trait Master of Ballistics.

Flagellants are battleline if your army includes Pontifex Zenestra. They spit mortals when they die on a 5+ to an enemy unit within 3”. There are certainly builds that could have you running hoards of them, but it seems like it is outclassed by some of the stronger options you have access to. 

The Iornweld great cannon has the same Fortify rules as the Fusiliers. While it can do some damage, I am wholly uncertain why you would ever take it over Fusiliers. 

One of the highlights of the book, a gang of absolute stars, the Freeguild Command Corps. This warscroll is dense with absolutely stellar rules amongst its 6 models. The unit can be a retinue for a Freeguild General on foot which gives that general a 4+ ward. The Arch-Knight and Mascot Gargoylian together have 7 damage D3 attacks which is nothing to sneeze at. The Whisperblade has a damage D6 attack and a boardwide once-per-turn command deny on a 4+. The command still counts as being issued and the command point is still spent. It may only be a coinflip, but if you have ever needed to reroll a critical charge this is a very scary coinflip that has no range or triggers holding it back. The Great Herald makes this unit a totem. Any HUMANS wholly within 12” of this unit white it has the Great Herald gets +1 to run and charge as well as an additional D3 to retreat moves. The War Surgeon allows you to pick 3 HUMAN units wholly within 12” at the end of your hero phase. Those units heal D3 wounds, or return D3 wounds worth of models if no wounds are allocated. The Soul Shepherd allows you to roll a die each time a model flees from a HUMAN unit wholly within 12”. On a 4+ that model does not flee. In this single warscroll you have the means to interrupt opponent commands, heal your own units/return models, prevent battleshock, gain extra mobility, and do some damage. If you want to play with HUMANS, I think you will be hard pressed not to include at least one unit of Freeguild Command Corps. 

DUARDIN

DUARDIN HEROES

The Cogsmith can issue commands to Gyrocopters and Gyrombombres anywhere on the battlefield. That’s it. The Runelord is your DUARDIN PRIEST, gets an unbind, and has the warscroll prayer Forgefire (CV4 range 18”) that can give a DUARDIN unit an extra rend in melee. The Warden King (if they are your general) can pick an enemy unit at the start of the battle and all your DUARDIN will automatically wound with melee weapons on hit rolls of 6. They can also make a DUARDIN unit fight immediately after they do. These are your 3 options for DUARDIN heroes. If you like spamming helicopters, the Cogsmith can help somewhat. The prayers offer some value, which the Runelord will enable you to access. And the Warden King can help take down a single tough target. These heroes’ use cases are not far and wide. 

DUARDIN UNITS

Ironbreakers and Longbeards are going to be your non-conditional battlelines. Ironbreakers have a 3+ save and when they Form a Shieldwall they get a 4+ ward rather than the 5+. Longbeards can have a 4+ save for rend 2 attacks or a 3+ save for rend 1 attacks. They will also prevent nearby DUARDIN models from fleeing to battleshock on a 4+ for each model. Neither unit is going to be particularly hitty, nor are they particularly tanky with 1 wound a piece. That being said, the DUARDIN have access to a number of buffs and orders that could make these little lads more formidable. Hammerers are going to do just that. They may have a 4+ save, but they do have 2 attacks at 2 rend and 2 damage. They will also give a Warden King a 4+ ward, but I am not sure you want the Warden King near danger with how few wounds they have. Irondrakes will be your shorty DUARDIN with 1 attack a piece at 15” range (2 attacks if it did not move and is not in combat). This is, again, outclassed by some of your other options for missile weapons. 

Gyrocopters and Gyrbombers each sport 3+ saves and 12” fly. The Copters will have a choice between long range damage D3 attacks or shorter range damage 1 attacks with more shots. The Bombers will have damage 2 attacks at 18” range as well as 2+ D3 mortals for any enemies it flies over. The damage on these units is nothing to write home about, but what they are is absolutely mobile. If you want to play fighter choppers in your fantasy wargame, you certainly can with these units. 

AELVES

AELF HEROES

There are 3 main keywords that will separate the AELVES: Serpentis, Darkling Covens, and Scourge Privateers. 

Black Dragons are the big monsters that your AELF HEROES can ride. The Dreadlord on Black Dragon (Serpentis) is 14 wounds on a 4+. Its damage is unimpressive, which is unfortunate because its warscroll would lead you to believe you want this thing to be a fighter. You can forgo some of its weapon options to have a shield that will make it always save on 6s regardless of modifiers. It gets bonus rend and damage on the charge with a lance, some horde killing with its breath, and gives reroll charges to all your Serpentis units (Drakespawns and War Hydra). With the mediocre damage and middling combat enhancements, this one feels like a bit of a miss. 

The Sorceress on Black Dragon (Darkling Covens) is not much better, unfortunately. The 5+ save is quite tough to swallow. The damage is worse and it has a warscroll spell. Bladestorm (CV6 range 18”) lets you roll 9 dice against a target and do a mortal for each roll below their save characteristic. It is a chaff clearer which is fine? It can double issue to your AELF units (specifically only the Darkling Coven ones) and that is it. This too feels like a miss. 

The Black Ark Fleetmaster (Scourge Privateers) is an interesting utility piece.  When it issues All-out-Attack to your Scourge Privateers, they also get +1 to their attack characteristics. Attack rolls of 1 that target this unit in melee reflect 2 mortals back to the attacker, which is funny enough. The special command alone is a reason to consider bringing this in an AELF build that wants to focus on Corsairs. 

The Sorceress (Darkling Covens) is going to be a very popular inclusion for an AELF hero. They can kill a Darkling Coven AELF model to get +2 to casting. It may only be a single caster, but it is a cheap one. Its warscroll spell Word of Pain (CV7 range 18”) will deal D3 mortals and give -1 to hit to the target. A good bit of utility packed into a small package, but the real bang for buck comes with how the Sorceress interacts with Black Guard. 

A serious miss comes in the form of the Assassin. It can do mortals on 6s, be invisible near AELVES (to units outside of 12”), and gets strike first on the charge. It is 5 wounds on a 5+ save. Your hero slots should not be spent here. 

AELF UNITS

Starting with the Darkling Coven units, the Blackguard are going to be battleline if you take a Darkling Coven AELF as your general. Their damage is basic but their real value comes in their Steel and Sorcery ability. This unit and a Sorceress within 3” of it will have a 4+ ward. Yes, that means a big old block of Black Guard can effectively double their wounds just for having a Sorceress nearby. This tool will allow this unit to be a very effective tar pit for your opponent to slam their head against. And if you happen to get a Tenebrael Blades off they will also output a respectable amount of damage. 

The Bleakswords and Dreadspears are cheap non-conditional battleline. Their damage is unextraordinary and their warscroll abilities give them exploding 6s to hit and +1 to hit on the charge respectively. They exist to fill battleline slots and screen for your good units, one of which is not Darkshards. Tenebrael Blades does not work in shooting and their shooting attack is quite bad without it. If you want to have a missile unit, don’t pick Darkshards. 

Executioners are quite expensive. They have damage 2 base and 6s to hit will cause 2 mortal wounds. Not much else to discuss there.
Moving on to the Scourge Privateers. Black Ark Corsairs have loads of attacks and with the help of the Fleetmaster they can get even more. Paired with Tenebrael Blades, this unit can absolutely blend whatever it may touch. 

Scourgerunner Chariots have damage D3 attacks at 18”, which is just 3 against monsters. These harpoons can benefit from the Fleetmaster so if you have a lot of monsters stomping around your meta, these Chariots will keep them in check. 

Kharybdiss has the Scourge Privateers. It is a relatively cheap monster that can get you a roar. It shuts off rally and inspiring presence within 12”. The damage is not remarkable, but it has its utility which is worth not nothing. 

Finally, we have the Serpentis units. Drakespawn knights are a 3+ save base and have bonus damage and rend on the charge. They’ve got 10” move so they fit kind of nicely into the relatively hitty and somewhat durable cavalry category. Drakespawn chariots do impact hits and that is really about it. 

Warhydra is meant to do damage and heal after combat. I do not think 12 wounds on a 4+ save is enabling to do that very effectively. 

Darkriders have the same random Shadowblades keyword that the Assassin does. It does not do anything which is similar to this unit. They have a 4+ save and some attacks on not great profiles. They shut off commands for enemies within 12” on a 5+. Not sure that justifies including the unit. 

Grand Strategies

There are four Grand Strategies to choose from in the book. Exemplar of the Acadamae Martial asks you to complete 4 battle tactics from the book. These are never the best pick as battle tactics can be way too finicky. Reclaim for Sigmar! asks you to have 1 CoS unit wholly within each quarter of the battlefield. Dedicating four units to four separate spots might be asking too much with objective based missions. Hold the High Ground wants you to have any friendly units and no enemy units within 12” of the center of the battlefield. This one is really easy to deny for your opponent. Banners Held High asks you to have more STANDARD BEARERS or TOTEMS than your opponent at the end of the game. Plenty of armies do not have too many standard bearers, but this one is really just asking you to kill your opponents units. You were already going to do that, so this one is the safest pick in the bunch. 

Battle Tactics

You will have access to 6 battle tactics in this tome. 

Bring Full Arms to Bear asks you to pick an enemy unit, use the Suppressing Fire order on it, and destroy it. This will require you to make a nice balancing act of shooting a unit with enough firepower that you kill enough models to beat their bravery, but not so much shooting that you outright kill the unit before you get the chance to suppress it. 

Raise the Banner has you pick an objective your opponent controls and take it with a Command Corps unit that has their Great Herald. This is a reliable tactic because the Freeguild Command Corps is too good of a toolbox to not include in your list. 

Blackpowder Bombardment asks you to kill 3 or more units in your shooting phase. The book packs some powerful missile weapons so this is possible but very risky. 

Mount the Charge has you pick an objective your opponent controls and take that objective only with mounted units that made a charge move that turn. Cavaliers and Griffons are great so this is a pretty free tactic if you are planning on bringing them.
Strike Without Warning asks you to charge with 3 or more CoS AELF units. With the strikes-first after charging and retreat after combat orders your AELF units have access to, charging with 3 units is very doable. 

Iron Might asks you to fight with 3 CoS DUARDIN units and have no DUARDIN units destroyed in that turn. Given the variety of durability buffs you can dish out your DUARDIN, this tactic is doable albeit extremely niche. 

Final Thoughts

The HUMANS feel like they are leading the pack in this book. They have the warscrolls and enhancements to make a variety of lists that can all perform well. The AELVES feel almost as good with slightly fewer options, but a lot of really good tricks. I think a Sorceress and Blackguard can fit into any list. DUARDIN feel a little lacking compared to the other options in the book. All that being said, if this book asks you to do one thing it is to find synergies to excel with. And the orders are a very interesting mechanic that can catch out plenty of opponents or force them into unideal decisions as they face down the barrel of your trap cards. I think there is so much potential for creative list building and skill expression in this book, and I hope CoS folks get their fair share of fun out of it. 

  • Credit to Rhinoceruption, a prolific Cities of Sigmar player who offered great insights on this article. 

Disciples of Tzeentch Battletome Review

Menu

Lore

The Disciples of Tzeentch are a faction within the Chaos pantheon in Warhammer Age of Sigmar. Dedicated to the Changer of Ways, Tzeentch, they embody the essence of change, magic, and manipulation. Led by powerful sorcerers and daemonic entities, they seek to unravel the fabric of reality and reshape it according to their whims. With a focus on sorcery, cunning, and intricate schemes, the Disciples of Tzeentch manipulate events from the shadows, often orchestrating complex plots that span years. In battle, they employ a diverse array of arcane powers and otherworldly creatures, leveraging their mastery over magic to outmanoeuvre and outwit their foes. However, their allegiance comes with a price, as Tzeentch is known for his ever-shifting plans and unpredictable nature, making loyalty to the Changer of Ways a precarious endeavour.

Battle Traits

Starting with the Battle Traits, Disciples of Tzeentch have a range of powerful and flavourful rules that really help define your army and shape list building. The first one, Arcane Armies allows an auto-cast of Tzeentch Endless Spell and it cannot be unbound until Turn 2 at the earliest. While somewhat out of sequence, it’s a good opportunity to go through those Warscrolls now to decide how good this rule actually is.

Tome of Eyes

The cheapest is also the one that I think is the best, due to the change to Chronomantic Cogs during 3rd edition. For 40 points, you can reroll casting roles (only) and thrown in is a spell that can do D3 mortals wounds and reduce bravery by 1 for the rest of the battle. For most efficiency, put it on Kairos and get to re-roll all three of his spells, potentially useful for a particular Book Battle Tactic. The Endless Spell follows around the model it is ‘bound’ to, so can also be used to sneakily screen off a portion of base, preventing all melee attacks being able to get in.

Burning Sigil

Next up, is the Endless Spell that I think is the coolest: Burning Sigil. It has a range of 18” and then at the end of the movement phase, you roll a dice for every unit within 9”, even friendly units. On a 4+, the unit takes D3 mortal wounds and if a model dies, you can add a spawn within 3” of the unit (only once per activation though). This is fantastic for shutting down shooting units as they find themselves in combat and have took overkill the spawn instead. It can be amazing to shut down charges too: I once popped a spawn down within 3” of a unit of Brutes, a Mawkrusha and some Pigs that were about to ruin my screen. Instead, they just ate a lot of magic next hero phase. It is pricey, at 70pts though, and with some armies, it’s practically useless. Face Beastclaw Raiders and it’s doing nothing as they have too many wounds; Khorne might die but a) they might ignore, earning Bloodtithe and b) they’ll kill the spawn quickly anyway…stop me if you’ve heard this one, earning Bloodtithe! 

Daemonic Simulacrum

Again for 70pts, you have an Endless Spell that probably does 3 mortal wounds (9 dice and 5+s) or 5 mortal wounds to wizards (9 dice and 4+s). Waste of a slot – take Aethervoid Pendulum or Ravenak’s Gnashing Jaws instead.

Summoning

Disciples of Tzeentch are a summoning army, with summoning or Fate Points being earned whenever a spell is cast, friendly and enemy. This can have an interesting effect on armies that depend on casting as if they do go through with the cast, they make summoning easier but at the same time, it might also make the Tzeentch player allow some spells to be cast for the same reason. There are several Daemon units that can be summoned, but the three you are most likely to see are 10 Blue Horrors for 10 Fate Points; 10 Pink Horrors for 20 Fate Points; a Lord of Change (the generic one, not Kairos!) for 30 Fate Points. There is a sub-faction that allows for Lords of Change to be summoned on a 9 the first time and then on an 18 each time after that BUT you can only summon Lords of Change. Lore-wise, the Guild of Summoners (the sub-faction in question), aims to summon NINE Lords of Change at once to bring about something appropriately apocalyptic. At 2k points and 5 turns, the most you can get on the table is 8, so look for a Guild of Summoners mirror match to check the veracity of the prophesy! The summoning is fine, but is severely overshadowed by Seraphon Starborne summoning as they get summoning points for existing and for casting their own spells and unbinding the opponent’s. 

Change Covens

I’ve mentioned one of the Change Covens or sub-factions already, so let’s dive into those now, starting with the Big Bird fans, Guild of Summoners.

Guild of Summoners

GoS is definitely one of the competitive options, allowing you to summon and almost 400pt model, relatively easily for only 9 Fate Points. Many GoS lists feature Kairic Acolytes as battleline, and they can cast a spell each; with a certain Command Ability, you get an extra 3 Fate Points and then the spell in Arcane Armies counts too – that’s 8 Fate Points already. In addition, there’s a Book Battle Tactic for doing this. However, there are a couple of buts. The biggest one is that only Arcanite (i.e. mortal) wizards can summon. Lose those and no more summoning. Having the space to fit those big bases in can be tricky too. The other catch is that the Lords of Change are casting from the same pool of spells and they are not good in combat, even with a sword and flaming weapon. Therefore, take the Rod of Sorcery for some shooting chip damage and an Endless Spell like Aethervoid Pendulum or Ravenak’s Gnashing Jaws.

Host Arcanum

The other competitive option, and the one you take if you want to take the very cool Screamers as battleline and be able to summon in Horrors (among other units, but mainly Horrors) is Host Arcanum. Another bonus from Host Arcanum is that you can unbind a spell without rolling dice rounds 1, 3 and 5. And why those three? What does 1+3+5 make?

And the rest…

Host Duplicitous has a cool gimmick where units can’t fall back and can bring 5 Pinks back on a 4+ once per game. Theoretically, 30 Pinks could tarpit a whole army as it would 150 wounds BUT that costs almost 800points and 10 Chosen fully buffed could take that out in a couple of combat phases. Eternal Conflagration gives extra rend to magical ranged attacks and have Flamers as battleline. 9 Flamers will put you back about 600 points and will die to a stiff breeze. The last two are Kairic and Tzaangor based and unless you have a particular army in mind for verrrrry casual games, skip these.

Coalition Options

Disciples of Tzeentch can play nicely with Slaves to Darkness, able to take two units out of every four from the other battletome and get along with Beasts of Chaos okay, able to take one out of every four from this book. As to the units you would want to take, they’ll probably all be melee units as melee is somewhere that Tzeentch can struggle with, though various hues of Tzaangor do have a good punch still. 

For Slaves to Darkness, six Varanguard are an excellent choice, with some Chaos Chosen also being an option. Six Ogroids can also do tremendous work with their great axes and look really cool alongside an Ogroid Thaumaturge. 20 Chaos Warriors can be a decent anvil if you don’t want to use Pinks, especially as all of these units will be able to receive the Shield of Fate spell buff, giving them a 5+ ward and a potential spell ignore too. With Mystic Shield, All out Defense AND a 5+ ward, those Warriors will be tricky to remove. Having a melee threat is really important as there are lots of matchups that can neutralise the magic threat, for example, Khorne. A couple of more techy pieces from the S2D range include the Cockatrice to potentially mean that enemy melee only hits on 6s and the Mindstealer Sphiranx for fight last (though to make that worthwhile you’re going to want two melee threats!). Of the Warcry Warbands, Corvus Cabal are good for deepstriking as Tzeentch has (almost) no way of teleporting short of Soulscreen Bridge. Untamed Beasts could be useful to look at for a pregame move. Last but not least, for those people who have more friends than they know what to do with, there is Belakor. His spells will add to Fate Point generation, and there’s always The Dark Master ability aka ‘Belakor says no’ to potentially shut down unit activations.

For Beasts of Chaos, melee hammers such as Dragon Ogres or Bullgor certainly have a place and Ungor can do a good job as a screen at a very reasonable price.

Locus of Change

Pretty handy rule here for keeping your Daemon units alive in the form of Locus of Change. Really straightforward in as much as if a Daemon unit is wholly within 12” of a Daemon hero (e.g. Lord of Change or Gaunt Summoner) then they are -1 to hit in melee.

Master of Destiny

And the final Battle Trait is Mastery of Destiny which gives you Destiny Dice. You roll nine at the beginning of the game and then you can use the result of one of these dice INSTEAD OF rolling. They can’t be used for every dice roll but can be used for:

Casting

Unbinding

Dispelling

Run

Charge

Hit

Wound

Save

Damage characteristic of missile or magic weapon (not for magic damage, sadly)

Battleshock

For the above rolls that need two dice, you need to use two Destiny Dice and your Coalition units cannot benefit from them at all.

In terms of gaining more dice, Kairos allows you to add one at the start of each hero phase; there is a spell that adds one; there is a relic that gives and extra dice for unmodified hit rolls of a 6; there is a command ability that allows a dice’s value to be changed; there is a relic that allows you to roll a dice each time a Destiny Dice is used and on a 5+, you can roll a new one. This last relic (The Eternal Shroud) can be useful for doing something with the 1s and 2s you have rolled as you can use them for run rolls or any other roll that doesn’t really matter to try and generate a better outcome. However you are generating them, the number you have cannot exceed nine. Therefore, a good trick if you’re going second is to find a pre-text to use a low roll up, such as for a save roll you couldn’t make anyway or by taking a battleshock test that won’t result in models running, even on a 6. Then, when Kairos activates his ability to generate a dice in the Hero phase, you get another try at rolling for a better dice.

Managing your Destiny Dice is key to victory as Tzeentch, particularly as the Grand Strategy, Master of Destiny, needs you to have a total of nine or more on Destiny Dice at the end of the game (e.g. a 2, a 3 and a 4). They can be tremendously powerful when used at the right time. I’ll share two examples to illustrate this. In a game against Beastclaw Raiders, I think I’ve screened well enough, but a Stonehorn manages to get into Kairos and would have turned him into a puff of feathers if not for Destiny Dice. I slow rolled the first couple of saves (i.e. one at a time) and then used almost half of the rest of my Destiny Dice to save the rest. Kairos lived (well, for a couple more turns at least!). An aggressive example is with Tzaangor Enlightened on Disc, who move 16” with fly. My opponent had screened quite well, but because I had a couple of high Destiny Dice, I could guarantee an 11” charge to rip apart several key support characters that shifted the whole game in my favour.

Battle Tactics

Tzeentch are blessed with some pretty good Book Battle Tactics that can all be achieved, albeit with some list construction choices needed to allow them to happen.

Call for Change

To achieve this tactic you need to summon a Lord of Change, which is very difficult for most Covens as it costs 30 Fate Points but simple for Guild of Summoners as they only need nine Fate Points. Being able to achieve this tactic so easily is one of GoS’s strengths competitively and you will complete this tactic if you take this sub-faction.

Mass Conjuration

Casting three spells that are not unbound with the same character is what is required here. It doesn’t specify Kairos Fateweaver as the character as, when the book came out, Wizards could take the Arcane Tome as a relic to get an extra cast, meaning that there were a few options to achieve this tactic. As things currently stand, however, it is Kairos only who can achieve this. There is a bit of risk with this one, but if Tome of Eyes is attached to Kairos and he is out of unbind range, it’s a relatively safe bet.

Ninefold Dismantlement

Kill a unit with nine or more models or a hero/monster with a wounds characteristic of nine or more. Very straightforward one as even if you only do the final wound to a 10 wound model, the battle tactic is achieved.

Tides of Anarchy

Take an objective from an opponent with nine or more models. Again, really easy to do unless you are pinned in your deployment zone for the whole game. 

Reckless Abandon

You need to successfully complete a charge with a mortal Tzeentch unit that started the turn 18” away from all enemy units. I have completed this one before, but the only unit that can really do it is a Magister on Disc and then the Magister gets squished shortly afterwards. Don’t bother with this one.

So in summary, two all sub-factions will be able to do; three that one of them will; one that Kairos can do but is situation dependent and one that’s just too much of a faff. Many armies would kill for an array that good! 

Grand Strategies

Dominate Arcane Nexus

Don’t choose this.

Preponderance of Fate

Don’t choose this.

Realm of Magic

Don’t choose this.

Master of Destiny

Choose this! Having nine on your Destiny Dice at the end of the game is ENTIRELY uninteractive as your opponent can do nothing to stop you. If you fail this strategy, Tzeentch is throwing you into the Well of Eternity next.

So to bring Battle Tactics and Grand Strategies together, a Tzeentch player is positioned to score well on these, with an expectation, short of an early tabling of scoring 10+ points on these. The challenge, therefore, is in the primary scoring of holding objectives, so make sure you build your lists with that in mind.

Command Abilities

There are two flavours on offer here, Daemon heroes and Mortal ones, with there being a few good ones but maybe Mortal Command Abilities just edging it.

Daemon Heroes

Arch Sorcerer

Know two extra spells from the Daemon spell lore, Lore of Change. Lords of Change/Kairos know all of the spells anyway and the Lore of Change is the weaker of the two, so give this one a pass.

Daemonspark

Once per game 3 Fate Points, which sounds underwhelming, but can help guarantee turn 1 summoning. If you have a Daemon general, this is probably your choice.

Incorporeal Form

5+ spell ignore…meh. You’re Tzeentch: unbind the spell!

Nexus of Fate

Can re-roll the result of a Destiny Dice at the start of each hero phase. Lots of fun, but there are better options.

Arcanite Heroes

Arcane Sacrifice

Add 9” to spell range by inflicting a wound to a nearby friendly unit. 27” cast is great, especially with some of the amazing spells from the Lore of Fate…but it’s only one spell and how long will you be 27” away from your target? One turn? 

Arch Sorcerer

Same as above but for Lore of Fate. Now, Lore of Fate is the better spell Lore but Gaunt Summoners exist and knowing two is not the same as casting two. Best on a Cursling if you’re going to take it as he does have two casts.

Cult Demagogue

If the FIRST casting roll is a double, even a double 2, the spell is successful, regardless of the casting value and cannot be unbound. In addition, you get 2 Fate Points for this spell. Spells that cannot be unbound are absolute money, so this is probably the pick of the bunch. Rolled a bunch of 2s for your Destiny Dice? Despair not if you have Cult Demagogue!

Illusionist

Subtract 1 from hit rolls that target your general. The most robust character that can take this has 8 wounds on a 4+. This Command Ability won’t save him.

Nexus of Fate

Copy and paste from above with same comments.

Soul Burn

Unmodified rolls of a 6 in meleedo one mortal wound on addition. Could not be more underwhelming. No model has enough attacks to make this proc often enough and you don’t want your characters in melee.

Artefacts of Power

As above, one basket for Daemons another for their Mortal summoners.

Daemon Heroes

Beacon of Mutability

Add 1 to wound rolls for Daemon units wholly within 9” of the bearer. Screamers are the only Daemon unit we want in combat and they go 16” and potentially charge another 12” into the distance. Simply won’t come off enough for the investment of an artefact.

Blade of Fate

Pick one of the bearer’s melee weapons…skip! Even Lords of Change with swords are decidedly mediocre and you’d need to hit with an unmodified roll of a 6 to be able to generate a Destiny Dice.

Nine-Eyed Tome

Re-roll casting, unbinding and dispelling. Fantastic value on a Gaunt Summoner to get to re-roll two casts; pop Tome of Eyes on Kairos and that’s 5 spells you’re re-rolling. It’s almost like Cogs never changed!

Pyrofyre Staff

Pick one of the bearer’s melee weapons…skip! Even worse that Blade of Fate so don’t waste your time with it.

Eternal Shroud

Each time a Destiny Dice is used, on a 5+, you can roll another dice and put it back in. Very good and the go-to when Chronomantic Cogs still offered full re-rolls. With Kairos, the Destiny Dice Spell and this, you can legitimately expect to have access to 15+ Destiny Dice per game. Definitely worth a look.

Warpfire Blade

Pick one of the bearer’s melee weapons…skip! In the Lore for Lords of Change it explains how they basically kite opponents, hurling spells at them as they fly backwards, desperately trying to stay out of melee range…so I am clueless as to why half the Daemon relics are versions of combat weapons. In comparison, one (ONE!) of the eight Blades of Khorne relics, Daemon and Mortal alike, features “pick one of the bearer’s melee weapons.”

Mortal

Ambition’s End

Once per battle, a Wizard within 1” of the bearer takes the battle round number of wounds. Rubbish.

Changeblade

Pick one of the bearer’s melee weapons…seriously?!

Daemonheart

Ambition’s End but for all units and not just Wizards. Slightly less rubbish, but still rubbish.

Secret Eater

Pick one of the bearer’s weapons…I’m going to actually consider this one for a moment before rejecting it as it can be a missile weapon and the Cursling has a D6 attacks missile weapon. Roll an unmodified hit roll of 6 and roll yourself up a Destiny Dice if you have fewer than nine. But is it better than re-rolling spells or getting Destiny Dice back just for spending them (on a 5+ anyway)? No.

Spiteful Shield

Two mortal wounds back on an unmodified save roll of a 6. Great on a melee hero, of which Tzeentch have none…

Timeslip Pendant

Fight for a second time but at the end of the phase. Unlikely to need to kill something enough while that unit will not kill you when they activate. Not terrible, but same problem as Secret Eater – nowhere near best-in-slot.

TL;DR your command trait is likely Daemonspark or Cult Demagogue and your artifact is probably Nine-Eyed Tome.

Spells

This is where a lot of the flavour comes from with Tzeentch, with a huge variety of spells to consider. The Tzeentch Endless Spells have already been looked at, but with look at the Tzeentch Spell Lores, Notable Warscroll Spells and Notable Endless Spells too.

Lore of Change (Daemon Spells)

Lords of Change and Kairos know all of these, which gives a lot of flexibility. Also worth mentioning at this point that if you are wholly with 18” of a big bird, you get +1 to casting, unbinding and dispelling and it stacks.

Bolt of Change

18”, CV7, D6 MWs. Bread and butter mortal wound spell and will be one of your most commonly cast spells. Really useful for popping heroes that are otherwise hidden by the Look Out Sir character targeting rules. Only slight downsides are the inherent variability of a D6 damage roll and the Lore of Fate has the same spell and you can only cast Bolt of Change from one of the disciplines and not both.

Fold Reality

18”, CV7, Recursion spell. Do you have Screamers in your lists in units of 6 or 9? If so, you want this spell. If successfully cast, choose one Daemon unit wholly within 18” and visible and roll a dice. On a 1, everything went wrong and the unit is sent back to whence it came. But on a 2+, you get this many models back. On a unit of nine Screamers that your opponent has whittled down to one or two, bringing back six with this spell is pretty crushing (and low risk for you as the 1 in 6 chance of being destroyed isn’t that impactful if there is only a single model left anyway). It does work on Horrors, but only Brimstones so only useful on them in very fringe circumstances. No restrictions on whether you are in engagement range either, which is another strong positive.

Treason of Tzeentch

18”, CV7, Damage/debuff spell. Pick a unit with two or more models (as they have to turn on each other, see) and roll the number of dice that there are in the unit and every 6 is a mortal wound. In addition, subtract 1 from hit rolls for this unit. It’s fine, but probably either a very situational spell or one that you use in Guild of Summoners when all of the other spells have been cast!

Tzeentch’s Firestorm

12”, CV8, Nine dice; 6s D3MWs. Really exciting spell on paper…that almost always does 2 mortal wounds. Cast Arcane Bolt and then charge instead!

Unchecked Mutation

18”, CV6, D3MWs and then maybe +D3MWs. An alright spell here and one that far outshines Tzeentch’s Firestorm at least on the one or two wound models that will proc the second D3MWs. 

Lore of Fate (Mortal Spells)

The Gaunt Summoner (both varieties) know all of these, despite being a Daemon and having their chosen spell have to come from the Lore of Change, or any spells specific to a season of AoS. The spells are generally very good, which is why I almost always start with a Gaunt Summoner in my lists.

Arcane Suggestion

18”, CV8, Debuff Variety Pack

Arcane Suggestion gives you a range of debuffs to inflict. Either not being able to issue it receive commands; -1 to hit and wound; -1 from save rolls (note that this does not change armour characteristic or AP of a unit so can stack with rules that do affect those). Great spell and one that you’re likely to want to cast every turn. Turning off Inspire Bravery for key units is massive; -1 to hit and wound, potentially coupled with Locus of Change so that even All out Attack doesn’t cancel the -1; reducing saves is always awesome. 

Bolt of Tzeentch

18”, CV7, D6 MWs. As above, but the Mortal variant that cannot be cast with the Daemon version.

Glimpse the Future

CV7, Gain a Destiny Dice. Great fill-in spell for when there’s not a particular spell effect you want, but you DO want the Fate Points. Why not grab an extra Destiny Dice!

Infusion Arcanum

CV5, Buffing spell. +1 to hit +1 to wound for attacks made by the caster. Actually very cool and works great on the Cursling as it takes him to 2s/2s on missile and main melee profiles…but it’s not worth missing out on the others for, unfortunately.

Shield of Fate

18”, CV6, Varying strength buff. If you have 1-3 Destiny Dice, a selected unit gets a 6+ ward. If you have 4-6 Destiny Dice, a selected unit gets a 5+ ward. If you have 7-9 Destiny Dice, a selected unit gets a 5+ ward AND a 4+ spell ignore. Just like Arcane Sacrifice, you will be wanting to cast this one pretty much every turn. Get your sequencing right if you have three or six Destiny Dice and cast Glimpse the Future first, if you can.

Treacherous Bond

9”, CV5, bodyguard spell. Pick a unit wholly within 9” of the caster and can pass off wounds, instead of taking a ward save, on a 3+ when the unit is within 9”. Note the difference: wholly when cast, to one model when effect takes place – just don’t take that one model first!

Notable Warscroll Spells

There are a lot of Warscroll Spells, but I’m just going to look at the ones you’ll find yourself using a bit more often.

Infernal Gateway

18”, CV8, Nine dice, starts on 3+ are MWs. Fantastic fantastic spell that legitimately has a good chance of one-shotting any foot hero unlucky enough to find themselves in range of this. The one downside is that Kairos and Lords of Change now share this as their Warscroll spell, which is why you hardly ever see a starting army with two big birds.

Blue Fire of Tzeentch

18”, CV8, Nine dice, 5+ are MWs. Kind of like Infernal Gateway-lite and cast by the Fluxmaster. The bonus to this spell and why the Fluxmaster was very hard to get hold of for a bit when the book dropped is that for each mortal wound caused you get an extra Fate Point, i.e. 3MWs = three Fate Points from the spell and one Fate Point from the cast. If you have a plan built upon summoning, this spell is hugely helpful to that plan.

Glean Magic

30”, CV4, Copy Homework spell. When the Cursling unbinds a spell, they can immediately cast Glean Magic, even in the opponent’s hero phase and attempt to take a copy of a spell on the opponent’s Warscroll that the Cursling would then be able to cast. For example, you can copy Kroak’s Celestial Deliverance spell (though only cast it once, Tzeentch is not an Order faction) because it just does damage to a unit, but you can’t copy the Alchemite Warforger’s Blazing Weapon spell as this names Cities of Sigmar units as the recipients of the spell. The opposing Wizard still knows the spell, but might see it coming back at them. A fun spell and a good way of earning some more Fate Points. 

Infernal Flames

12”, CV7, Damage spell. Not cast very often, but the Gaunt Summoner does have a horde clearance spell that rolls the number of dice in the unit and causes a mortal on a 5+. Not why you’re taking the Gaunt Summoner, but handy to have if you run into 60 zombies.

Choking Tendrils

18”, CV7, Damage and healing spell. The Ogroid Thaumaturge has a nifty variant of Bolt of Tzeentch that also does D6 damage but also allows the Ogroid to heal a wound for each model slain by the spell.

Bolt of Change

18”, CV7, Damage/transformation spell. Both varieties of Magister can hurl out this spell that causes D3 MWs, with the option of turning a model into a spawn if one is killed, in much the same way as the Burning Sigil. They operate independently, however, and you can theoretically generate two spawn a turn with both at your disposal. Think hard about whether it benefits you to have a spawn though. Will it give an enemy unit free movement via a charge? Might it add a Bloodtithe point? Could it be an easy battle tactic for my opponent? Going against Khorne, the answer is almost always yes to all three of these, so such take the wounds and leave it there!

Sudden Warp-portal

18”, CV8, Teleportation spell with hoops to jump through. Even if you know Tzeentch quite well, you’re probably not that familiar with Sudden Warp-portal as it can only be cast by Ephilim the Unknowable, a Warhammer Underworlds release. Hoop number one is casting it as 8 is not straightforward, but then it gets very Tzeentchian. You must pick a unit that is wholly within 18” of Ephilim, within 6” of an objective AND 3” from enemy models. Okay, tricky, but doable, you may be thinking. We’re not finished yet. The unit must then be set up again within 6” of an objective and 9” from enemy models and then cannot move in the following movement phase. If being able to drop a unit in your opponent’s backfield is so key to your plan, take 2 units of Corvus Cabal for the same price and probably greater utility.

Notable Endless Spells

Aethervoid Pendulum

8” + 8”, CV6, D6 MWs. On a 2+, D6 MWs caused on every unit that it flew over or ended with 1” off but it must move in a straight line and it can cause them to friendly units too. Great damage dealer.

Ravenak’s Gnashing Jaws

8” + 3D6”, CV6, Variable MWs. You roll the 3D6 distance (re-rolling if desired – below 10 is a good indicator) and it moves that far and one unit it crosses or ends up within an inch of takes the difference in movement characteristic and the 3D6 roll in damage. Most units move 6”, so on average, that’s 5MWs, which isn’t bad. It’s also a pretty big base for move blocking.

Umbral Spellportal

18”, CV5, Extra range spell. When it is cast, you place one end next to the wizard you want to send a spell through and another in a strategic location that allows you to get range and visibility on a target as long as both ends are wholly with 18” of the caster. Then, when the portal is used the ‘other’ end is where all the measurements happen from. Combos really well with Infernal Gateway but is not cheap, so is not as commonly seen as it once was.

Warscrolls

Kairos Fateweaver/Lord of Change

I’ll look at these two together as you will rarely have both in a starting list and they do have very similar Warscrolls. They both have fly, move 12”, are Daemon monsters and share the same Warscroll spell as mentioned above: Infernal Gateway. They offer a great buff, Beacon of Sorcery, adding +1 to casting, unbinding and dispelling rolls when wholly within 18”, which does stack. They are also excellent at casting and unbinding as, when rolling the casting dice, you can turn the lowest dice into the highest dice, i.e. a 6 and a 1 is actually a 12, +1 for Beacon of Sorcery, making a CV of 13. They can also steal an Endless Spell instead of dispelling it.

Now to the differences. Kairos is a three cast whereas the Lord of Change is only two, so if you plan on attempting the Mass Conjuration battle tactic, Kairos is your guy. Kairos also gives an additional buff in as much as you get to roll an extra Destiny Dice at the start of your hero phase of you have less than nine. Neither are particularly great in combat, maybe able to beat up on a screening or skirmishing unit, but not much else. The Lord of Change, however, does have the option to take a 2D6 ranged attack that hits and wounds on 3s, for -1 and 1 damage, which isn’t terrible and the option you’ll most likely see.

Of the two, I tend to go for Kairos for the extra utility, but if you need to save on points and Mass Conjuration isn’t part of your plans, it’s a good place to make points savings.

Gaunt Summoner (on Disc)

More than Kairos or a Lord of Change, the Gaunt Summoner is my most auto-take and, while the Disc version gives an extra wound, better save and is faster, I usually go for the foot version to save points and be screenable. The reason he is so good is that he is a two cast wizard, with +1 to cast innately, which also stacks with Beacon of Sorcery. You can also be flexible with your casts as he knows all of the Lore of Fate. This combination makes Arcane Sacrifice succeed more often than not, despite being CV8. You also get to choose a bonus spell from the Lore of Change for added flexibility. If you are screening with Horrors, he also adds -1 to hit them from Locus of Change. His Warscroll spell is also notable in that it can be great for Horde clearance. There are two rules that he has that I rarely use: Silvered Portal and Lords of the Silvered Towers. Silvered Portal allows up to two Tzeentch units (so could be coalition unit) to be ‘in’ the Gaunt Summoner to be deployed as reserves at the end of a movement phase, wholly within 9” of the Gaunt Summoner and more than 9” from other enemy models. A Gaunt Summoner on Disc obviously gives you more reach on this, but would be somewhat exposed afterwards. Could be great for getting units forward quickly and, if they are Disciples of Tzeentch, you can guarantee the charge with Destiny Dice. But. You won’t get to buff the unit as they weren’t on the battlefield during the hero phase and, depending on what is inside the Gaunt Summoner, there could be half your points invested in an, at best, 6 wound character on a 4+ save. Finally, while you never want your Gaunt Summoner in combat or having to shoot, he’s not useless. The missile attack is 3 attacks, 3s, 3s, -1, 1 damage at 18” and the melee profile is 2 attacks, 3s, 3s, -2, D3.

Magister (on Disc)

As with the Gaunt Summoner, the Magister of Disc gets extra movement, an extra wound, a better save and one of the coolest models in the Disciples of Tzeentch range. It also allows the battle tactic of Reckless Abandon. It does suffer from the same targeting issues from being on disc, so you’ll probably more often see on foot. The Warscroll spell, Bolt of Change, can turn models into spawn, which is very fun and often strategically useful and he can potentially go from a one cast to a two cast wizard. The first spell has to be successfully cast and not unbound and then you can gamble on casting a second spell. If the second spell is a double, either the Magister blows himself up or turns into a spawn. Probably only use if you have a need for the spell rather than just randomly casting – unless you’re one Fate Point short of a summon you need, particularly if you need a Lord of Change for your battle tactic. At that point, it’s probably best to use Destiny Dice to guarantee the cast and the tactic. Above, I said the Gaunt Summoner is not useless at shooting/fighting… the Magister is! Almost better to save you and your opponent the one minute of your lives you are never getting back by not even rolling the attacks!

Curseling

A very interesting Warscroll, the Curseling. He’s a two cast wizard, with a very unique spell, Glean Magic, that is explained in more detail above. He can also re-roll unbinding and dispelling rolls to make it more likely to get the counter-spell version of Glean Magic off. He’s got good armour, at 3+, but only had 5 wounds and no ward (without buffing spells that probably want to go elsewhere). He’s low-key okay at range, with D6 attacks at 18” 3s, 3s, -1, 1 damage; and has 4 attacks, 3s, 3s, -1 2 damage AND D6 attacks, 4s, 4s, -, 1 damage. If you can justify it, the spell Infusion Arcanum adds +1 to all these hit rolls. Generally speaking, if you have a Gaunt Summoner to take care of your key buff spells and/or you have Endless Spells that need casting or the extra spell bonus from the Command Entourage or Warlord batallions, Infusion Arcanum isn’t as much of a luxury.

Ogroid Thaumaturge

The big, blue angry magic bull! Has a great default Warscroll spell as a D6 damage spell is almost always useful, meaning that his chosen spell can be a bit more buff orientated. Infusion Arcanum is a good potential spell here if you want him to get stuck in, though no range attack to buff as well. Of all the heroes, the Thaumaturge is the one you’d be happiest throwing into combat as he has 8 wounds on a 4+ save and the Warscroll spell can heal him. He’s also a bit of a bully to your more standard battleline, screening units with 3 attacks, 3s, 3s, -1, D3 damage; 2 attacks, 3s, 3s, -2, 3 damage; 4 attacks, 3s, 3s, -, 1 damage. In addition, if any wounds were allocated earlier in the phase, you get +1 to hit and wound. This final ability means that the Ogroid is a good candidate for the Timeslip Pendant as, when he gets to fight again, some wounds were probably taken, meaning that the second set of attacks are more efficient than the first.

Fluxmaster

A Herald of Tzeentch on Disc who is pretty mediocre apart from the speed of the disc, potentially allowing a summons to pop up in an awkward spot or to spread the Locus of Change to some swarming Screamers harassing your enemy’s deployment (and being able to issue them orders as they are not elite) and their Warscroll spell. The spell does cause mortal wounds, but is more of a Fate Point generator than anything else as each wound is an extra Fate Point. If successfully cast, a return of 3-5 Fate Points is not unreasonable, which is close to a Lord of Change across a whole game, even if you aren’t Guild of Summoners. It is a difficult spell to cast, but the Fluxmaster also has a once per game re-roll of a cast with an additional +3 to whatever the outcome is.

The characters so far will be the backbone of most hero slots in most lists, with the Ogroid, Magister and Curseling being particularly key to Guild of Summoners lists as they are where the summoning comes from. Next, are a variety of characters that might have a niche role they can play in your list. I’ll focus on what makes each a bit different.

Changecaster

A relatively easy character to summon who can reduce save rolls by 1 with his Warscroll spell and has the same once per battle re-roll mechanic as the Fluxmaster, who is basically the same character but on a disc. 

Fateskimmer

The most VIP of the Heralds of Tzeentch, being pulled on a Screamer Sleigh. Tougher than the Fluxmaster with some combat punch. The spell just isn’t as good as the Fluxmaster as it is an AoE spell from measured from himself and needs to be danger close for it to really work.

Fatemaster

A dude of a disc who can’t cast spells, can’t really fight, but does buff the wound roll Disciples of Tzeentch wholly within 9”. Possibly useful for this mythical Flamer build…but you’re investing so many points in buffing units that won’t hang around long enough to justify the investment.

Blue Scribes

Can choose any spell from Lore of Change or Fate and cast it on a 2+ and it cannot be unbound. Good ability and flexibility, but on a disc, so character screening is an issue.

The Changeling

Can be set up in your opponent’s deployment 3” away from enemy models, but has no Warscroll spell, despite being a two cast wizard, and can choose to debuff hit rolls and halve the movement of a unit. 5 wounds on a 5+ means that he’ll be The Deadling next turn though.

Tzaangor Shaman

Cheap and mobile with a spell to potentially increase numbers of standard Tzaangor units. If you have lots of these, maybe worth it. Can be used for Guild of Summoners summoning too.

Ephilim the Unknowable

If you’re taking him, it’s for the Sudden Warp-portal teleport spell described above.

Vortemis the All-seeing

Magister with a worse Warscroll spell. Don’t bother.

Pink Horrors

Probably one of the most iconic and maybe most hated units in AoS! You start with 10 Pinks as standard and those can split into 20 Blue Horrors, who then split into 20 Brimstone Horror bases. So in total, that’s 50 wounds. Very awkward unit to shift by trying to chip away at it as there end up being more of the unit than there was to begin with. Also, nothing counts as being slain until Brimstones start being lifted off the table. This is actually good news for opponents of Tzeentch as it means that you can only Rally Brimstones and not Pink Horrors! 

The problem they’ve had more recently is that there are plenty of units who can just go in and clear 50 wounds on, at best, a 5+ save ignoring rend -2 and a 5+ ward, even if the attacking unit has -1 to hit and wound from Arcane Sacrifice. Might be better off with a unit of, for example, Kairic Acolytes, who will die MUCH quicker, but you can have two separate units for about the same price, meaning that the whole unit isn’t wiped out in one phase.

But what else can they do? Well, on a 3+ for each banner you get a Fate Point for free; they have a lot of shots, with the Eternal Conflagration sub-faction adding rend -1 to those attacks. With some additional spell support that could be even better. The highest volume of shots you can get is when you have all Blue Horrors, with all Brimstones being the ‘best’ (in heavily inverted commas!) combat option. 

They can do great work and if your opponent has a couple of hammers that you can cripple early on, then it does become difficult to shift them. In addition, if you can get to 20 Fate Points and return 10 Pink Horrors to the board, the colour will drain from your opponent as they have to chew through those wounds again.

Theoretically, they can be taken in units of 30, but it becomes difficult for a Daemon character to stay wholly within 12” for Locus of Change and it’s a big investment in one unit that isn’t realistically going to cause much damage. It is 150 wounds, but please don’t underestimate how tiring it is, swapping Pinks to Blues and Blues to Brims. Depending on table height and battleplan, you might need a chiropractor over the weekend. And speaking of deliberately inflicting pain for fun, watch out for Pink Horrors vs. Slaanesh. They will be on maximum Depravity in no time at all as the chew through 50 wounds of Horrors in double quick time!

Kairic Acolytes 

The other and probably more common battleline option for Disciples of Tzeentch are cheap, a little bit shooty and a little bit fighty. When at 9 or more models they can cast a spell that adds -1 rend to their shooting attacks. This can be cast multiple times by different units and be passed onto another Kairic Acolytes unit. For example, with three Kairics as your battleline, two outer units could buff a central unit that buffs itself for -3 rend shooting attacks. It is only one attacks, 4s, 3s, -, 1 damage though. You do get Fate Points from these spells though and your opponent will be unlikely to attempt to unbind them, so useful to cast at the start of the Hero phase to track Fate Point generation. A smart opponent will simply try to kill a couple from each unit and that’s the casting done with though. Most times they are build with shields for a 6+ ward, but don’t rely on these guys hanging around too long on a 5+ save. They can fight a little bit, but the ceiling on damage is 13, with everything hitting, wounding and going through. 

Tzaangors

Currently the most effective way of running these is with a Pair of Savage Blades along with a couple of mutants. With their run and charge ability, this generates 33 Savage Blade attacks on 3s, 3s, -, 1 damage (though only 1” range, even on the Greatblades, so you’ll struggle to get this efficiency). On top of this, there’s 20 beak attacks on 4s, 3s, -, 1 damage. They’re also 2 wounds on a 5+, so while not tanky by any stretch of the imagination, adding Mystic Shield, All out Defense and Shield of Fate has them at 4+ ignoring rend +1 with a 5+ ward. Also debuff the unit most likely tasked with killing them with Arcane Sacrifice, and they’ll hang around for longer than your opponent would like. Their final ability is a nice bonus on top. Ornate Totems allows you to pick a unit within 18” and then roll as many dice as there are Wizards (friendly and enemy) within (not wholly within) 9”. On 4+, you do a mortal wound. If you have three such banners in range of your more than likely 3-5 Wizards…that’s probably about 8 mortal wounds to something that probably isn’t screening very well any more. There’s also no targeting restrictions, so a foot character within range is probably not long for this world! It is done at the start of your hero phase so can be done before battle tactics are chosen.

Jade Obelisk

The last of the standard battleline options is a Warcry Warband whose gimmick is that have a 4+ save that cannot be modified up or down. They still only have 10 wounds though and their other ability, smashing an enemy terrain feature to rubble is a bit too niche to justify these. I have not experimented thoroughly though, so maybe a unit of 20 could do some damage with their Mason’s Tools and their double Obelisk Bearer to bring back a model each at the end of the combat phase.

Screamers (Host Arcanum)

Super-fast skysharks that also cause mortal wounds when they fly over another unit (move, charge or fallback), Screamers are the best one of the better melee options that Tzeentch have. They can do great work as 16” move objective grabbers and harassers in minimum sized units, with 3 attacks each that hit and wound on 3s at -1 rend and 1 damage. As conditional Battleline in a double reinforced pack of nine is where they can start to do some damage. Passing over a target unit with all nine should do 4-5 mortal wounds, and then when you charge (which can be turbocharged by Destiny Dice) you get to do another 4-5 before the attacks even start. With 27 attacks coming in, while -1 rend may bounce off tankier units, they will shred anything on a 5+ or even 4+ save. They’re also not easy to wipe out in one go as there at 27 wounds in a unit of nine. Just be careful if you need to issue them orders as they’re not elite and don’t have a champion, so it will need to come from a hero. If your opponent does manage to kill most of them, the Fold Reality spell can bring up to six of them back allowing them to go again with close to maximum efficiency even if the unit is left with only one alive (very worthwhile having a sneaky Rally here first).

Flamers (Eternal Conflagration)

Every Tzeentch player at some point looks through their Battletome and looks at the Flamer Warscroll and starts to wonder whether it can do work. At maximum efficiency, with a Fatemaster for +1 to wound, an Exalted Flamer for an extra attack and the rend -1 stacked with another buff, Arcane Sacrifice, for example, to make the attacks effective rend -2 you get: 36 attacks at 18”, hitting on 3s, wounding on 2s, -2 rend and D3 damage. But what I’ve just described takes half of your army to pull off, so it should be pretty good! You can also use Fold Reality on this unit and bring Flamers back…if they aren’t all wiped out in one attack as they’re only two wounds each on a 4+ save. So enjoy that shooting phase…it’s probably the only one you’re going to get! 

Burning Chariots/Exalted Flamer

Both of these buff Flamers with an extra attack when in range and are similar to each other in as much as the Burning Chariot is an Exalted Flamer on a Disc that is pulled by two Screamers. The ranged attack is similar to that of Flamers, but is 4s and 3s rather than the other way around, which is slightly better and the Screamers do most of the melee work for the Burning Chariot variety. It would be cool to see these on the table but they are about the same price if not more than a Stormstrike Chariot at half the wounds, worse save, weaker combat and shooting and no mortals on impact.

Chaos Spawn

You’ll get more use out of an Endless Spell. If you want some spawn, bring them in via spells – don’t make them part of the original army. If you want something cheap that can get on points and can’t fit in Screamers, add coalition Furies.

Ephilim’s Pandaemonium/Eyes of the Nine

These come with their respective characters, Ephilim and Vortemis – you’re not taking them for their own Warscrolls.

Tzaangor Enlightened/on Disc 

The Disc bird/goat-kin get most of the headlines and rightly so, but the on foot variant are worth considering too. Both types of Enlightened have 3 attacks with their 2” spears, hitting on 4s, wounding on 3s, rend -1 and damage 2. However, if you are going second in a battle round, they wound on 2s. They are also elite, so can issue All out Attack for themselves. Time for their next ability – they prevent command abilities being received within 3”. This is huge as it means that the rend -1 is effectively rend -2 and maybe even rend -3 if Arcane Sacrifice was successfully cast on the target unit. It also helps make the unit more survivable too. They also both get a beak attack each that isn’t anywhere near as good, but could chip a wound away here or there. The Disc version gets fly, 16” move, an extra wound and an extra D3 Disc attacks that hit on 4s, 3s, -1, D3 damage. With Destiny Dice helping with charges, that’s a potential 28” threat range for the Discs and 18” for the on foot. Clearly the Disc versions are better but are they 100% better? At the time of writing, the on Foot versions are exactly half the points of the Disc versions, which really start to ask some questions about which ones should be in the list or not. Or just take both! The Discs for an early raid behind enemy lines and the on Foot version for lurking behind screens, ready to compete with their faster kin ones the screens part ways.

Tzaangor Skyfires

In a unit of three, you get four shots at 24” from a Disc that moves 16” that hit on 4s and ignore negative modifiers, wound on 3s at rend -1 but ignore positive modifiers to saves (i.e. the save is, at best, at rend -1) for D3 damage. Any hits of 6 automatically go to D3 mortal wounds. The way that Destiny Dice interact with these is worth going through. Let’s imagine that we have a six wound character that we can shoot at (we’re ignoring the -1 from Look Out Sir, but are close enough to ignore other rules) and we have a 6 and two 5s in Destiny Dice at our disposal for this attack. We slow roll the hit rolls and if we have no 6s by the fourth roll, we use our 6 to cause D3 mortal wounds. We cannot use a 5 to make this 3 mortal wounds. The Destiny Dice rules say that we can use them for the damage of missile or melee attacks. No wound roll or save roll was made to allocate damage with, so Destiny Dice can’t be used. However, we roll a 4 for two mortal wounds, two saves were failed and after rolling for one damage with the first dice, we use one of the 5s to make second damage, damage 3. In total, 6 wounds and the character is dead. Before the changes to targeting, Skyfires used to be a lot stronger, but on balance, I think Tzeentch players are happier not having their characters levelled by Thunderers from 18” away!

Sample Lists

List 1 – Classic Tzeentch

Army Faction: Disciples of Tzeentch
– Subfaction: Hosts Duplicitous
– Grand Strategy: Master of Destiny
– Triumph: Indomitable

LEADERS
Gaunt Summoner of Tzeentch (230)*
– General
– Command Traits: Daemonspark
– Artefacts of Power: Nine-Eyed Tome
– Spells: Unchecked Mutation
Ogroid Thaumaturge (170)*
– Spells: Infusion Arcanum
Fluxmaster (180)**
– Artefacts of Power: The Eternal Shroud
– Spells: Fold Reality
Kairos Fateweaver (440)**
Magister (140)**
– Spells: Glimpse the Future

BATTLELINE
Horrors of Tzeentch (Pink) (260)*
– Iridescent Horror
– Pink Horror Icon Bearer
– Pink Horror Hornblower
– Split and Split Again
Horrors of Tzeentch (Pink) (260)*
– Iridescent Horror
– Pink Horror Icon Bearer
– Pink Horror Hornblower
– Split and Split Again
Kairic Acolytes (120)*
– Kairic Adept
– Cursed Blade and Arcanite Shield
– Scroll of the Dark Arts
– Vulcharc
– 3 x Cursed Glaive and Arcanite Shield

ENDLESS SPELLS & INVOCATIONS
1 x Umbral Spellportal (80)
1 x Tome of Eyes (40)
1 x Ravenak’s Gnashing Jaws (70)

CORE BATTALIONS
*Battle Regiment
**Command Entourage – Magnificent

TOTAL POINTS: 1990/2000

 – Army Faction: Disciples of Tzeentch

– Subfaction: Hosts Duplicitous

– Grand Strategy: Master of Destiny

– Triumph: Indomitable

LEADERS

Gaunt Summoner of Tzeentch (230)*

– General

– Command Traits: Daemonspark

– Artefacts of Power: Nine-Eyed Tome

– Spells: Unchecked Mutation

Ogroid Thaumaturge (170)*

– Spells: Infusion Arcanum

Fluxmaster (180)**

– Artefacts of Power: The Eternal Shroud

– Spells: Fold Reality

Kairos Fateweaver (440)**

Magister (140)**

– Spells: Glimpse the Future

BATTLELINE

Horrors of Tzeentch (Pink) (260)*

– Iridescent Horror

– Pink Horror Icon Bearer

– Pink Horror Hornblower

– Split and Split Again

Horrors of Tzeentch (Pink) (260)*

– Iridescent Horror

– Pink Horror Icon Bearer

– Pink Horror Hornblower

– Split and Split Again

Kairic Acolytes (120)*

– Kairic Adept

– Cursed Blade and Arcanite Shield

– Scroll of the Dark Arts

– Vulcharc

– 3 x Cursed Glaive and Arcanite Shield

ENDLESS SPELLS & INVOCATIONS

1 x Umbral Spellportal (80)

1 x Tome of Eyes (40)

1 x Ravenak’s Gnashing Jaws (70)

CORE BATTALIONS

*Battle Regiment

**Command Entourage

– Magnificent

TOTAL POINTS: 1990/2000

When I first started playing Tzeentch, this is very similar to what I was playing. Lots of casters generating a tonne of points, with Umbral Spellportal getting into awkward places and the Jaws chomping anyone they could get near. 20 Pinks for strong early screening and Host Duplicitous to be just within engagement range of enemies so they couldn’t run away, while being within 18” of the magical maelstrom that was about to be unleashed!

List 2 – Guild of Summoners Melee Twist

 – Army Faction: Disciples of Tzeentch

– Subfaction: Guild of Summoners

– Grand Strategy: Master of Destiny

LEADERS

Gaunt Summoner of Tzeentch (230)*

– Artefacts of Power: Nine-Eyed Tome

– Spells: Unchecked Mutation

Magister (140)*

– Spells: Glimpse the Future

Ogroid Thaumaturge (170)*

– General

– Command Traits: Cult Demagogue

– Spells: Shield of Fate

BATTLELINE

Horrors of Tzeentch (Pink) (260)*

– Iridescent Horror

– Pink Horror Icon Bearer

– Pink Horror Hornblower

– Split and Split Again

Kairic Acolytes (120)*

– Kairic Adept

– Cursed Blade and Arcanite Shield

– Scroll of the Dark Arts

– Vulcharc

– 3 x Cursed Glaive and Arcanite Shield

Kairic Acolytes (120)*

– Kairic Adept

– Cursed Blade and Arcanite Shield

– Scroll of the Dark Arts

– Vulcharc

– 3 x Cursed Glaive and Arcanite Shield

OTHER

Tzaangor Enlightened on Discs of Tzeentch (360)*

– Aviarch

Varanguard (560)*

– 6 x Fellspear

ENDLESS SPELLS & INVOCATIONS

1 x Tome of Eyes (40)

CORE BATTALIONS

*Battle Regiment

TOTAL POINTS: 2000/2000

As more and more of the meta became anti-magic, I started to look at options where I could leverage damage in good matchups, but the heavy lifting could be done by my own melee units that I could target with buffs. Here, we have a one-drop list that is looking to take second turn and use the Enlightened’s bottom of the turn buff to delete something important. No Lord of Change to begin with, but looking to summon one in either turn one or two. Varanguard a speedy threat ready to be fully buffed up and sent in do some heavy work and screening while magic missiles come from the rear. Should also be able to score three book tactics without much effort.

List 3 – Screamers

 – Army Faction: Disciples of Tzeentch

– Subfaction: Hosts Arcanum

– Grand Strategy: Master of Destiny

– Triumph: Inspired

LEADERS

Gaunt Summoner of Tzeentch (230)

– Artefacts of Power: Nine-Eyed Tome

– Spells: Fold Reality

Curseling (200)

– General

– Command Traits: Cult Demagogue

– Spells: Shield of Fate

Ogroid Thaumaturge (170)

– Spells: Infusion Arcanum

BATTLELINE

Screamers of Tzeentch (330)

Screamers of Tzeentch (220)

Screamers of Tzeentch (110)

Horrors of Tzeentch (Pink) (260)

– Iridescent Horror

– Pink Horror Icon Bearer

– Pink Horror Hornblower

– Split and Split Again

OTHER

Tzaangor Enlightened on Discs of Tzeentch (360)

– Aviarch

ENDLESS SPELLS & INVOCATIONS

1 x Ravenak’s Gnashing Jaws (70)

1 x Tome of Eyes (40)

TOTAL POINTS: 1990/2000

No big bird in this lists either to be able to get the full 18 Screamers into the list. One unit of nine that is the focus for Fold Reality and defensive buffs, with smaller units able to bully threats on the flank. Enlightened with their 28” threat range always ready to pounce on any opportunities. Not Guild of Summoners, so summoning of extra Screamers or Horrors is an option.

Conclusion

So there we have it – Disciples of Tzeentch. A challenging army to play well, but one with plenty of options available to a player willing to dig through the Battletome (and that of Slaves to Darkness and Beasts of Chaos) for some good combinations to work. An extremely strong Grand Strategy and good Book Tactics mean that if you can score the primary, you’ll be in most games, with a magical double turn potentially able to cripple your opponent. And, if you do lose a battle, smile enigmatically and simply repeat the Tzeentch motto, “just as planned”!

Arcane Journal Review: Tomb Kings of Khemri

Grognards rejoice, the Old World has returned, and it’s returned with a bang!

Games Workshop released Tomb Kings and Bretonnia as the first two factions of this new edition set in the Old World.

Lore Review

The Bretonnians, being Bretonnians, launched a Crusade that happened to trespass across the finely manicured lawns of Nehekhara and steal the treasures of these ancient cities away. The Tomb Kings are having none of it and have launched an invasion of Bretonnia, which is making its way towards the Kingdom via the Border Princes. What happens next is up to you!

Nehekhara has stood for millenia, while the Human tribes of the Old World were still inhabiting mud huts. The many city states of Nehekhara suffered a multitude of civil wars as the various Kings and Queens tried to establish their domains. Only once Settra came to power were the various city states unified.

Under Settra’s command, the priests of Nehekhara aimed to conquer death.

The Book

With the core rules for the Tomb Kings inside the Ravening Hordes Book, this is a supplement to that book and adds further lore and rules to your Tomb King forces. It also gives you rules for three special characters; Settra the Imperishable, Prince Apophas, and Nekaph.

Armies of Infamy

The Armies of Infamy offers novel and thematic approaches to constructing your faction’s army lists. Introducing unique army-wide special rules and granting access to upgraded units that enhance specific playstyles. However, opting for an army of infamy imposes greater restrictions on your army composition compared to the base books by excluding certain units.

It’s important to mention that these Arcane Journals differ from traditional army books from previous editions. They act as supplements to the unit lists and army rules found in Ravening Hordes and Forces of Fantasy books. Playing a game in the Old World only using the Arcane Journals is not possible, as they rely on references to the special rules from Ravening Hordes and Forces of Fantasy. These journals provide new ways to play your faction, including special characters, but they don’t provide details on specific rules.

Nehekharan Royal Host

The Nehekharan Royal Host is tailored for those seeking an elite gaming experience with their skeletal forces, this list embodies the pinnacle of Tomb Kings’ might at the expense of magical prowess. High Priests are absent; instead, the focus is on an impressive display of chariots and the steadfast ranks of the royal guard.

Royal Rules

As for the Royal Rules, the vanguard of the host, the Royal Host chariots, gain the ‘Grind Them Down‘ rule within their General’s command range, enabling them to reroll impact hits against their enemies. The General, a Tomb King or Tomb Prince, has the option to elevate their status to a level 1 wizard with the ‘Arise!‘ special rule. However, if chosen, they automatically become your Hierophant, regardless of other wizards in your list.

Also, for every 1000 points in your army, one unit of Skeleton Skirmishers can acquire the ‘Ambushers‘ special rule for free, and one unit of Skeleton Horse Archers can take the ‘Chariot Runners‘ special rule for free. This strategic addition ensures effective screens for your chariots.

Lastly, units in the army with the Volley Fire special rule gain ‘Steadfast Discipline,’ allowing its use even after movement or when declaring the Stand and Shoot reaction.

List Composition

Hero units still make up to 50% of your list and you must have at least one Tomb King or Prince. You now don’t need to take any Mortuary Priests as long as you upgrade your General with the 35pt Hierophant upgrade.

Your selection of core units has increased from a minimum of 25% to 33%. Skeleton Chariots have been changed to a minimum of 1+ units, and you can take a single unit of Tomb Guard or Tomb Guard Chariots, which replace the Sepulchral Stalkers in the standard army composition.

Special remains at a maximum of 50% of your list, but you can only take up to two Tomb Scorpions instead of three per 1000 points. You’ll also find Skeleton Archers and Skeleton Horse Archers now in the specials. If you take any more than one Tomb Guard Chariots (the first being a core choice), the rest will be classed as Special.

Rare is at a maximum of 25%, as before. With the only change being the inclusion of the Screaming Skull Catapult.

You won’t be able to select; High Priests, Necrotects, Skeleton Archers, Skeleton Warriors, Tomb Swarms, Carrion, Necrolith Colossus, Necrosphinx or the Casket of Souls.

Royal Host Units

Being a Royal Host, the Tomb Kings naturally surround themselves with the very best Units. To represent that, the Royal Host has access to a number of upgraded units.

My personal favourite is the Royal Host, which costs 5 points per model. This can be a mixture of Skeleton Warriors and Skeleton Archers, of which you must have a minimum of 5 models of each type. You can purchase as many of each after the first 10. Skeleton Warriors in this unit must fight on the front rank with the Archers at the back. They keep the rules of both the Warriors and the Archers as well as gaining the Steadfast Discipline rule. They can also purchase the Nehekharan Phalanx special rule.

Royal Host cavalry works in the same manner, made up of Skeleton horseman and Skeleton Archers, meaning you’ll need at least 10 models to field them. These come in at 11 points each and again, gain the Steadfast Discipline rule. They can also buy the Counter Charge rule for 1 point per model.

The last unit is the Tomb Guard chariots, which are slightly more expensive than the regular chariots. They come armed with Halberds and Shields along with an extra point of strength and cleaving blow on their attacks. The Indomitable (2) special rule and an additional impact hit per chariot.

Mortuary Cult

This army revolves around the Preists and the rarer bone constructs available to Tomb Kings. They lack speed but have greater control over their forces.

Cult Rules

Mortuary Cult armies must have a priest be the general of the army, which must also be a Hierophant.

Every Liche Priest in the army acquires the ‘Harmonious Incantations special rule, allowing a Liche Priest within the command range of other friendly Liche Priests to recover an additional wound when using the Arise! special rule.

Liche priests also have the option to use wounds from nearby swarms, monstrous infantry, monstrous cavalry, monstrous creatures, and behemoths to power their spells using the ‘Sepuchral Animus.‘ Nehekharan Undead within the command range of a Liche priest may sacrifice 1-3 wounds to boost the next spell cast by the wizard, potentially giving a High Priest up to a +8 or more, depending on the presence of a Casket of Souls and chosen magic items.

Finally, Tomb Scorpions and Necroserpents can invest 2 points per model for ‘The Terrors Below‘ special rule. Units with this upgrade and entering the battlefield via ‘From Beneath the Sands,’ can select a single enemy infantry or heavy unit within 8 inches to take a number of initiative tests equal to the ambusher’s unit strength or be removed.

Mortuary Cult Composition

In Mortuary Cult lists, it is mandatory to include at least one High Priest or Mortuary Priest as the general, while there is no obligation to field a Tomb King or Tomb Prince on the battlefield. Notably, Tomb Kings are entirely excluded from consideration when assembling this Army of Infamy. As compensation, Cults players are granted access to the new hero option, the Arch Necrotect.

Similar to the Royal Hosts, Mortuary Cults lists must allocate at least 33% of their composition to Core options, with the initial unit of Ushabti and Necroserpents also counting as core, and the Tomb Swarms restricted to one.

Regarding Special slots, inclusion of one Tomb Scorpion is required per 1000 points in a Mortuary Cults list, with no upper limit imposed beyond the

special points allocation, unlike the constraints of the Ravening Hordes force organization chart. Moreover, players have the liberty to select one Necrolith Colossus or Necrosphinx as a Special choice without consuming any of their Rare points allocation. The options available for the Rare slot remain unaltered from those outlined in the main book.

Notably, Mortuary Cults lists forego access to several units, including Tomb Kings, Tomb Heralds, Tomb Guard, Necropolis Knights, Skeleton Chariots, and the Khemrian Warsphinx.

Mortuary Cult Units

The Arch Necrotect emerges as a unique Hero unit exclusive to the Mortuary Cults, offering additional enhancements to the units within your ranks through two distinct abilities. “Immortal Overseer” elevates a friendly unit’s initiative by D3 following a successful leadership test, while “Stone Shaper” bolsters the Regeneration save of a friendly Necrolith Colossus, Necrosphinx, or Ushabti unit within an 8-inch radius by 1.

Venerable Ushabti, formidable close combat monstrous infantry, opt for a slight reduction in movement compared to their standard counterparts, in exchange for heightened strength, weapon skill, and the Magic Resistance (2) special rule.

Lastly, the Mortuary Cults occasionally field Necroserpents, relinquishing their riders in favour of adopting the ambushers’ special rule, the Open Order formation, and at a reduced points cost.

Special Characters

The main army composition lists found in Ravening Hordes and Forces of Fantasy notably lacked the array of special characters that enthusiasts have grown fond of within their cherished factions. While it’s understandable considering the shift in time period, with many of these iconic figures potentially not yet existing, it leaves a void in the hearts of fans longing for something extraordinary to connect with. The Arcane Journals address this gap by introducing a selection of special characters, both familiar and new, to their respective armies, and none are older than those presented here.

Settra the Imperishable makes his grand return, embodying all the traits fans have come to expect. Priced at 445 points, the King of Kings charges into battle atop his legendary heavy chariot, the Chariot of the Gods, reminiscent of old. With 8 wounds, a 5+ ward save, and 5+ regeneration, Settra exudes impressive survivability in this edition, particularly when included in the Royal Host army of infamy, where he gains the ability to join units of Tomb Guard chariots for added protection.

True to his stature, Settra boasts an array of special rules. Unlike his counterparts, he can utilise the Arise! ability in combat, and his ‘Crown of Nehekhara‘ extends his ‘My Will be Done‘ ability to all friendly units within 6 inches, rather than just those he has joined. Additionally, Settra’s Blade of Ptra remains as lethal as ever, boasting Strength 6, Armour Penetration -3, and imposing a permanent -1 penalty to Hit on any surviving enemy model wounded by it.

Accompanying Settra is his steadfast bodyguard, Nekaph, known as the ‘Herald of Despair’. Nekaph’s presence instills fear and terror in larger infantry squads, compelling them to take additional tests with an extra die, discarding the lowest result. With the enhancements Fear and Terror have received in this edition, Nekaph may find a place in lists whether Settra is present or not, although he cannot be included in Mortuary Cults lists as he is classified as a Tomb Herald. As Settra’s Champion, Nekaph is obligated to declare and/or accept challenges if possible, and his challenges cannot be refused. In challenges, Nekaph delivers a killing blow on a roll of 5 or 6 to wound.

Lastly, Prince Apophos the Cursed Scarab Lord returns, resuming his role as a flying assassin designed to eliminate a specific target or perish in the attempt. As Usirian’s Reaper, the disgraced prince gains full rerolls to hit and to wound against a designated enemy character declared at the start of the game, and possesses a breath weapon that inflicts wounds on a 4+, albeit with no Armour Penetration.

Magic Items

The final sections of the arcane journal reveals 17 new magical items for Tomb Kings heroes. Among these, three are exclusive to the Armies of Infamy detailed earlier, while one is reserved for armies featuring Settra himself or Nekaph.

The Blade of Antarhak, priced at 45 points, is a weapon exclusive to the Royal Host. It bestows upon its wielder a +1 strength modifier, -1 Armour Penetration, and the ability to regenerate a wound for each unsaved wound inflicted in combat.

Locked to the Mortuary Cults, the Staff of Aeons, costing 30 points, empowers a Liche Priest with +2 strength, an Armour Penetration of -1, and any unsaved wounds inflicted by the staff permanently diminish the opponent’s armor save by 1.

For members of the Nehekharan Royal Host, the Royal Mantle, priced at 40 points, serves as magical armor enhancing the wearer’s armor save by +1, while extending the My Will Be Done special rule to all units within a 6-inch radius.

The Royal Standard of Settra, a 50-point banner, instils the unit carrying it with Hatred (enemy characters) and the Terror special rules.

Other notable items include the Banner of the Desert Winds, providing a unit with the Vanguard and Reserve Move special rules; Phakth’s Blades of Justice, increasing the user’s attacks by 1 for each rank of enemy units engaged with them; and Phazerakt’s Kanopi, enabling the summoning of 2d6+3 Skeleton Warriors to the battlefield upon a successful leadership test.

Warhammer 40k January Balance Dataslate

Winners and Losers

Introduction

It’s a little late and much anticipated, but in the middle of the night (for me), Games Workshop finally gave us their latest take on the 40k meta and how it needs adjustment. Overwhelmingly, this is a dataslate of nerfs. Very little gets buffed. Before we go too far, we need to acknowledge that the 40k balance is amongst the best it’s ever been. GW’s own data shows that only 2 factions are outside of the 45% – 55% win rate band (Aeldari and Necron). 5 factions are at the bottom (45%), though:

  •  Imperial Knights
  • Tyranids
  • Astra Militarum
  • Drukhari
  • Blood Angels

I question the data, but Drukhari and Daemons (not on that list) are really struggling. Tyranids are extremely player dependent on both top and bottom tables at recent events.

I am going to concentrate on the dataslate and factions within it and mention the points when it’s important. Some factions like Tau haven’t seen any attention outside of points, and I haven’t delved into them. These are my opinions, I might be very wrong. If you think I am, I’d love to hear your thoughts. And we can see if I’m right in 3 months’ time.

Dataslate

Big Winners – These are the standouts

Custodes
No doubt about it, winners. 
They get an additional model in Custodian Warden and Vexila Praetor units and keep their 4+ Inv (Invulnerable save) 4+ FNP (feel no pain). And the FNP works on Devastating Wounds.
They are going to be very strong, possibly top 5, and at least A Tier again.

Drukhari
A new detachment – Skysplinter Assault – that is going to grant a lot of movement and cover to very soft units. Combined with combat buffs (+ 1 AP when empowered) and the Archon joining Incubi Druhkari melee is back. A bit anyway. Dark Lances and Heat Lances remain strong. It remains to be seen if it’s enough to get them over the top, but expect them to be a real threat.

Necrons
A 3 month reprieve, no rule or point changes. Expect Necrons to be a problem with other top factions being nerfed.

Winners – At least you got something right?

Blood Angels – Blood Rite Detachment
Plus 2 Strength and 1 attack to melee weapons might not sound like a lot, but it gets a lot of units past breakpoints like Toughness 4 and Toughness 9. Potentially wounding on 2s (with a stratagem) sounds pretty good. No points changes but they may be competitive in Blood Rite.

Grey Knights
The Grand Master has ignore modifiers again – he’s going back into the list and DreadKnights got buffs to shooting (S10 -2AP 3 Damage ignores cover) and melee (Weapon Skill either 3+ with the S14 hammer or 2+ with the Sword). It’s not a huge buff but should potentially see a surge in play and success.

Black Templars – Gladius Detachment
This is looking very strong with Primaris Crusaders and Sword Brethren not being touched. It may be the best army in the game.

Space Wolves
Their sagas can be completed at the end of each players turn. You probably still won’t play the ‘Deeds Worthy of Saga’ detachment, but it is more likely to help now. Small buff (they are still good in other detachments).

Chaos Daemons
No rules changes but so many points drops which is what they really need. Certain to climb the list. Khorne daemons offer some real output. One to watch.

Chaos Knights
Points down on all of their big Knights and only Brigands going up 10 points. 

Neutral

Death Watch
Still nerfed 

Thousand Sons 
Nothing happening here

Astra Militarum
Clarification of orders, but Manticores took a hit

Genestealer Cults
Nothing, no points, and no rules. This is a sleeper, expensive, and not easy to play they have very strong rules in the index.

Nerfs – These factions are feeling some pain

Imperial Knights
Clarified an earlier ruling, didn’t extend bondsman. Very small buffs probably leave them borderline between nerf and neutral.

Adeptus Sororitas
This may actually be a winner in disguise. A very strong strategy has been limited on the Triumph, and they’ve had points increases. But at the same time, there are a lot of drops, so Paragons, Repentia, and Retributors are now more viable. They’ll continue to push on to the top tables.

Death Guard
Less free grenades and points rise on Plague Burst Crawlers and Plague Marines will hurt current lists. It’s more that it will change the lists/play more than make them much weaker.

Space Marines
Overall, their best generic units have taken a solid hit (Aggressors, Inceptors, and Centurions). Some chapters (Black Templars) took solid hits to points but are still strong. Overall, this is a small nerf.

Tyranids 
Already struggling, their best units have all had points increases. It’s a nerf, not a big one, but it’s still a nerf.

Adeptus Mechanicus
The codex is a miss, and they needed help, GW decided that they want more data (I think) before adjusting the most recent codexes. That’s great for Necrons and less so for Ad Mech. 

World Eaters
Their best enhancement is stripped back, and points increase to the most effective units. It exposes the lack of units and balance in the army. They are still strong and difficult to manage, but they didn’t have a lot of units on the table, and now they will have less.

Biggest Losers – these might sting a little

Aeldari
Less fate dice overall, Fate’s Messenger rerolls only affect the bearer (this is a big change), Phantasm has more restrictions, Night Spinner changed to a -2 to move, advance and charge, Yncrne can only teleport and charge in your turn and Wraithguard can only shoot the unit that shot them. Only Night Spinners and Wraithguards have had a points increase. 
This might seem like a lot, but the Yncrne is still very effective at influencing your opponents game, Night Spinners might have a buff. They didn’t affect charges before, and this is huge. Phantasm is harder to use but still going to be an issue. Weakened, yes, but this is still a very good army.

Chaos Space MarinesHammer Time
Embarked units must have the same mark as the Transport, Dark Obscuration now they only have to be within 18”, Profane Zeal only gives reroll wounds, only available to a unit with the Undivided Mark and Accursed Cultists are dead.

Accursed Cultists can only return models in your command phase and are OC1. They are hard to build, move, or use. Never really popular. They are probably on the shelf with a 40pt hike. Forgefiends, Chaos Lord, Chosen, Warp Talons, and Obliterators all went up between 10 and 30 for minimum unit sizes. But that’s not all, Daemons are a lot harder to include. You must have a battleline unit for each non-battleline unit you  include. No more Blue Scribes, Changeling, or Syll’esske. 

CSM is going to be a lot weaker, maybe even just an average army with these changes.

Chaos Space Marines – Possessed, are they good yet? (Build Review)

Credit: Games Workshop

Introduction

Possessed are central to the entire concept of Chaos Space Marines, especially Word Bearers (my Chaos legion). Their primarch commits some of his sons to a risky mission in the Warp. Those that returned are hosts. Called Gal Vorbak they are the first true possessed. Further experimentation yields mixed results with none of the new Possessed reaching the same strength of the Gal Vorbak.

Gal Vorbak; c/ Games Workshop

Possessed are among my favourite models in the Games Workshop range, I have at least 30.

Background

The original plastic models were available back in 7th edition (and probably before). For its time, it was a small kit with only 5 models, but there were a lot of options. You could build five Possessed and convert 5 more from standard Chaos Space Marines.

Orginal Possessed Kit (with conversions)

During 8th edition, there was a line refresh with Chaos Space Marines and Obliterators being remodelled and 3 new kits. Introduced with the Shadowspear Army Box, were the new Venomcrawler, Master of Possession and Greater Possessed. Greater Possessed were a separate unit to the Possessed until the 9th edition codex. The Shadowspear models were available in the Start Collecting Box exclusively, leading to a lot of eBay trading. As cheap Chaos Space Marines everywhere.

Greater Possessed

With the 9th edition codex, there was another refresh. This time, the Possessed kit was replaced. Possessed were “Primarised” increasing in size to match the Greater Possessed they became just Possessed. 

Comparison between generations

What’s in the box

That brings us to this review. It might be a bit late. The Chaos Space Marine – Possessed kit was released almost 18 months ago now. But maybe you want a Chaos Space Marine (CSM) army, and it’s not CSM without Possessed. Plus, with a balanced dataslate soon, they could be a competitive option again, replacing Chosen in armies. 

The box includes 5 x 40mm bases and 2 sprues. There are fewer options than the old kit, but there’s enough to build a few different models. There are 2 backpack options for the champion and at least one alternative arm for each model. 3 are shown with options for the heads, but the heads can be swapped on all models. There is also a base option, and the powerpacks can be mixed across all models. Not including the backpacks, it gives about 18 different combinations to make sure all of your Possessed aren’t identical. 

Preparation and construction

Unfortunately, the different weapon options are model specific, restricting how much you can mix the models. The parts in these kits are the wrong scale to modify current Chaos Space Marines. You could use them with some sculpting to modify Primaris Marines (Assault Intercessors would be my choice).

The instructions are clear, and for the most part, the castings are clean with minimal flash. Most of the sprue attachments are well thought out and accessible from underneath. The plastic is the same as all current kits, cut easily enough, and responds to light sanding.

The builds are mono dimensional with some very close fitting parts. I recommend removing all of the pieces from the sprue and cleaning them up before dry fitting.

Champion in subassembly ready for building

The models come together well without any gaps (unlike push fit). If you have any issues getting a tight fit check that you’ve cleaned the joining surfaces well enough. They lack the positive engagement of newer kits (released in 10th edition), but they are relatively easy to assemble. 

Heading for the painting stick

The trickiest steps are the first step (parts 1 and 2) and 5a (Parts 35 and 36). You need to get the angle right on the torso for the legs to make a clean join with the hose (that is part of 36), meeting the hole on 35. All up, it took about 1.25 hours for me to put them together in two bursts. 

Primed and ready

Paint and final steps

Now the tricky part, painting. I prime black and then heavy dry brush a bright silver (Vallejo Aluminium Air) to catch the trim (Word Bearers). Working out where the armour stops and flesh starts is harder on the new models than the old. I’ve gone with a demonic flesh with a strong red accent. It reduces the contrast between ceramite (armour) and a trait of Possessed is their armour moulds with them. 

Finished models

Here are some I prepared earlier. It will take me a week or more to complete the latest additions. If you look closely you’ll see that Squad has 2 champions.

Are they good again?

Possessed are fast (9” move) and more tanky than Chosen (3 wounds, toughness 5 and 5+ invulnerable save). They are expensive (140 points) and lack output, though. With only 1 AP, 2 Damage, and devastating wounds, you may be disappointed. The current meta has a lot of 3/4 wound models (Chosen, Wraithguard, Wraiths, and Aggressors). A Master of Possession can join them (80 points) giving a 6+ Feel No Pain and limited, precision, ranged. 

Word Bearer Possessed

They lack the advance and charge of Chosen (unless you make them Slaanesh and spend a CP). Or their output (thanks Chaos Lord) and are inconsistent against vehicles and monsters. But they can get up the board pretty fast without Rhinos (a Chosen weakness) and are more tanky than Chosen. If they receive a points drop, they could be a good trading piece and objective/mission tool. I’m going to be testing that theory later this month.

So are they good yet? To be determined

LVO Stats Preview

Factions

Let’s start with something nice and simple. With 347 players attending this year’s event, almost every faction is represented (sorry Bonesplitterz!). The international trend of Stormcast Eternals, being the most popular faction currently, has followed through to the LVO with both they and Gitz being represented by 29 players each. Blades of Khorne and its anti-magic continue to be popular.

Subfactions

Of the 24 Blades of Khorne players, 14 have opted to run Reapers of Vengeance. 13 of the 16 Idoneth players have gone for Fuethan to optimise their Sharks.

Most Diverse Factions

Most factions seem to have one or perhaps two go to subfactions regardless of whether it’s in the international meta or at LVo. However, the four factions above appear to have the most diverse subfaction selections.

Thanks to Furythrow2 from PlasticCraic‘s discord for asking this question and peaking my interest. Rest assured, this will be included faction stat articles.

Most Common Warscrolls

Talking about Idoneth, we can see that the dreaded sharks appear in 81% of all Idoneth lists, and the turtle joins them in 75% of Idoneth lists.

Every Big Waaagh list features at least one Wurrgog Prophet, and each Ironjawz list features at least one Maw-krusha.

In the Cities lists, we can see that both Pontifex Zenestra and the Command Corps are too good to pass up and are making their way into 91% of Cities lists. While the fusiliers are also popular, appearing in 73% of lists.

Likewise, with unique and powerful characters (300pts+), we can see Katakros features in 16 out of 22 Bonereapers lists. King Brodd has been chosen in 12 out of 13 Sons lists.

Grand Strategies

Around 1/5 of all players in attendance are using the Spellcasting Savant grand strategy (keep your Andtorian general alive).

Command Traits

Shaman of the Chilled Lands proves to be both the most popular command trait from the GHB and at the LVO this year, with no less than 36 players using it in their lists. While Master of Magic, which compliments the current GHB nicely, is also the most popular command trait from the core rules.

List Points

The vast majority of lists come in at either 2000 or 1990 points. The lowest points total for a list this year is 1910.

Player Experience

This is perhaps the most interesting section (to me, at least), we’ve broken down the attending players’ experience over a number of slides and have based this information on all tournaments they’ve attended (GTs and otherwise) since the start of 3rd edition AoS in 2021.

I was uncertain whether to include this one. Essentially, they show the average win rates of players who have tournament experience in Blue, compared to the most recent win rate in the meta for that faction. It would appear a number of skilled players with high win rates are playing Cities of Sigmar, Daughters of Khaine and Disciples of Tzeentch. While Slaves to Darkness, Maggotkin, Sons, Lumineth, and Gitz appear to have been largely ignored by the more elite players.

Following on from the previous slides. We have the top 20 players sorted by their win rates. In theory, this should be the list of the favourites to win the event this year. Note that three of these players are playing Cities, tying back to our previous slide.

I believe (buy don’t quote me) that Gavin Grigar is the most experienced player at the tournament with 61 different events under his belt since the start of 3rd edition AoS.

As expected, the vast majority of players are from the US or Canada, with only 1 Australian (Anthony of AoS Coach fame) and 1 from Ireland (the amazing Mick Wendel).

Finally, we have a breakdown of all the players’ experience in attendance. Interestingly, players with 11 or more events in their history make up over 50% of the field, while those with 5 or fewer events only make up roughly a quarter of the player base!

Good luck to everyone heading to Vegas this year!

Flesh-eater Courts: Battletome Review

Menu

Lore Synopsis

The Flesh-eater Courts are leagues of valiant nobles, courtiers, knights, and serfs that aim to bring peace to the Mortal Realms. At least, that is what the Delusions have led them to believe. In reality, the nobles of the Flesh-eater Courts are bestial vampires and ghoulish monstrosities all led by Ushoran. Known by many titles, the Carrion King, the First Exemplar, the Sumeros Summerking, the Lord of Masques, the Sombre Paladin, the Mortarch of Delusion.

Credit: Games Workshop

Ushoran, one of Nagash’s great Mortarchs, was driven mad by something that occurred at the edges of the Realm of Death. Nagash placed him within the prison of the Shroudcage in an attempt to repair his broken mind. Sigmar’s invasion of Shyish resulted in the destruction of the Shroudcage and Ushoran’s escape. The madness, however, turned into something greater within the Shroudcage. Ushoran emerged a monstrous bestial creature dripping with madness. The delusion he now held was that he was still the valiant and beautiful Sombre Paladin that he once was. He would rally his courts and lead them to defend the mortal realms. This delusion spread to the members of his courts simply by proximity. Mortals would feast on his blood and on bountiful feasts of carrion, devolving into the ghoulish monstrosities that make up the Flesh-eater Courts. However, the madness takes them in turn, and they, in turn, see themselves as heroic figures led by the beneficent Summer King.

Playstyle

The Flesh-eater Courts is a battletome that supports a number of distinct playstyles centred around the common theme of recursion (returning slain models to the battlefield). Heroes utilize spells and abilities to debuff the enemy and strengthen your forces. You can deploy hordes of serfs or bands of knights that level volumes of attacks at your opponent while confidently occupying objectives. Or you can stomp across the battlefield with imposing monsters that wield a combination of debuffs, melee, and missile weapons.

Credit: Games Workshop

Allegiance Abilities

The FEC Deathless Courtiers battle trait is their version of the Death signature 6+ ward for all of their units. The crux of their other allegiance abilities are Noble Deed Points (which we will shorten to NDPs for the rest of this article) that are earned by their HEROES. FEC HEROES start the battle with 0 NDPs. Each time they chant a prayer or cast a spell that isn’t unbound, they get 1 NDP. After they fight, they earn a number of NDPs equal to the amount of wounds allocated to enemy units (excluding those caused by mount attacks). Each HERO can have a maximum of 6 NDPs. They will need them for FEC’s other abilities because Feeding Frenzy, Muster, and Summoning have changed entirely from their previous edition.

Feeding Frenzy is now a 12” aura that emanates from your HEROES that have 6 NDPs. The aura gives +1 attacks to melee weapons for all FEC units that are wholly within the aura. Rather than extra attacks being tied to spells, it is now just a passive buff you get for doing things you already planned on doing. So you will still have plenty of dice to chuck at your opponent.

Credit: Games Workshop

Muster Guard is the first recursion mechanic that they can utilize to return slain models. At the end of the movement phase, each COURTIER can spend 1 NDP to return 1 slain model to a SERF unit within 10” or 2 NDPs to return a KNIGHT. You can use this ability as many times as you wish as long as you have the NDPs to spend. Summon Loyal Subjects is the second major recursion mechanic. At the end of the movement phase, each ABHORRANT can spend 6 NDPs to pick 1 SERF or KNIGHT unit that has been destroyed. You can summon an identical replacement unit with half of the number of models rounded up, wholly within 6” of the board edge and more than 9” away from all enemy units. You can only replace each of your units once, and replacement units themselves can’t get replaced. What makes FEC very unique here is that the remaining models that are not set up are considered slain. This means they can be returned with abilities like Rally and Muster Guard. Note that both Summon Loyal Subjects and Muster Guard are both at the end of the movement phase. So you can position your COURTIERS, summon a replacement unit, and then muster that unit. The mustered models can be placed closer to the enemy to reduce your charge distances. Managing this NDP economy makes for interesting decision-making.

The last battle trait we have to cover is Delusions, which have also been overhauled. You get to pick 1 Delusion to apply to your FEC units for the whole battle, but you do not pick until before the first turn and after starting command points have been received. The flexibility of being able to pick your delusion after knowing the battle plan, your opponent, and who is going first is really neat. Crusading Army gives +1 to run and charge, perfect for chasing down some pesky invaders. Defenders of the Realm give +1 to save rolls while contesting objectives that you control, which is a nice durability boost for our not so great save characteristics. The Royal Hunt gives +1 to wound rolls against MONSTERS, sorry Gargants (He’s not sorry – Peter). The Grand Tournament gives +1 to hit for HEROES that are not a general and made a charge move in the same turn. The Feast Day allows Feeding Frenzy to apply, while HEROES have 4 NDPs rather than 6.

You also have access to 2 unique heroic actions. The first being Rousing Oration which allows you to roll a number of dice equal to the number of FEC units wholly within 12” of that HERO. Every 5+ gives that HERO 1 NDP. A nice extra way of generating NDPs and keeping your economy steady. The second is Scent of Blood which allows you to roll a die and on a 3+ make a move of D6”. You have to finish the move outside of 3” of enemy units. If there is an enemy with wounds allocated to it, you have to finish the move closer to that unit. A neat, albeit niche tool we can use for some minute repositioning, like walking out of combat!

Subfaction Traits Summary

Morgaunt

Morgaunt will allow each of your MORGAUNT HEROES to gain 1 NDP at the end of each turn if they are contesting an objective. A nice NDP trickle. This subfaction will also make the new Crypt Guard unit battleline.

Battleline in Morgaunt. Credit: Games Workshop

Hollowmourne

Hollowmourne will give HOLLOWMOURNE KNIGHTS +1 damage on the charge for their melee weapons (excluding mount). This subfaction will also make your Crypt Horrors battleline.

Yes, Horrors will be damage 4 on those 6s to wound.

Crypt Horrors, battleline in Hollowmourne. Credit: Games Workshop

Blisterskin

Blisterskin gives your ABHORRANTS the PRIEST keyword. Your HEROES can not chant a prayer and cast a spell in the same phase. This subfaction will also allow your Crypt Flayers to be battleline. The prayers are good, but I don’t think they are so good that this is warranted. This is really just for the Flayer enjoyers.

Gristlegore

Gristlegore will allow you to pick 1 of your GRISTLEGORE MONSTERS at the start of your combat phase to have Strikes First. This subfaction will also make your non-hero Zombie Dragons and Terrorgeists battleline. Monster mash enjoyers rejoice!

Credit: Games Workshop

Spells and Prayers

Misamal Shroud (Spell)

Miasmal Shroud has a casting value of 6 (CV6) and a range of 18”. It allows you to pick 1 visible enemy and roll 6 dice (8 if the casting roll is 10+). If 2 of those dice share a number, the enemy takes 1 mortal wound. If 3 share a number, they get -1 to hit rolls. If 4 share a number, they get -1 to wound rolls. These effects are cumulative.

Crimson Victuals (Spell)

Crimson Victuals has CV6 and range 18”. You pick one enemy unit and one FEC unit within 6” of that enemy that has a wounds characteristic of 1. The enemy suffers D3 mortal wounds and you can return 1 slain model to that friendly unit for each wound not negated. If the casting roll was 10+, the enemy suffers 2d3 mortals instead. This will help keep your SERF units topped off.

Deranged Transformation (Spell)

Lastly Deranged Transformation has CV6 and range 24”. Pick an FEC unit with a wounds characteristic of 7 or less that is wholly within range and visible. They get +2 to their move characteristic and +1 to wound until your next hero phase. If the casting roll was 10+, you can pick 3 friendly units instead of 1. This one is certainly the highlight for this lore, keeping your units screaming across the battlefield.

Bless this Meal (Prayer)

Bless this Meal is CV3 and range 18”. Pick 1 visible enemy unit. Each time a model from that unit is slain, you can heal 1 wound to a FEC unit within 6” of that enemy. This could be nice for keeping your monsters topped off.

The Summerking’s Favour (Prayer)

The Summerking’s Favour is CV3 and range 18”. You can pick 1 friendly HERO and they gain 1 additional NDP each time they slay an enemy model. Given that the max is 6, I am not sure our fighty heroes will be able to really take advantage.

Charnel Conviction (Prayer)

Charnel Conviction is CV3 and range 18”. You can give a 5+ ward to one of your units until the start of your next hero phase. A 5+ ward on any of our dense wound blocks is quite the jump in durability.

Command Traits and Artefacts

Your ABHORRANT generals will have access to 3 command traits. Shadowy Obfuscation will make your general invisible to models more than 12” away from them. Piss off pesky archers! Feverish Scholar will give your general +1 to casting, unbinding, and dispelling rolls. That bonus jumps up to +2 if that HERO has 6 NDPs. This is really nice for all those 10+ effects in the spell lore. And Kroak is shaking in his boots when it’s FECs time to unbind! Master of the Menagerie makes it so that you can use Summon Loyal Subjects on a NON-HERO MONSTER instead of only SERFS and KNIGHTS. When the MONSTER is summoned, it has 6 wounds allocated to it. Get back on the battlefield, you big beautiful monsters!

Your ABHORRANT HEROES have access to 3 artefacts of power. The Grim Garland subtracts 2 from the bravery characteristics of enemy units while they are within 9” of the bearer. This will combo nicely with some features we will cover later. The Blood-river Chalice allows the bearer to heal 2d3 in the hero phase once per battle. The Heart of the Gargant allows the bearer to add 1 to the attacks characteristic of themselves and their mount once per battle. Those last two leave a little bit to be desired.

Your COURTIER general will have access to 3 command traits. Stronger in Madness will add 2 to their wounds characteristic and give them a 5+ ward while they have 6 NDPs. Savage Beyond Reason makes their melee weapons score 2 hits instead of 1 for each unmodified hit roll of 6, 3 hits if they have 6 NDPs. Cruel Taskmaster improves their ability to use Muster Guard. Now when they spend 1 NDP to muster, they can return 1 slain KNIGHT model or 2 slain SERF models. The first two seem ok if you want to focus on a smashy Varghulf Courtier. However, the value on Cruel Taskmaster is absolutely and insanely efficient if you want to focus on blocks of KNIGHTS.

Your COURTIER HEROES have access to 3 artefacts of power. The Medal of Madness allows them to once per battle round issue a command as if they were a general without spending a command point. This simply isn’t the choice with such a lack of impact. The Flayed Pennant allows all Flesh-Eater Courts units to reroll charges while wholly within 12” of the bearer. This is not the worst artefact. The Charnel Vestments gives the bearer the PRIEST keyword. Having access to a prayer without having to invest in the Abhorrant Cardinal is really nice.

Mount Traits and Monstrous Actions

Your Royal Zombie Dragons and Royal Terrorgheists will have access to 2 unique monstrous actions. Delectable Appetizers allows you to pick 1 enemy unit within 3” with a wounds characteristic of 2 or less and roll a dice. On a 3+, that unit suffers D3 mortal wounds and the monster heals the number of wounds that were caused and not negated. This is just more healing to ensure your monster is topped off before the fight. Bloodcurdling Shriek allows you to pick 1 enemy unit within 3” and roll a dice. On a 3+, subtract 2 from the target’s bravery characteristic until the end of the turn. More bravery debuffs for more bravery shenanigans.

Your Zombie Dragon HEROES will have 3 mount traits to choose from. Baneful Breath will give the Pestilential Breath rend 2 rather than 1. Death from the Skies allows you to set up this unit in reserve and deploy at the end of the first movement phase anywhere outside of 9” of enemy units. Venerated Zombie Dragon allows you to add 1 to hit rolls for friendly Flesh-eater Courts MONSTERS wholly within 12” of this unit. That last one will be the obvious pick if your goal is Monster Mash.

Your Terrorgheist HEROES will also have 3 mount traits to choose from. Gruesome Bite adds 1 to the attack characteristics of this units Fanged Maw. This is for all your gamblers out there as the Fanged Maw is still going to cause 6 mortal wounds on 6s to hit. Horribly Resilient allows you to heal 2d3 in the hero phase with Royal Blood rather than D3. Morbheg’s Swiftness allows this unit to retreat and charge, which is a really nice bit of mobility.

Warscrolls

Nagash is in the book, but the spell lore is not really one he can take advantage of. The points seem tight, and there are a lot of neat FEC toys that interact with each other. If Nagash is your jam, he definitely fits the theme of recursion.

Terrain

The Charnel Throne is back and mostly the same. Enemies still can not use abilities that would allow them to ignore battleshock tests while they are within 12” of it. However, when one of your little 7 wound or fewer heroes is garrisoned inside, they generate D3 NDPs at the start of your hero phase! Chuck an Archregent in there and the rest of your army around it to hear a Rousing Oration, and you will be at 6 NDPs before you know it.

Abhorrant Heroes

Ushoran, the Mortarch of Delusion, has some very interesting abilities on his warscroll in addition to being a two caster Wizard. His warscroll spell is CV7 and range 18”. You pick an enemy model and 1 of its weapons. That model has to make that weapon attack against another unit within range. If your opponent is not careful, their units might get a bonk! He heals 2d3 in the hero phase and has a 5+ ward which makes him quite resilient. In the hero phase, Ushoran can pick a second delusion to apply to the army until your next hero phase. The flexibility this provides you can be so valuable. His Feeding Frenzy range is 24” rather than 12” if he has 6 NDPs. At the start of the combat phase, he will give -1 bravery to each unit within 3” that lasts for the rest of the battle. And then, he rolls 2 dice against the bravery characteristic of each enemy within 1”. If the roll surpasses that unit’s bravery, that enemy will fight last. Combining this with another hero carrying the Grim Garland can make Ushoran hand out fight last to even the bravest of units. There is a lot of utility in this single warscroll.

All ABHORRANTS can heal D3 in the hero phase with their Royal Blood ability.

The Abhorrant Archregent can use Countless Servants to return 3 SERF models or 1 KNIGHT model to a single unit within 18” of this unit. I will have a side of recursion with my recursion. Thank you very much. Being a two caster means the Archregent can generate NDPs quite well. Their CV6 warscroll spell Carrion Call allows a unit that is set up at the end of the following movement phase to make a D6” move. This warscroll is packed to the brim with value.

The Abhorrant Ghoul King does not come with similar value. It is a single caster with a CV6 warscroll spell that allows them to make a 3d6 charge in the hero phase. In the combat phase, it can pick an enemy hero to duel and get +1 damage against them. 5 attacks at damage 3 is funny, certainly. However, I do not think this mini missile will afford you the same utility as some of these other warscrolls.

The Abhorrant Cardinal is going to be your only priest outside of a COURTIER, taking the Charnel Vestments. Their warscroll prayer is CV 4 and range 18”. Pick a unit, and every time it receives a command, the command fails on a 4+. I am not sure how this prayer is expected to compete with the 5+ ward or healing/recursion prayers that have CV 3s. They generate 1 NDP from 1 prayer and then offer no other utility.

The Abhorrant Gorewarden is going to make your Morbheg Knights battleline if it is the general. It can set itself up in reserve and bring a unit of Morbheg Knights or Crypt Flayers to reserve with them, dropping onto the battlefield outside of 9”. It is a single caster with a CV6 spell that teleports them and a flying unit anywhere outside of 9” of enemies. A good bit of utility on this one, and a great pick if you want to focus on Morbheg Knights!

Grand Justice Gormayne is an interesting fella. He is not a priest, but instead has 4 judgments he can pick from to pronounce in your hero phase on a 3+. Petty Transgression lets you target a visible enemy (no range) and get +1 to wound rolls for all your FEC units that target that enemy that turn. There is some redundancy here with Deranged Transformation, but it has its uses.. Grievous Insult to the Court is the same but with +1 to hit rolls instead, with the added requirement of that enemy having to be within 3” of an ABHORRANT to be selected. Dishonourable Conduct in Battle lets you target a visible enemy (no range) that is outside of 3” of your units. All your FEC units can run and charge if they finish the charge within .5” of the target. Even more mobility? Yes, please! Regicide lets you pick a visible enemy (no range) that has slain an ABHORRANT. Your units get +1 damage against them. We have found the Abhorrant Ghoul King’s purpose!

The Abhorrant Ghoul King on Royal Terrorgheist is up to 16 wounds now. The rider has damage 2 attacks, and the Skeletal Claws are up to 7 attacks! The warscroll is otherwise mostly the same except for the CV6 warscroll spell – Ferocious Hunger, which allows a Royal Terrogheist to reroll those Fanged Maw to hit rolls. So the Terrorgheist is still the same moderate beat stick 6 fisherman we all know and love.

The Abhorrant Ghoul King on Royal Zombie Dragon also received the 16 wound and damage 2 rider treatment. On this warscroll, however, you will shut down Inspiring Presence or units within 3” of any Royal Zombie Dragon, which will combo nicely with the Bloodcurdling Shriek and the Charnel Throne. The CV 6 and range 18” warscroll spell Monstrous Hunger will give out run and charge to every FEC monster within range. If you like Monster Mash, this hero is an excellent inclusion to send your monsters barreling forward.

Courtier Heroes

Your COURTIER heroes will give you access to the Muster Guard ability, but that means they will need to generate NDPs in order to use them. None of them are wizards or priests innately, so you will have to rely on Morgaunt, Rousing Oration, the Charnel Throne, or combat to generate those NDPs.

The Marrowscroll Herald is invisible to the enemy if there are 5 FEC models within 6” of them. This keeps them exceptionally safe, and you can even abuse this to charge the Herald in and shut off unleash hell (yes, unleash hell requires visibility). The Herald can also give out an infected bone at the end of the charge phase. The enemy can deny it and give all your units within 3” of the Herald fight first. If they accept, then you can roll against their bravery every time they try to issue or receive a command, cast, or chant. If you beat their bravery, they fail. Yet another case where our bravery debuffs are going to come in handy.

The Crypt Ghast Courtier and the Royal Decapitator will be able to chain activate a SERF unit in the combat phase. In theory, you can have them fight, generate NDPs, and chain activate SERFs that are now benefiting from Feeding Frenzy. In practice, their combat profiles are just not what they need to be for this trick to work. Not to mention, they are very squishy, so the frontlines might not be where you want them. The Decapitator also has the funny 5+ auto slay at the end of combat if it dealt any wounds to a hero. Are you feeling lucky?

The Varghulf, Crypt Infernal, and Crypt Haunter are going to be your punchy COURTIERS that might be able to fight with your units a bit more efficiently. The Varghulf 2 extra attacks against 1 or 2 wound non-mounted units, a D6 heal if it slayed models, and a retreat move at the end of the combat phase. With some decent mobility and combat stats, the Varghulf could prove an interesting inclusion. If the Crypt Infernal manages to kill a model in the shooting phase, it will give +1 damage to your nearby Crypt Flayers for that shooting phase. If you’re into shooting, Flayer bricks can surprise your opponent with this trick. The Crypt Haunter can chain activate your Crypt Horrors in the combat phase, and it might have the best chance at taking advantage of that Feeding Frenzy trick. The Infernal and Haunter are only 6 wounds, meaning they can receive Deranged Transformation. Sporting 8 wounds, the Varghulf is not so lucky.

Knights

The new Morbheg Knights can pick 1 unit within 1” after a charge, and that enemy can not receive unleash hell. You can also roll a dice for each model in this unit that is within 1” of that enemy unit, and each 4+ will cause D3 mortal wounds. Archers be damned! These KNIGHTS sprint around with 12” move and a tasty 4+ save. They get +1 to run and charge and count as 3 each on objectives if they charged. On top of all of this, they can retreat and charge. These batty KNIGHTS are not to be trifled with.

The Crypt Flayers and Crypt Horrors remain the same. Flayers can pick up and transport your sub-7 wound heroes, which is the perfect tool for positioning your COURTIERS that need to muster elsewhere on the board. They also get +1 to wound for shooting sub 7 bravery targets, of which there will be many with all the bravery debuffs we can hand out. Crypt Horrors are going to be the cheapest battleline option in Hollowmourne and very hitty to boot.

Serfs

The new Cryptguard will allow Flesh-eater Courts HEROES that are wholly within 3” of a unit of Cryptguard to add 1 to their ward rolls. This will provide a nice little boost to the durability of your ever important heroes. They can also form a U shape around larger bases to get your monsters wholly within 3” of the unit. You can deploy your Cryptguard or charge them into this formation to make your monsters even more formidable (yes, Ushoran will have a 4+ ward). They also prevent enemies they damage from receiving commands for the turn. Niche for the combat phase commands, but very good for turning off Inspiring Presence.

Crypt Ghouls are the same on the warscroll, but the pitched battle profile has seen a huge update in that they are now minimum size 20! This means you can rock up to the table with Crypt Ghoul units as large as 40 or 60 models strong! The wound density of these little Ghouls makes them an exceptionally efficient choice. They will also be your only non-conditional battleline.

Royal Beastflayers are the cheapest serfs but are in no way battleline. The unit has a wounds characteristic of 1 and the SERFS keyword. This means you can return 1 model to this unit for 1 NDP from a COURTIER, 3 models to this unit with Countless Servants from an Abhorrant Archregent, and the number of other tricks this book has for replenishing SERFS. The reason this matters is because of the Offal Hound and Flaymaster models within this unit that have 2 and 3 wounds, respectively. For the price of returning a SERF model that is typically 1 wound, you can return Offal Hounds and Flymasters. This makes the Beastflayers so absolutely efficient that they will compete with Ghouls at clogging up the board and tying up your opponent. They also turn off monstrous actions and make monsters -1 damage, which is just a cherry on top.

Monsters

The non-hero version of the Royal Zombie Dragon and Royal Terrorgheist are going to be the makeup of your monster mash lists. They sport 14 wounds a piece. The Terrorgheist has the same mortals on the maw, and the Zombie Dragon has the same shutting off inspiring presence. The Zombie Dragon can be set up in reserve, which may combo nicely with Carrion Call. 

Endless Spells

The Chalice of Ushoran is CV 6 with 24” range.  The endless spell is all the same, except now it is an 8” flying predatory spell! You keep track of the number of models slain within 12”. At the end of the turn, you roll that many dice. For each 4+, you can heal 1 wound allocated to a Flesh-eater courts model within 12”, or return 1 slain model to a Flesh-eater courts unit wholly within 12” that has a wounds characteristic of 1. This will confidently keep your units topped off as it always did. However, now you can move it around to hide behind terrain or get out of range and avoid dispellment.

The Cadaverous Barricade is CV5 with 24” range. It becomes a piece of terrain that prevents runs, retreats, and halves movement within 3”. It might be easy to dispel, but it is super cheap and can be used to block redeploys or counter charges in your turn. Not to mention, the laughs that may ensue should it fail to be dispelled.

The Corpsemare Stampede is a CV7 with a range of 3d6” and predatory flying move of 12”. You roll 6 dice against every unit it flies across, and it does a mortal for each 6, and for each roll that’s greater than that unit’s wounds characteristic. It is on a decent sized base, so it could also be used for move blocking outside of the ok damage.

Grand Strategies

The Grand Strategies are quite difficult to achieve, and you may be better off with a generic option. On the table, none of these have proven to be very reliable.

Legendary Exploits requires having 3 FEC heroes alive with 6 NDPs each at the end of the battle. FEC feels like an army that wants to grind to the final turn, and it needs to spend those NDPs to stay on the field. I am not sure this one is feasible at all.

Expand the Kingdom requires an Abhorrant to be wholly within enemy territory while the enemy general is not wholly within their territory. This one is very easy for the opponent to deny, especially if their general is the type to sit in the back and hide anyway.

Defend the Throne requires you to have no enemy units within 6” of the Charnel Throne and have it garrisoned by one of your heroes. This one is also easily preventable by your enemy simply running up alongside the throne. The way you score this is by sitting the throne in the corner, but then the hero inside of it does not get to interact with the battle and you do not get to take advantage of the turning off battleshock abilities.

Battle Tactics

Some of these are going to be a bit challenging, but with the specific setup and list building, they can be good alternatives to the GHB tactics.

Screamed to Death requires you to kill an enemy unit with the shooting from Crypt Flayers, the Crypt Infernal, or a Terrorghiest. If you are running Crypt Flayer Bricks, this one is quite achievable. Or if there is a weakened unit or model running around that a Terrorgeist can pick off with a shout, even better.

Valiant Slaying requires you to kill a monster with attacks made by an Abhorrant. If you are not running a big monster, this one may be quite impossible unless there happens to be a severely wounded monster for an Archregent to pick off.

Overrun requires every enemy unit on the battlefield to finish the turn within 3” of an FEC unit. If you’re running large SERF blocks, then this tactic is much more achievable as you can spread yourself quite effectively and squeeze in between screens. However, this one may be a safer tactic to pick up later into the game when there are fewer enemies to tag.

Glorious Feast requires every friendly unit to be wholly within 12” of a FEC hero that has 6 NDPs. On certain battleplans where you do not want to travel far from your deployment, you may be able to reliably set this up on turn 1. You can roll Rousing Oration before you select your battle tactic. If you are going second, 2 good orations and a good roll on the D3 from Charnel Throne could guarantee this tactic. REALLY, good rolls could even make it possible as a Turn 1 tactic. More likely, though, you can pick this up towards the end of the battle when there are fewer units to track.

Lance Formation requires you to charge with two or more KNIGHT units, and each of those charge rolls must be a 7+. With +1 to charge from Crusading, +1 to charge on the Morbheg Knights, and potentially a reroll charge for a CP, this tactic is doable. Two 7+s is still a lot to ask for. Not to mention, if you are aiming to charge with more than 2 KNIGHT units, you risk more chances of failure.

The Ties of Chivalry requires you to take an objective from your opponent and be contesting it at the end of the turn with a SERF, KNIGHT, and COURTIER unit. This requires very specific positioning on the battlefield but may be one of the easier tactics we have access to.

Final Thoughts

The new Flesh-eater Courts tome has a lot of really interesting interactions that make multiple playstyles viable. Whether you want to swarm the board with hordes of bodies or punch the enemy with powerful hammers, you will be a nuisance that dies and keeps standing back up. Our overall weak save characteristics are aided by wound density and some good defensive buffs. The army has the same issue as it did last edition, which is a lack of rend across the board. We can still hope that the volume of attacks will help crack those tough saves. With strong objective presence and very neat warscroll rules, the Flesh-eater Courts are the perfect army to be able to push around a variety of toys and experiment with different lists from one battle to the next.